
It’s a shame really, because I have tons to share. In the few stolen moments in between my graphic design work, running and everyday mom duties, I’ve been a busy little worker bee.
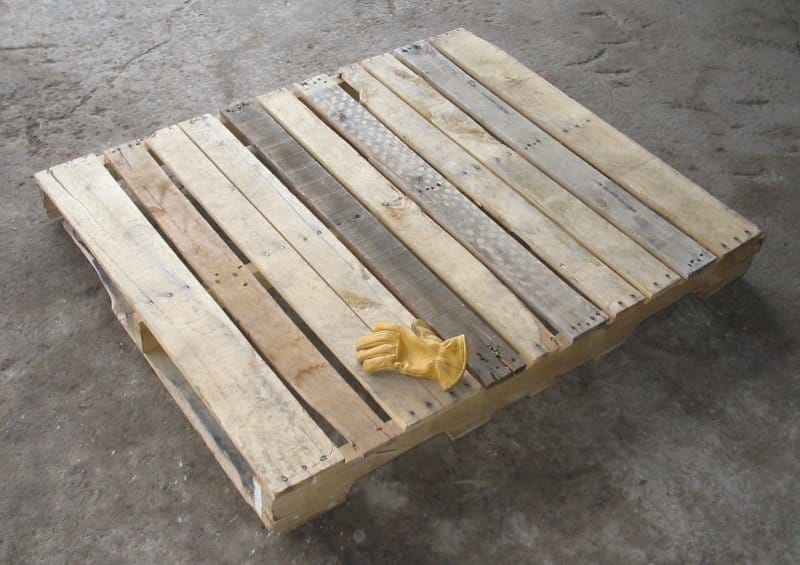
Let’s start with free palettes today. 🙂 I’ve learned that despite being free, they are really quite the little buggers to work with. You definitely need to be ready to put on your working gloves when you deal with these bad boys.
 |
| Via |
For my first palette project, the palette was fairly agreeable when it came to taking the boards apart. I was able to remove most of the long boards without splitting them by whacking the backsides with a hammer until they came apart. It was good hard work and great way to work out some aggression. 😉
Here’s what I created with the boards I got in the end. I’ve been wanting a rustic element for my fall mantle. I plan on redecorating it after Halloween with more traditional fall decor, a wreath maybe?
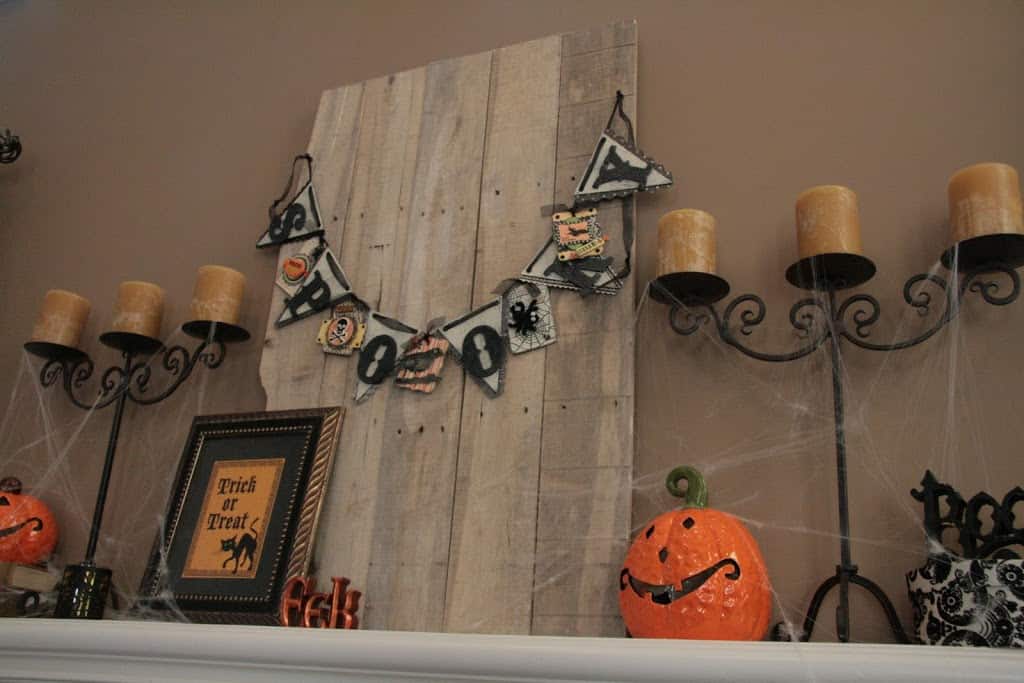
Anyway, I just love it. It’s exactly the organic looking element I was hoping for. And I love that it gave my “spooky” banner I created for GCD Studios last Halloween new life. (Click on the first link for a complete how to.)
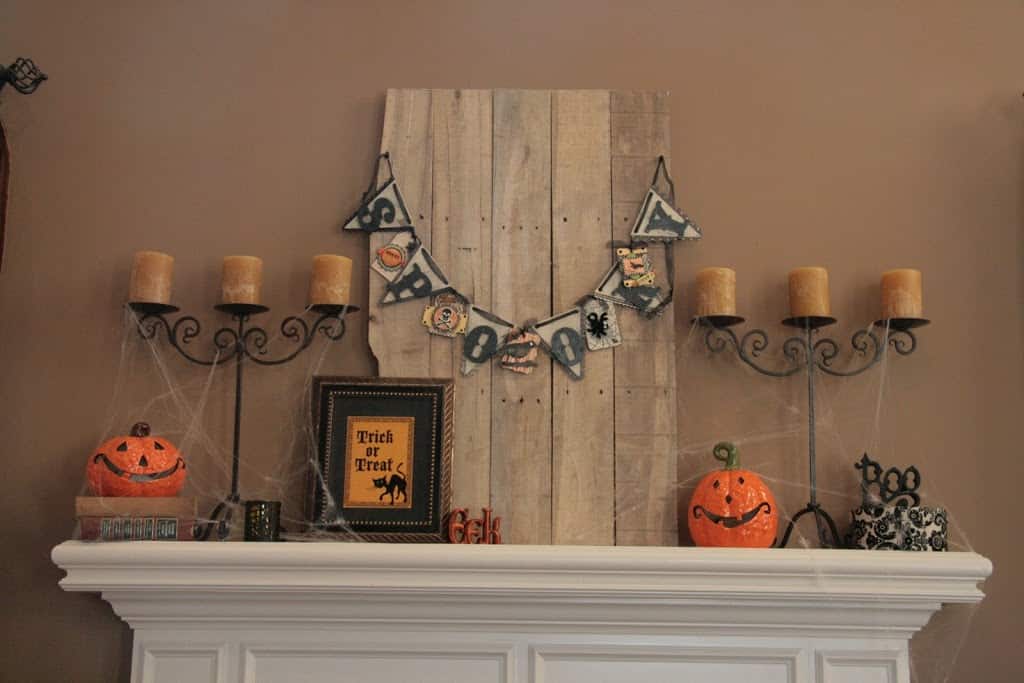
Very simple construction really and so much easier than the deconstruction! I just took some of the other board pieces and made a cross support to hold the long boards all together. The weathered patina is perfect for this type of decorating and of course that’s why I went to all the trouble to work with a palette anyway. Well, and they are free.
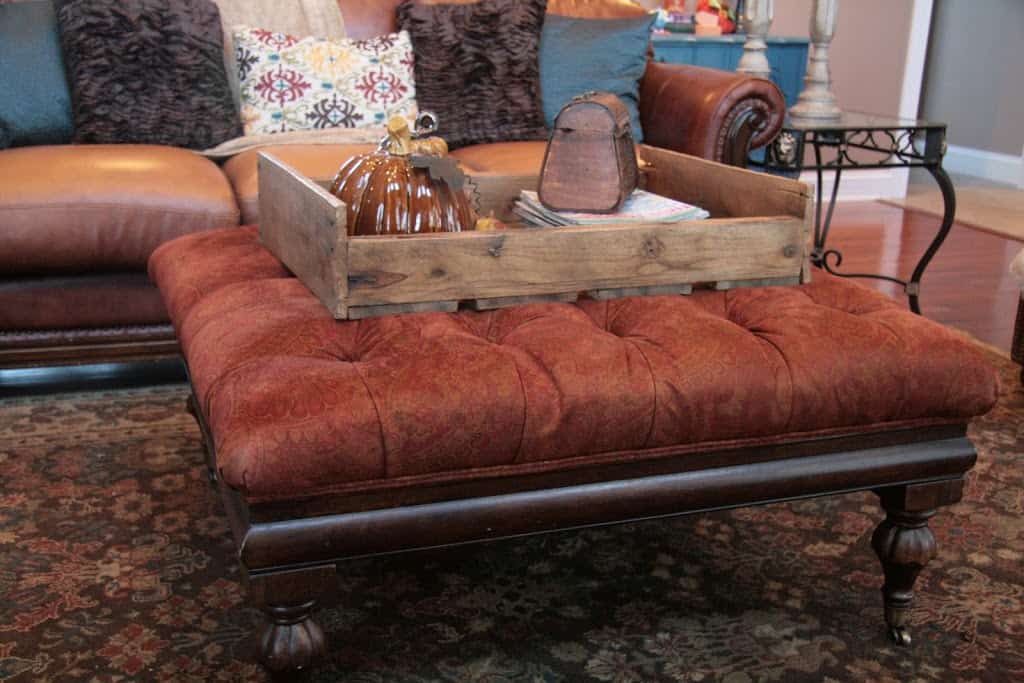
The next project evolved from my desire to have an extra large tray on our ottoman and not wanting to spend $75 to $100 to get one. I plan on slip covering or reupholstering it the ottoman this winter, but until then I thought covering it with a larger tray would be a good place to start. (I’m so over this rusty color and am tired of trying to decorate around it.)
The second palette had much sturdier, thicker wood and therefore was much harder to get apart. I pretty much decided the only way to tackle this one was to cut it up with a circular saw. Much to the dismay of my husband, Richard, who came home while I had abandoned the project half way to go to a meeting, I made a complete mess in the garage.
The two shorter, long boards are still attached to the bottom boards they were originally. So basically I cut off one of the sections divided by these boards. Does that make sense? After I cut them to the right length, I then used other boards I removed as the ends. As simple as this sounds, it was by no means easy, but in the end, it came out pretty cool, I think.

After I got they tray built, or the crate as Richard calls it, I sanded it down really well and applied clear and dark waxes and then buffed. I kind of like the process of adding both the clear and dark waxes at the same time. Feels more fluid to work with and easier to control the coverage.
Of course this solution brought about a new dilemma… what to put in the tray. For now I threw in a few ceramic pumpkins, a box we sometimes store remote controls in (wink, wink) and the magazines I had on a smaller tray.
So if you have any great suggestions for what to put in my new tray after the holidays, I’d love to hear them!!


2 Comments
scrapmebaby
October 28, 2011 at 9:06 pmHmmm, very nice. My hubby's office has a ton of palettes all the time and I keep eyeing them up wondering if I have the skills necessary! LOL, thanks for the inspiration (and the warning:)
Courtney ~ French Country Cottage
November 3, 2011 at 2:40 pmLove your pallet decor- sharing this at the party tonight- thanks for sharing at Feathered Nest Friday!