
This week marks a major transition in the One Room Challenge. It’s week 4 of the room makeover and we are closer to the end than it seems! Because my best friend and I are in London this week for the Amara Blog Awards ceremony, I will be keeping this post rather brief. (I was thrilled and honored to be short-listed (the top 5) in the Best DIY and Home Improvement category for the US.
My plan had been to use the WiFi on the plane to write this post. But connection was spotty at best so I am currently writting this post after no sleep for the last 38 hours and a full day of touring this amazing city!
If you need a refresher on what was completed over the last 3 weeks of the One Room Challenge check out these posts.
There are still quite a few elements that need tweaking to bring the a Shades of Grey Master bedroom up to the level of style of the master bathroom we created a few years ago. You can see the video recap and read all the details for this One Room Challenge post here.
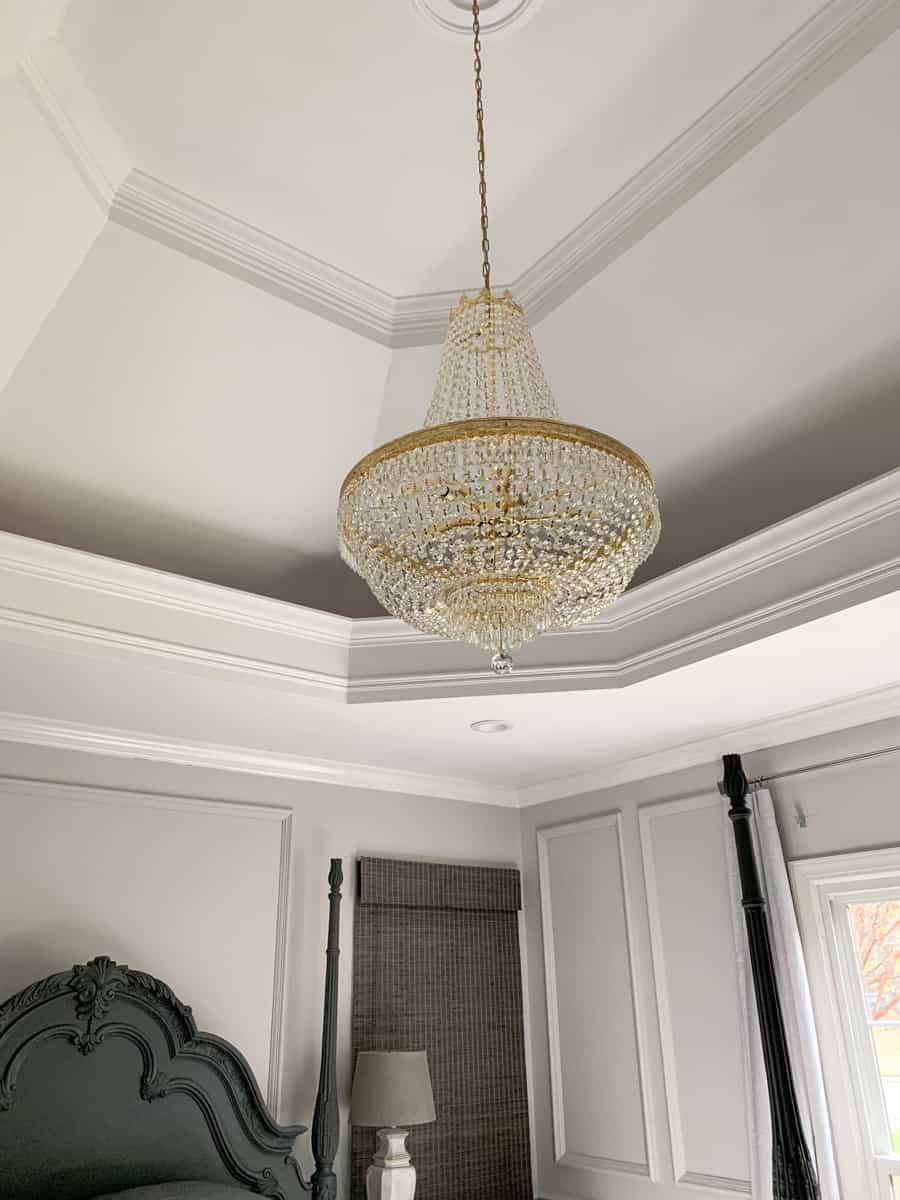
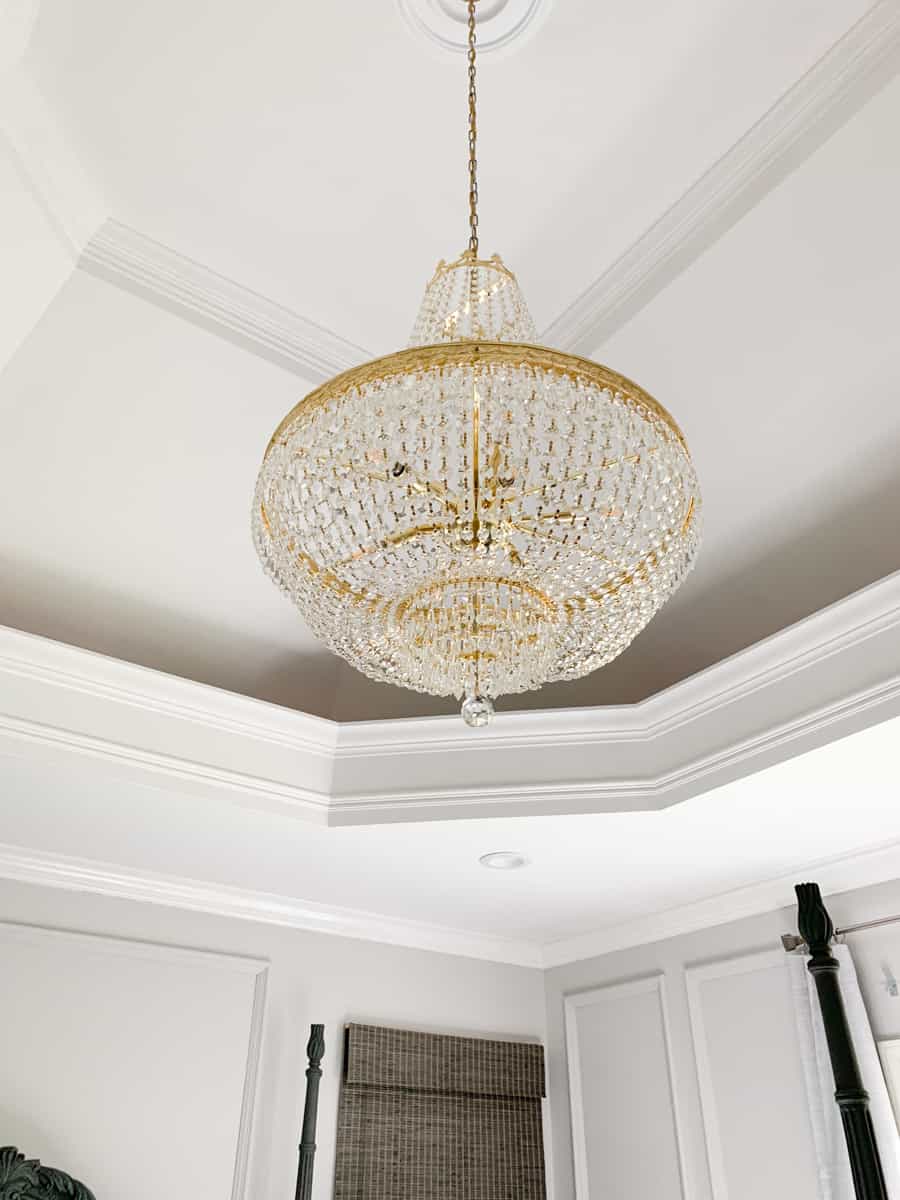
The new chandelier was hung at the end of Week 2 and I feel like the shape and size suit the room perfectly.
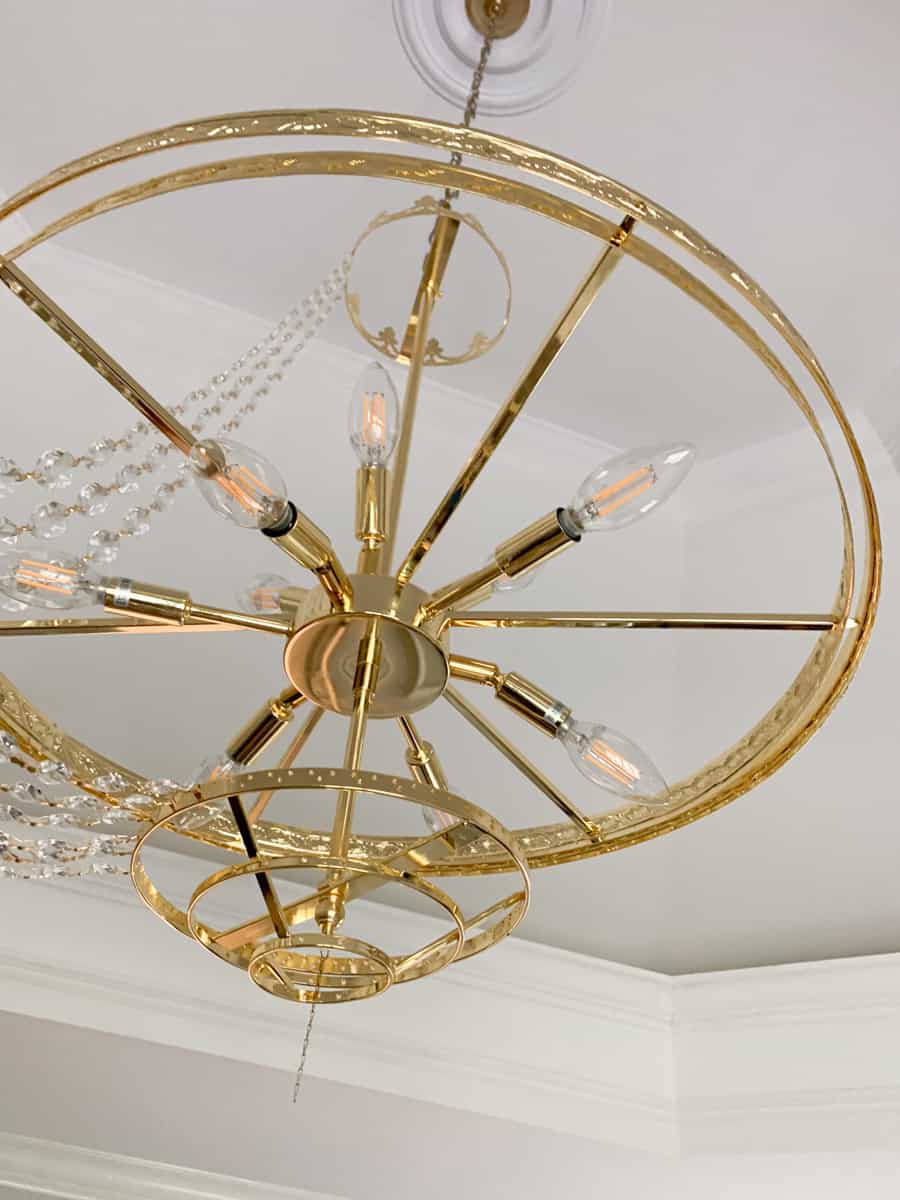
However, as I had feared when I ordered it, the finish was a bit more of a shiny brass than I had hoped. (The photo online was very poor, but the price was considerably less than other French empire chandeliers I found so it was a good choice for the budget.) Given the time crunch I was under to get it hung while I had help, spray painting the fixture was not in the cards.
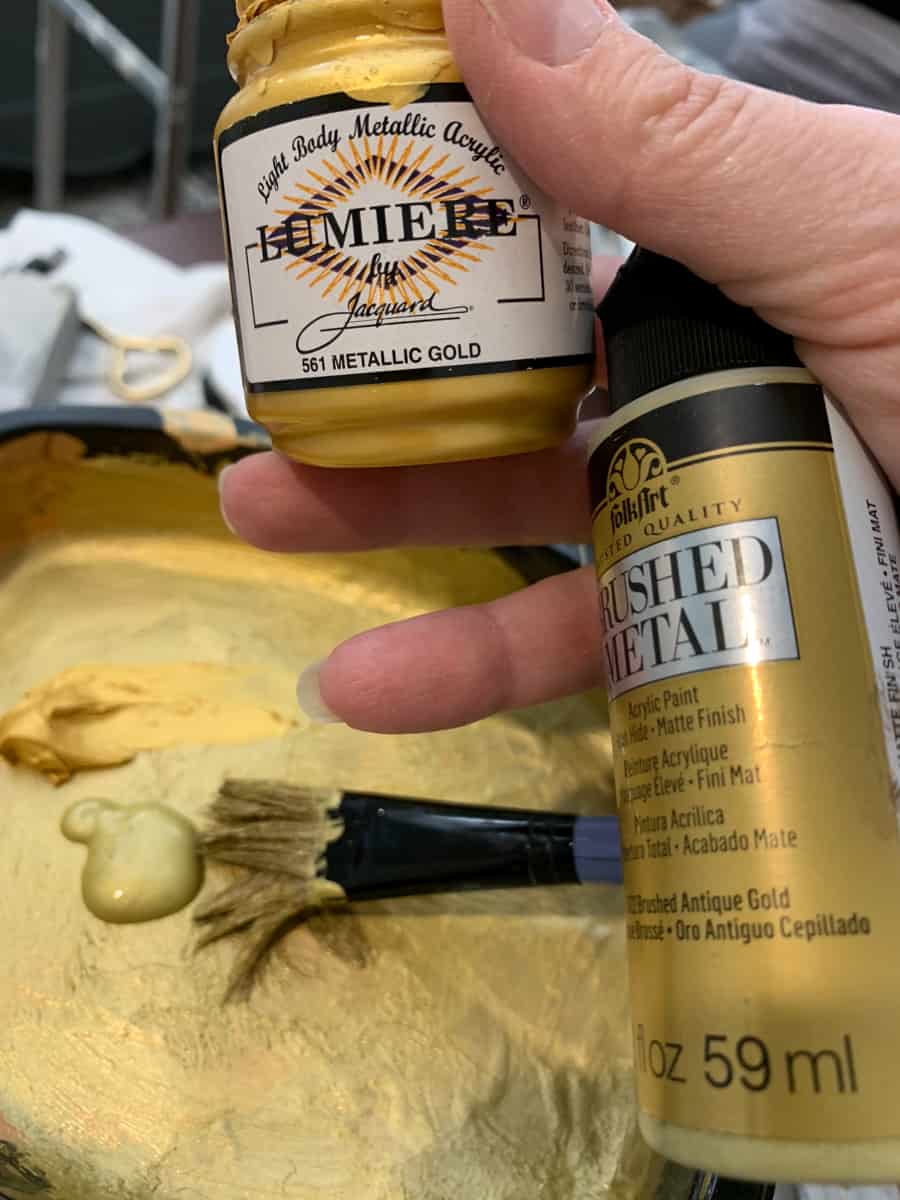
I ended up mixing these two acrylic paints and applied them as a wash, or a glaze, over the outer bands of the chandelier. It definitely helped.
The other task I completed before my work on the room was derailed for packing for the trip, was painting and waxing the antique vanity.
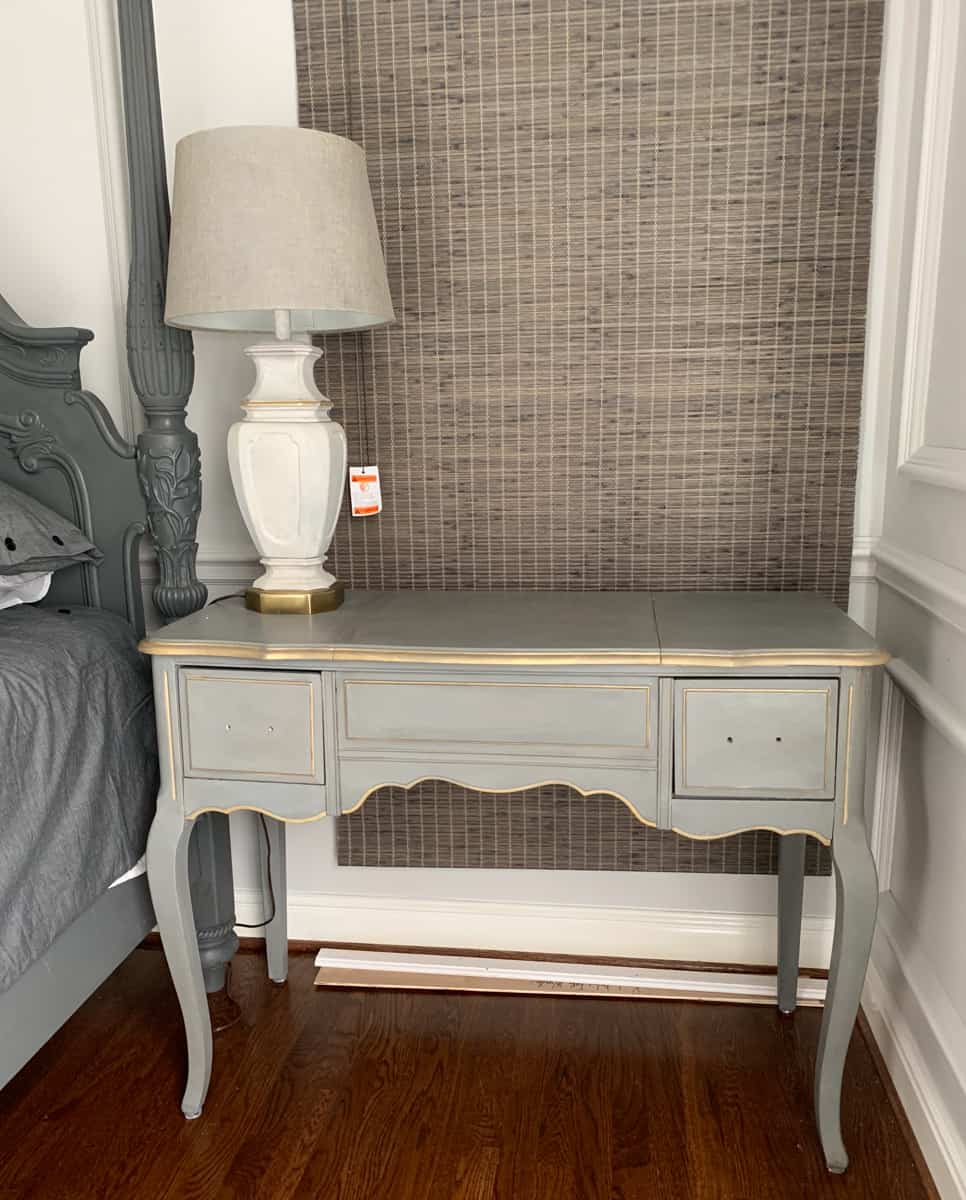
As you can also see here, I started on the faux window that will bring balance to the entire room.
I am still debating on the finish I used to update/makeover the extremely functional lamps. They have what best could be described as a “hotel lamp” with a switch on the base. We’ve become so spoiled by this feature, it is definitely a feature I would hate to give up. If I decide to keep them, I will be searching for a tapered drum shade when I return.
I am thrilled to use this trip as an opportunity to source a few pieces of art to bring into the room. My favorite type of souvenir is an antique or special piece from wherever I am visiting. I have a feeling London will not disappoint.
Here’s is a look again at the inspiration and links to sources.
This post contains affiliate links for your convenience.
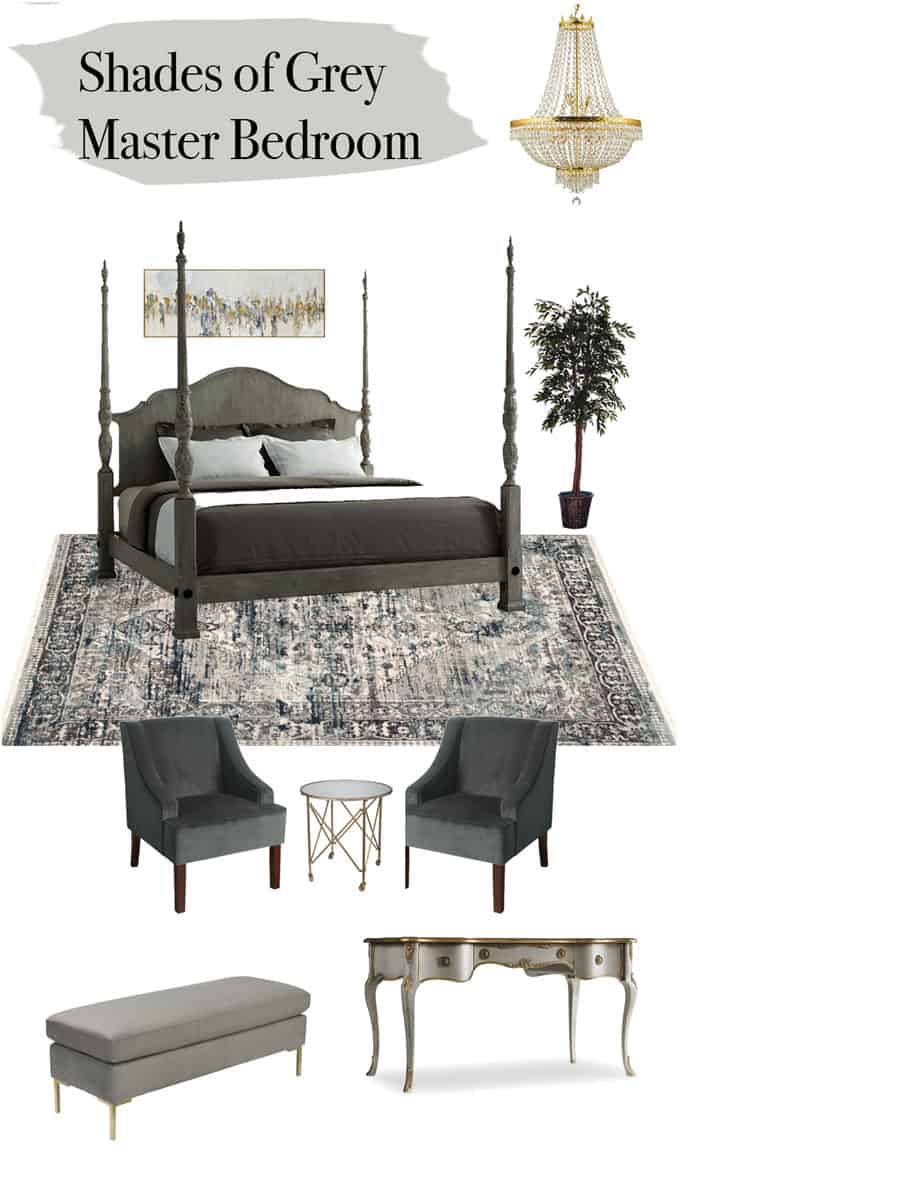
French Empire Chandelier || Similar Bed || Rug || HomePop Chairs || Side Table|| HomePop Bench || Similar Desk
The Specific Plan & the To-Do List
Install molding from Metrie just as we did in the master bathroom.Paint the bed. (I know some of you just gasped as you read this but I debated for a very long time and I have decided this is the best option for me and my sentimental side. Not to mention, I do not want a tufted or upholstered headboard. I tend to be a bit of a design rebel and can’t stand to create a space that is not unique.)Simplify the other furniture. (I have a few new pieces coming in from HomePop and editing others which will require me to give up a smidge of storage, but I feel like it will be worth it.)- Create symmetry in the room. This is probably the one feature of the room I struggled with the most. I finally had a lightbulb moment a few weeks ago and I can’t wait to tell you how I am going to solve this pesky problem!
Reimagine my existing curtainsand add shades from Payless Decor. This will help me stay on budget and has the potential to be an interesting DIY. UPDATE: I will be purchasing the right curtains, hopefully at the right price since what I wanted was free!Paint my existing vanity. I love this little antique. It is perfectly functional and just needs to blend with the rest of the room. (You can see just a hint of it in the before photos.)- Recover the vanity chair.
- Give the existing lamps a makeover. They are extremely well made and have a very convenient switch on the base, a feature we love having next to the bed. The shape of the lamps are nice and I am always reluctant to get rid of something for the sake of having something new.
- New bedding is also in order to fit the new color scheme. I am thrilled to share that I have partnered with Laura Ashley Home for a beautiful new quilt set!
I have been extremely fortunate to partner with these amazing companies. I’ll be sure to share more details about each of them in the coming weeks!!!


Be sure not to miss the other guest participants here and of course, the featured participants here! It is always such a thrilling time to check in on everyone’s progress week to week!


4 Comments
Cate
October 25, 2018 at 4:15 amGirl, get some sleep! I know you must be exhausted, but I’m sure it’s so exciting to be there! The room is looking fantastic. Well done on dulling the chandelier a bit. It’s lovely! Two more weeks!
Jewel
October 25, 2018 at 4:40 amI adore this space! I am stoked to see this one finished!
laura
October 25, 2018 at 6:53 amCongratulations Leslie on the award! And, you get a trip to London! how fun!
laura
Mark Jarvis
September 9, 2020 at 2:18 amIn this chandelier, do you use LED light or anything else? actually I need some more brightness that is why am asking.