How to Make Graphic Holiday Art with Royal Design Studio

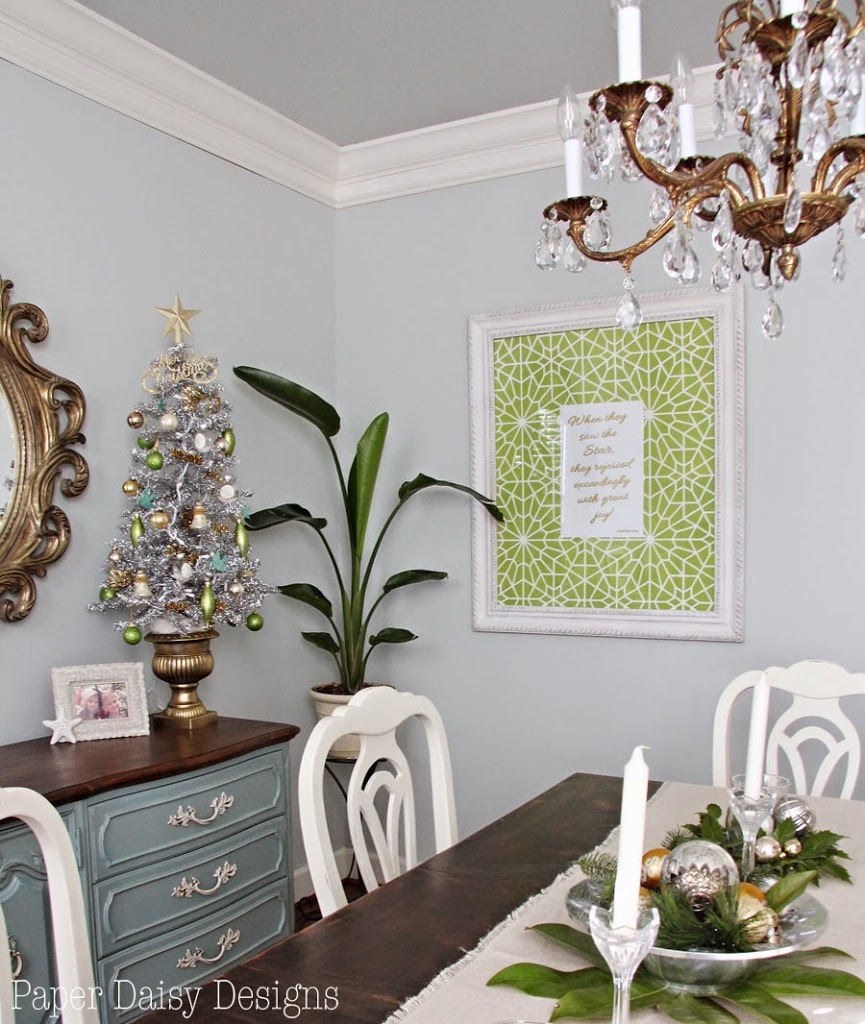
I love custom art for the home, especially with a bend toward modern design. My decorating is trending toward a more transitional style, although my dining room is still very traditional. I thought a pop of color and a bit of Moroccan flair would deck my walls for the holidays.
So when I was asked to create a DIY holiday decoration by Royal Design Studio, I knew I wanted to a graphic art piece that I could use year after year that would coordinate with the dinning room. I have used their stencils before and loved the process of creating personalized designs.
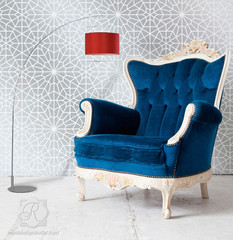
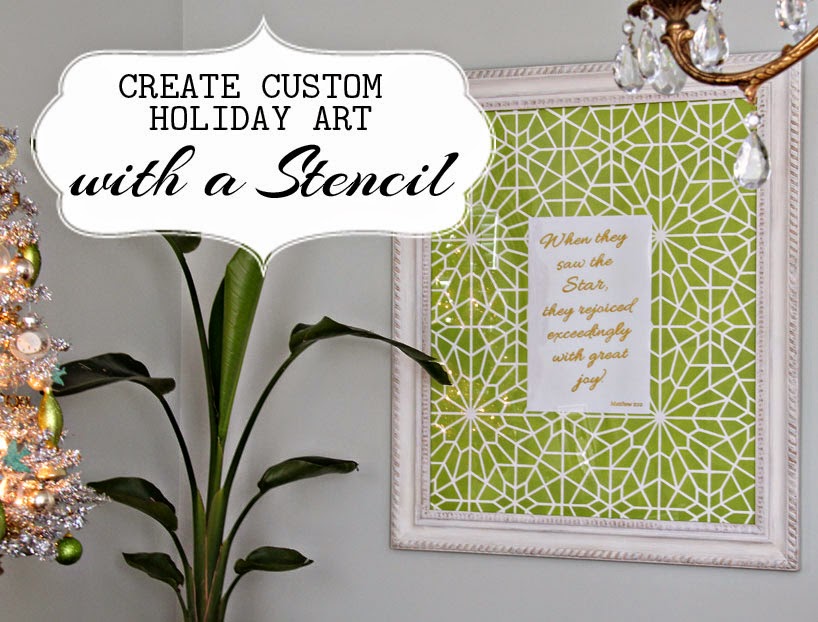
I chose the Starry Moroccan Night stencil. I love the detailed modern, graphic pattern.
Stencils are so easy, I promise anyone can do it. I promise! And because this is a wall stencil, even with the large scale of my art it was a super quick project as well.
I began by gathering my stenciling supplies on a large flat surface. It gave me a good reason to clear off my studio table.
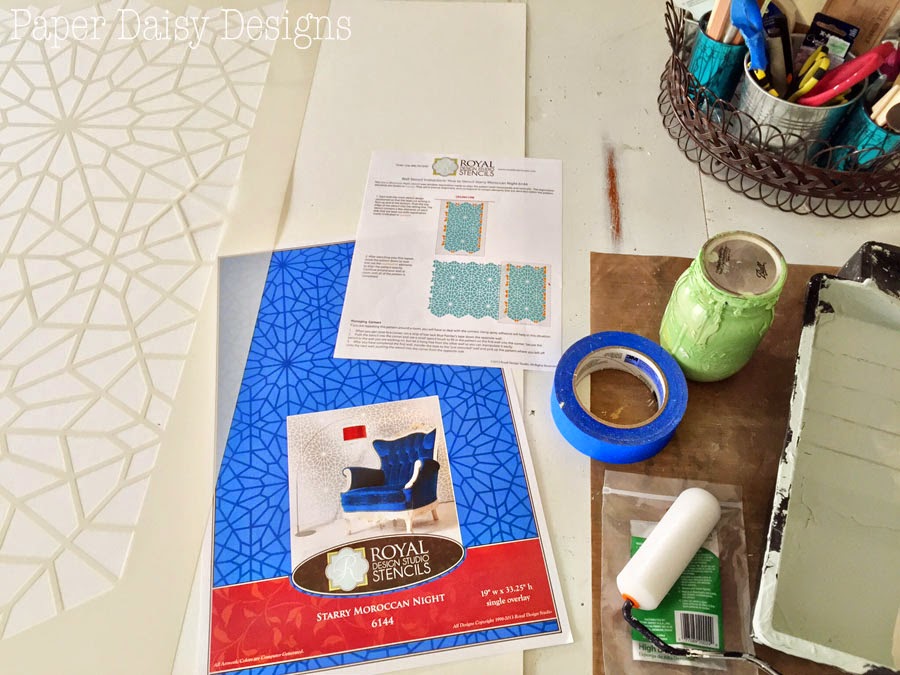
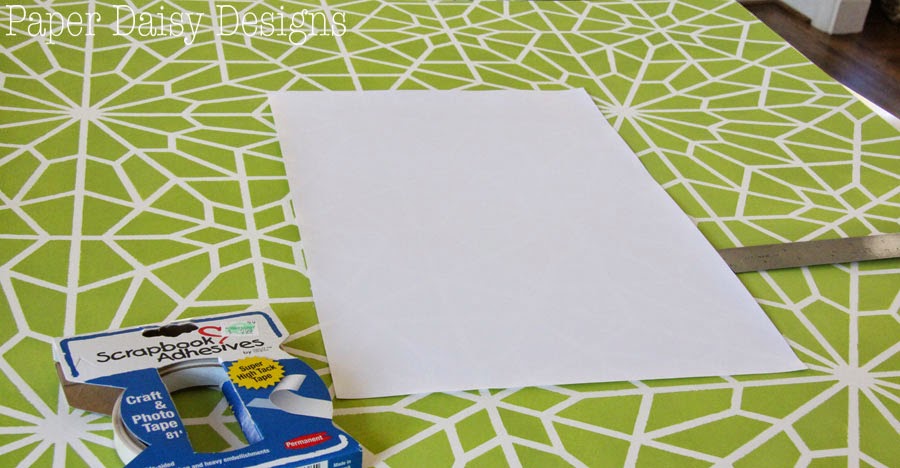
Besides the stencil, you will need a matte board cut to the size of your frame, painters tape, paint, a fine foam roller, paint tray and a bit of scrap paper to roll off excess paint.
Like I said, I’ve done quite a bit of stenciling in my home and this is my best tip. Make sure you do not have too much paint on your brush or roller. Otherwise, you get a bleed through on the edges of your stencil.
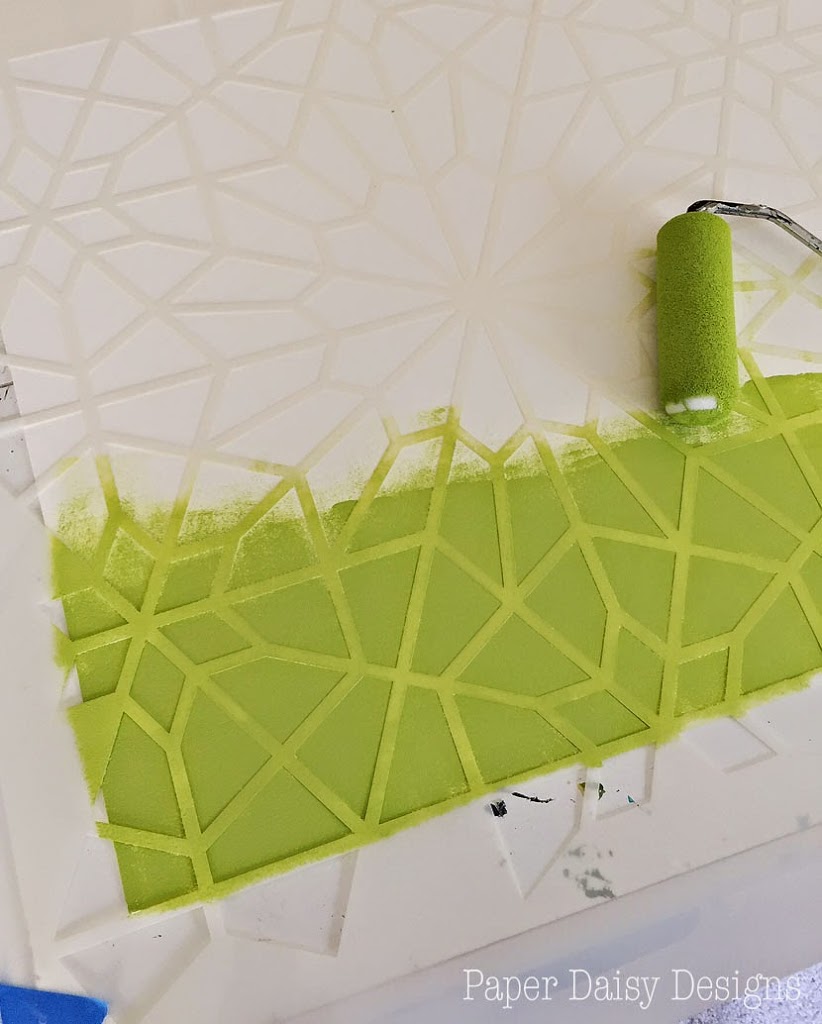
Royal Design Studio Stencils are made with high quality mylar, so there is no need to apply a temporary adhesive to the stencil when working on a flat surface. I just taped the edges of my matte board and a little bit on the stencil to keep it from shifting on the table if I bumped it.
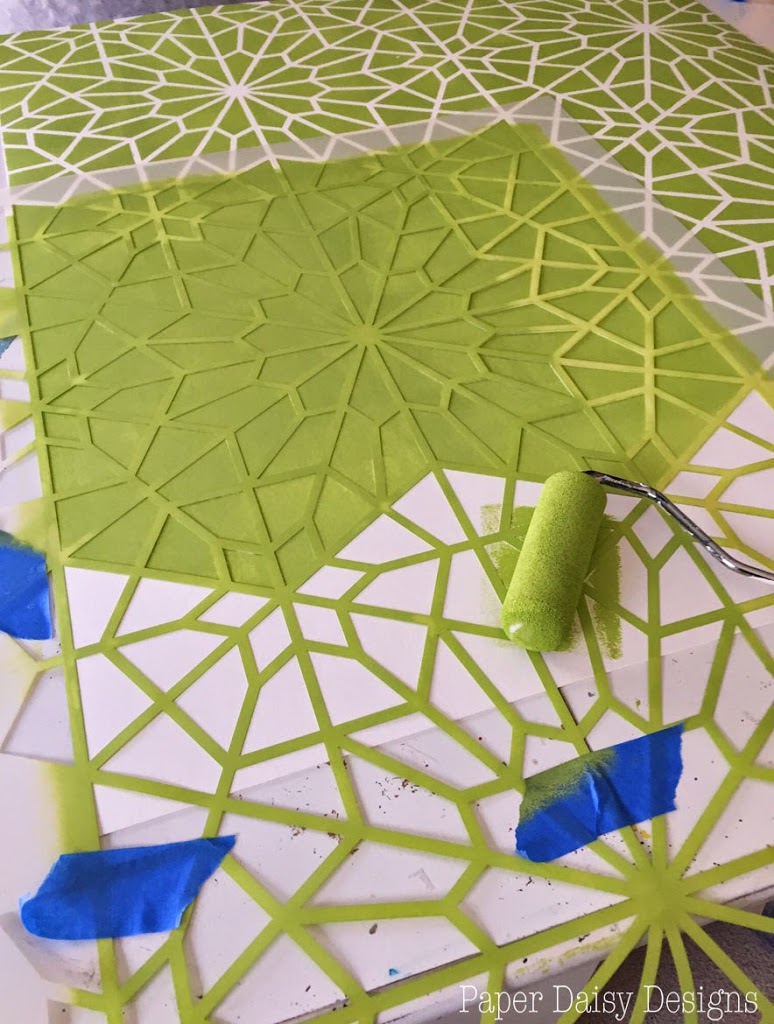
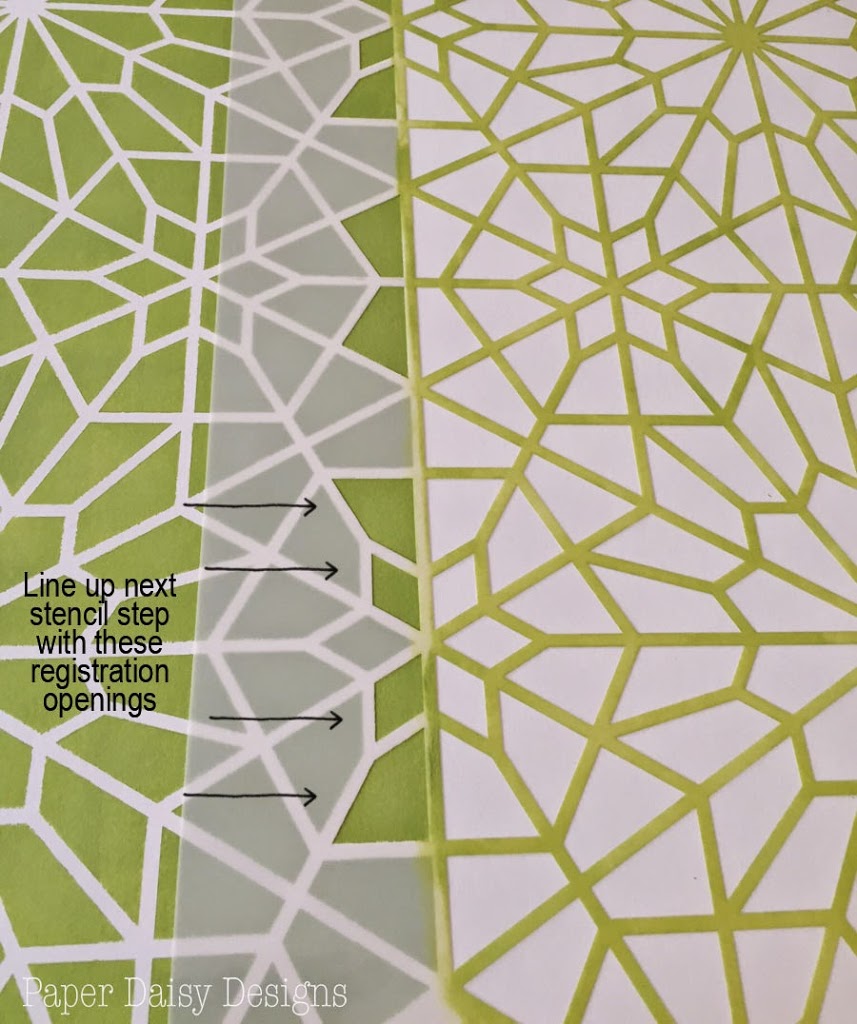
Once you cover the first section of the stencil, simply reposition the stencil using the registration elements for your particular stencil and repeat the painting process until your matte board is covered with the design.
My matte board, which I had cut at Hobby Lobby, was 30″x36″. I used a coupon, so it only cost about $6. I chose to use matte board because of the larger size I needed and because I was using chalk paint. I’m sure if your frame is smaller you might be able to use a poster board.
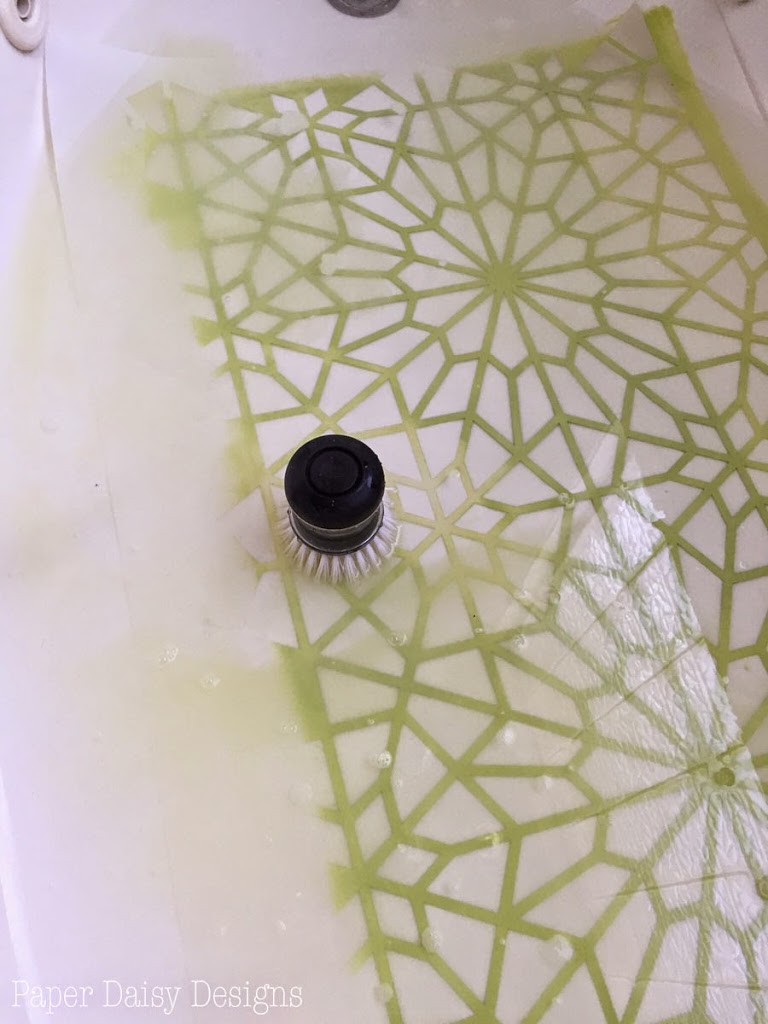
Once you are done stenciling you want to take the time to clean your stencil. I put it in the bath tub with a little dish soap and an old dish scrubby.
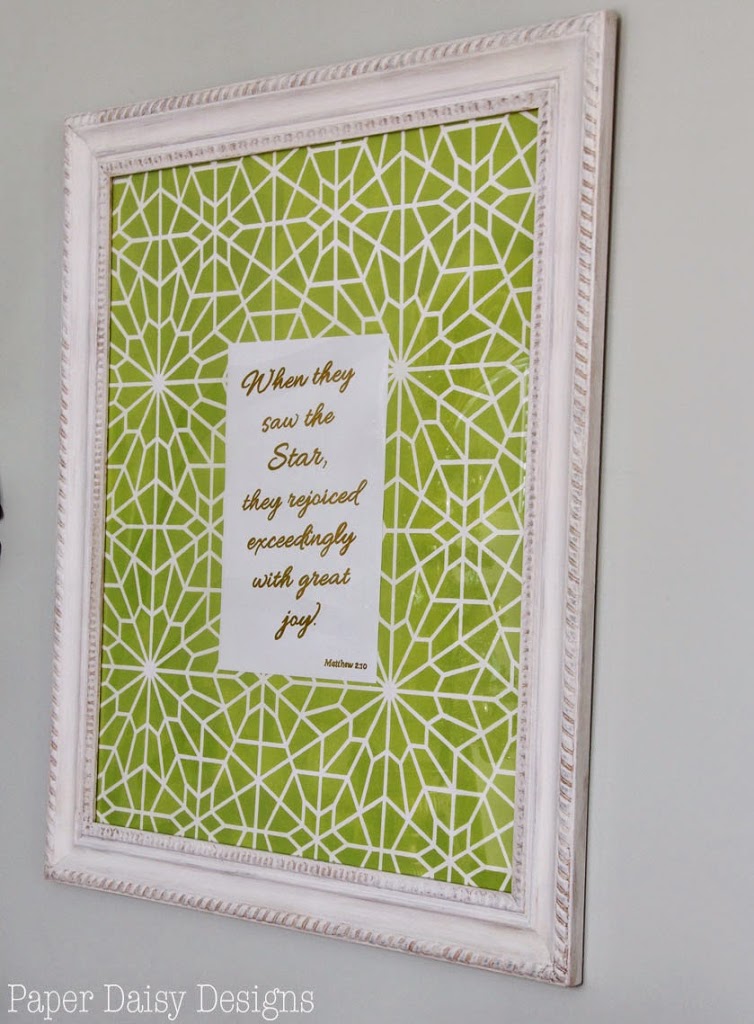
The next part of the project was a little trickier to execute. I knew I wanted to use a bible verse, Mathew 2:10 and I wanted it to be in gold.
After a little trial and error I ended up having a small poster printed on glossy paper at Staples. To get the gold metallic look I was after, I traced the lettering with a gold water based Sharpie Paint pen.
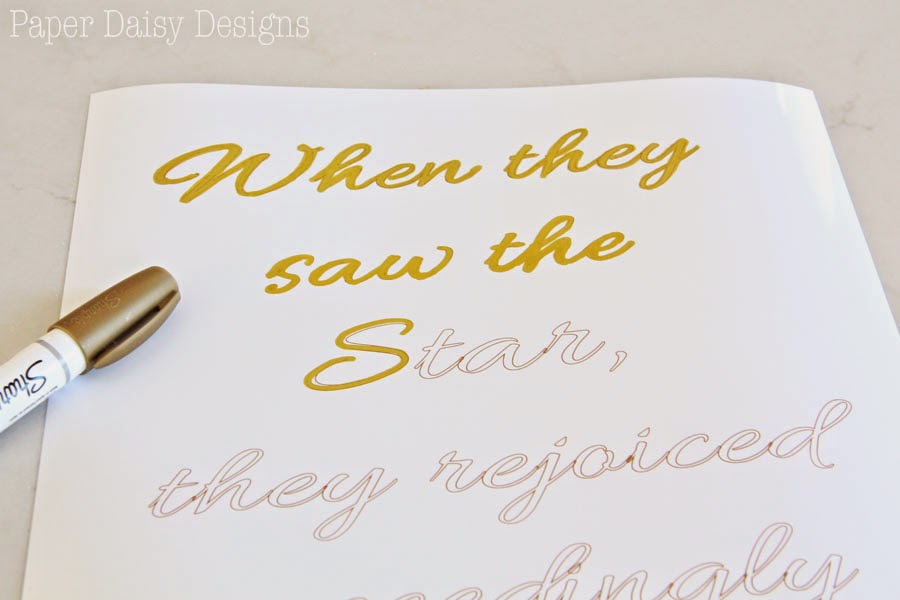
When I set up my art, I only applied a stroke the the letters. I chose a light brown color to blend in with the gold, but if you were doing it in silver metallic you might choose a light grey.
If you don’t feel very confident in your tracing skills I would use a finer point Sharpie. It think you would have more control than with the medium point.
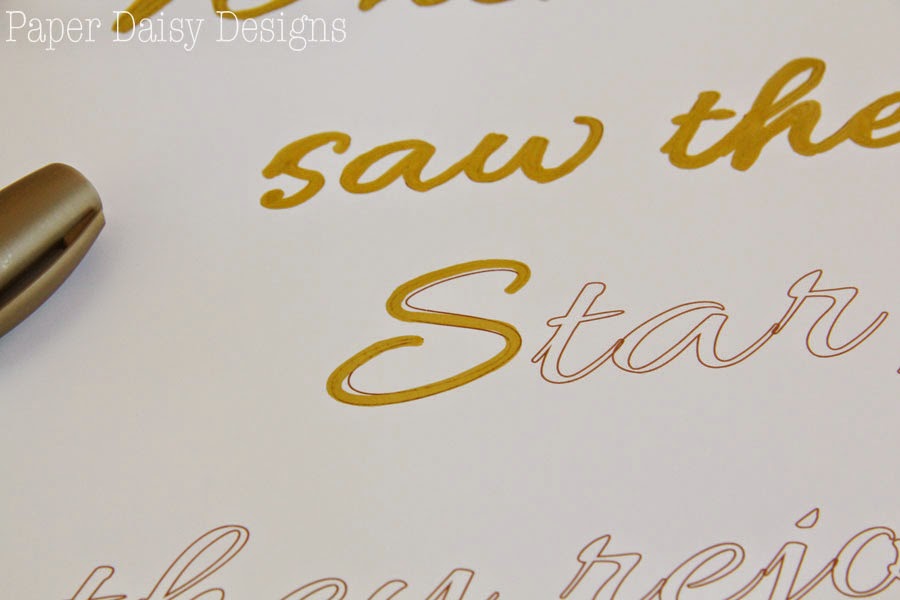
The technique to I used to apply the gold, was to outline one side of the letter and then fill in where the pen didn’t cover. Sometimes I had to go over the letter more than once, but I wanted to avoid too much paint coming out of the marker.
After letting it dry, I adhered it to my stenciled matte board. I got lucky because my Staples gave me 2 copies of my poster. I’m happy they did and would advise you to get two copies as well, for two reasons. One, in case you make a mistake in your tracing you’ve got a backup and the other one you will want to use as a second layer to mount behind the first. I could see the stencil design through the poster. I wasn’t expecting that. I used a heavier duty craft tape to mount them to the matte board one on top of the other.
I thought I’d share this tip in case it’s helpful. When I’m recycling a frame for another project, I often replace the glazing points. You can pick these up at any craft store in the framing department. This style much easier to use than older ones I’ve found that have to be bent back and forth.
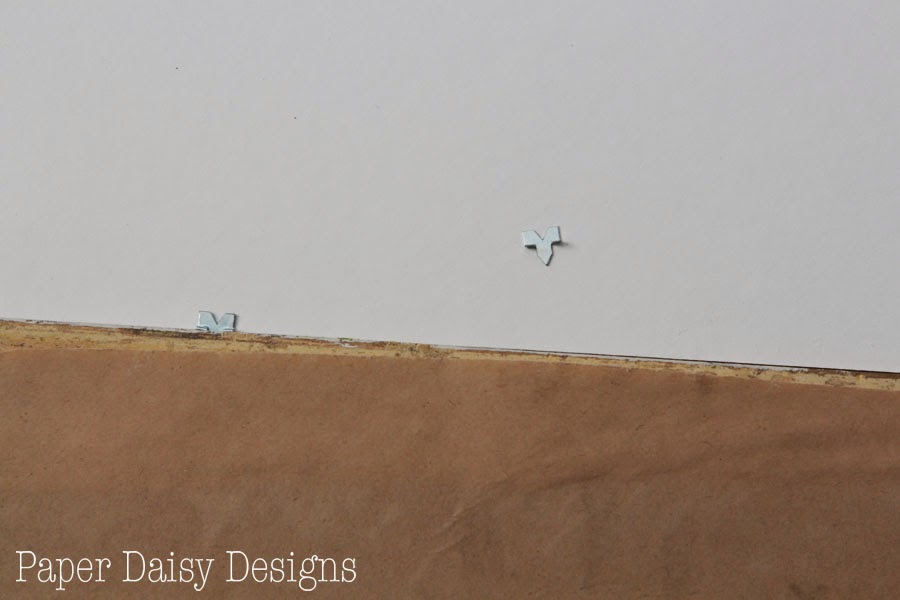
These can be pushed into the wood frame with a flat head screw driver and removed easily as well.
I couldn’t be more happy with the result.

I love this stencil so much I’m dreaming about wall application somewhere else in the house or maybe making some wrapping paper. The stencil is so large it would go rather quickly.
Do you like to create custom art for your home? Have you used a stencil for a craft project before? Share in the comments. I’d love to hear about your adventures.
For this post, I was gifted a stencil of my choice by Royal Design Studio. All opinions and other designs are my own.


Your modern Christmas home decor is GORGEOUS!! Amazed by your home! Thank you for reviewing our Christmas Stencils!