At long last, the kitchen is ready for the big reveal. It is hard to believe we have been in #theTrailHouseReno for a year now and I’m finally able to share the full kitchen. I think this kitchen renovation shows that a complete gut and overhaul is not always necessary to have a beautiful, updated kitchen.
In addition to a full tour, I am even going to give you a budget breakdown at the end. I hope you love it as much as we do.
This post contains affiliate links for your convenience.
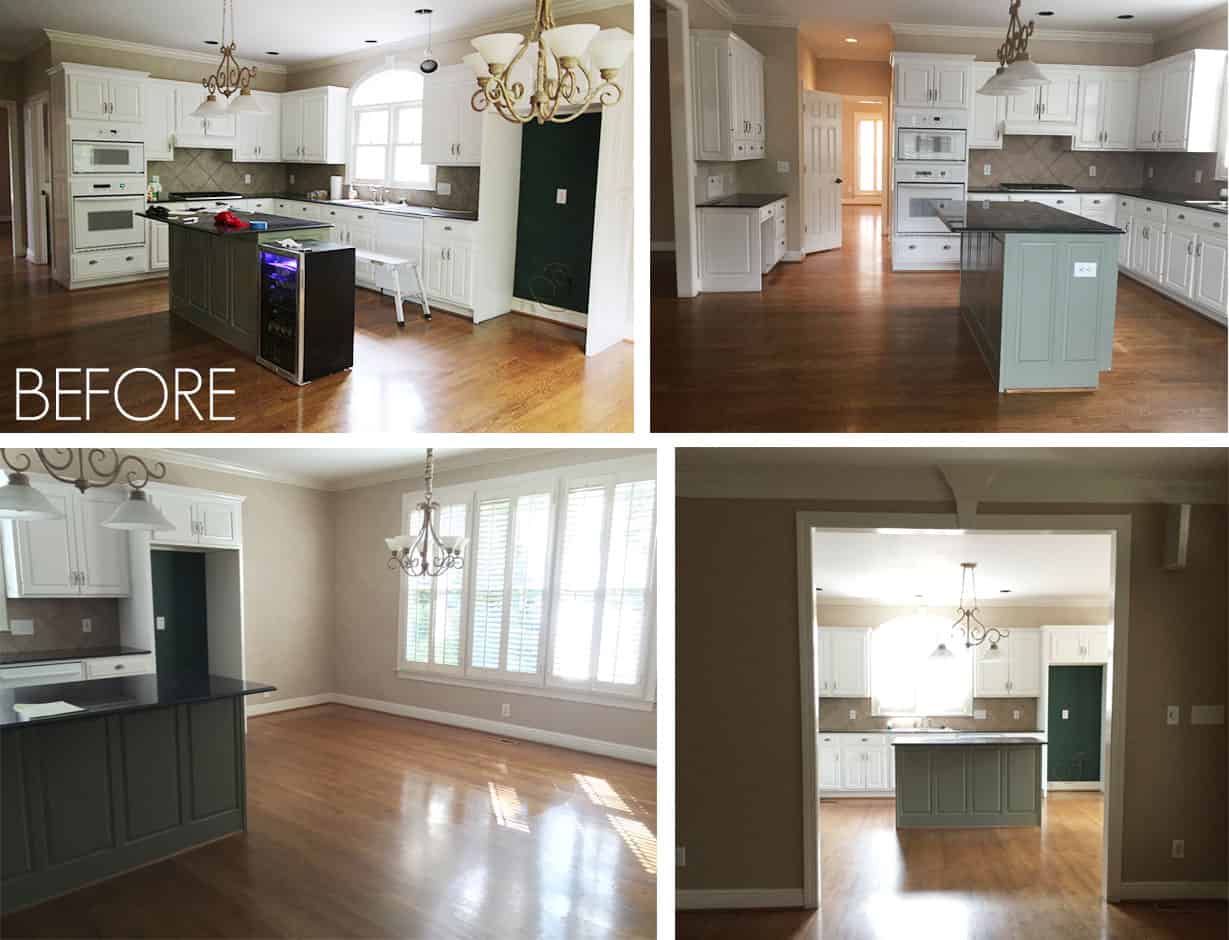
Let’s start with the before photos. The kitchen already had a nice footprint and appeared to have a good workflow. That being said, I knew from the first time we stepped into this kitchen that with just a few tweaks it could be an awesome kitchen. It definitely proves that a budget-friendly makeover can yield big results.
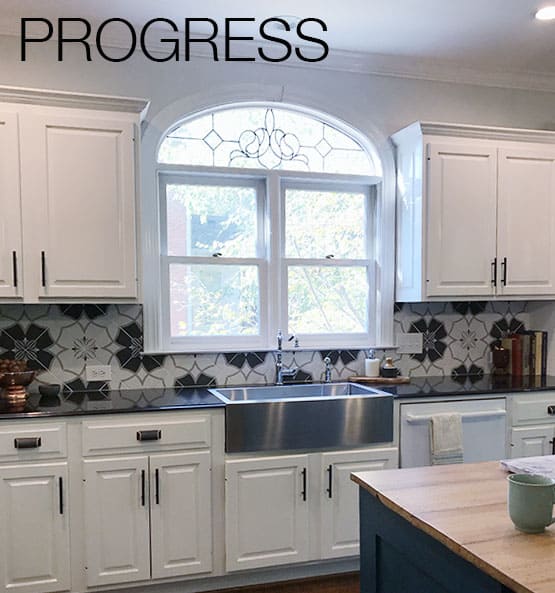
I also feel compelled to explain the setbacks that caused the extended delay. From the very beginning, the windows over the sink felt dated and even though it was a large opening, the three small windows seemed cramped.
But with all of the other renovations being done around the house, the new window installation didn’t come to fruition until October of last year, well after the first reveal. You can see the reveal post sponsored by Home Depot and Anzzi here.
And then the highly unexpected problems related to the window snowballed one after another and I certainly couldn’t reveal a kitchen with an unfinished window.
The first custom window came in and was installed with gaping holes where the arch didn’t match the opening and the window clearly didn’t fit. It turned out that this arch is not particularly common. (For your building reference it is considered a 3-centered arch window, not a typical ellipse. Trust me, I wish I didn’t have to know this.) Months later when the new custom built window came and was installed we then tackled the new molding around the window.
Because the arch is irregular a standard flex molding didn’t work either. So for both the window and the molding, despite hiring professionals, it took two time-consuming attempts to get it right. What seemed to be a simple change was not simple at all and definitely tried my patience. In the end, the window is beautiful and is pretty close to what I had dreamed it would look like.
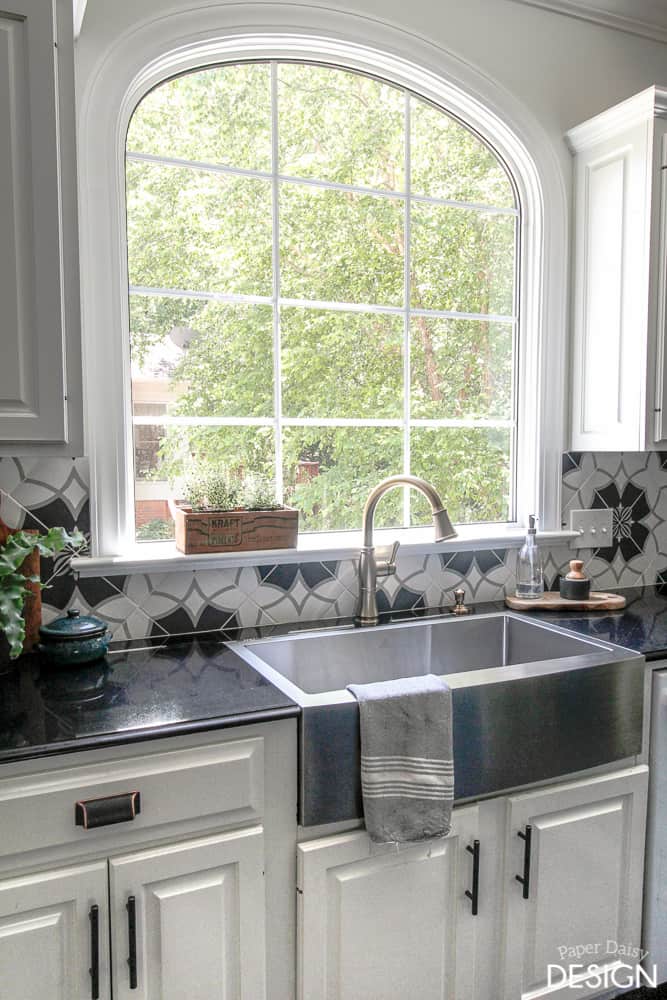
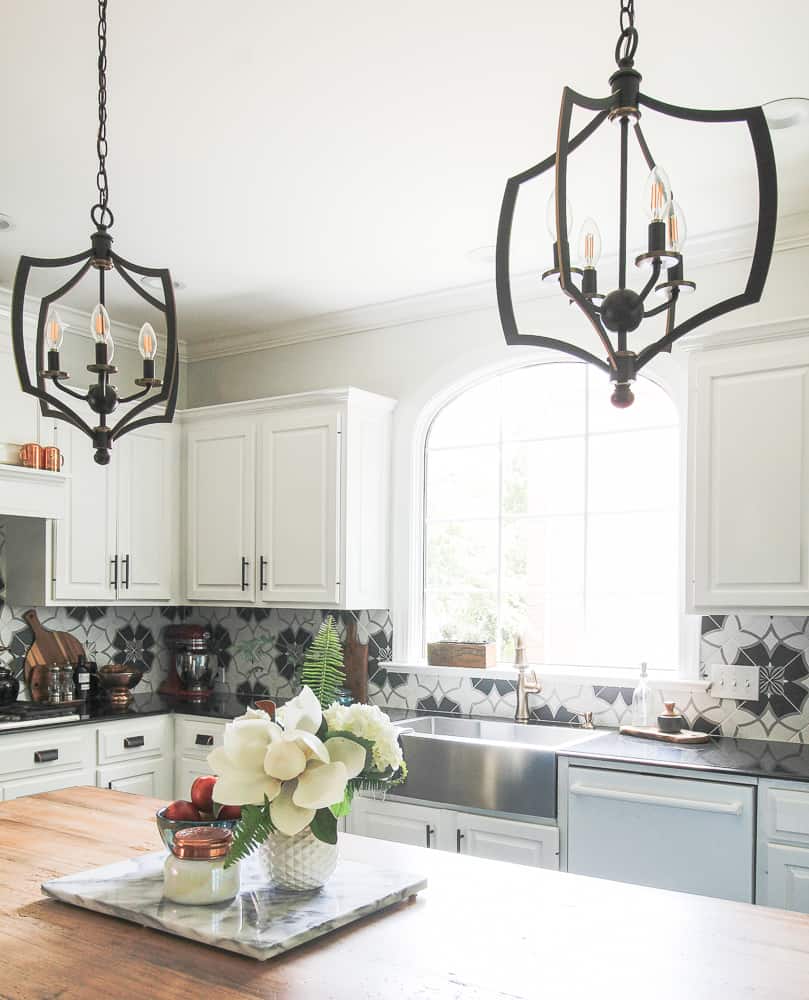
We were all a bit surprised at how much more light comes through the window without all of the previous window framing.
Shop The look
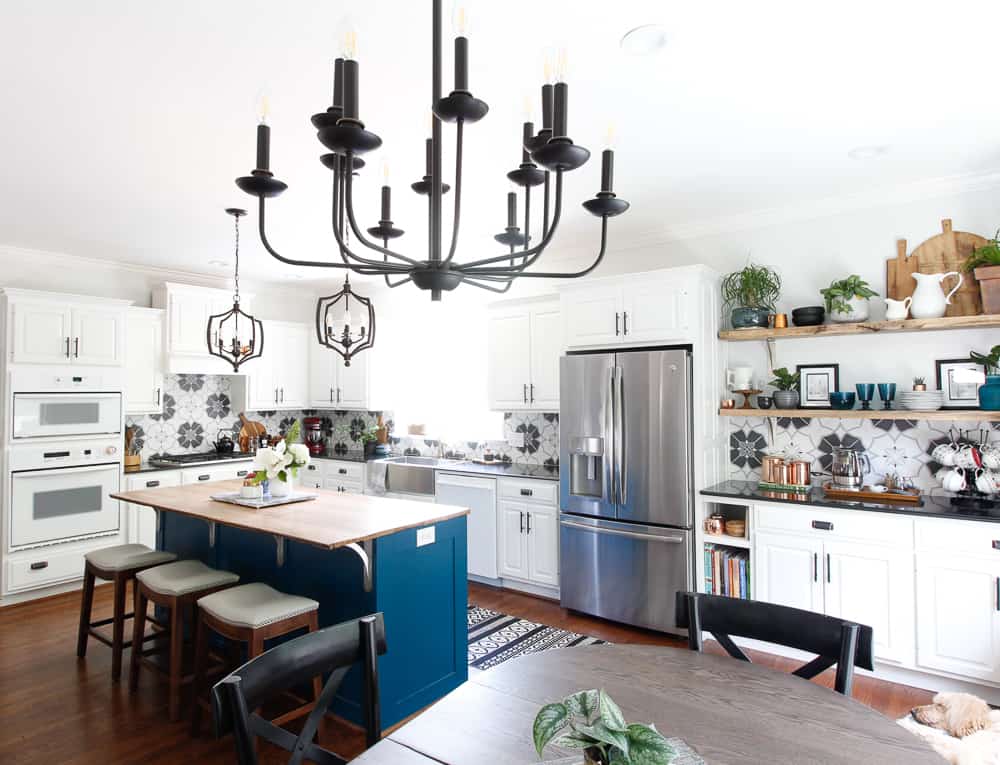
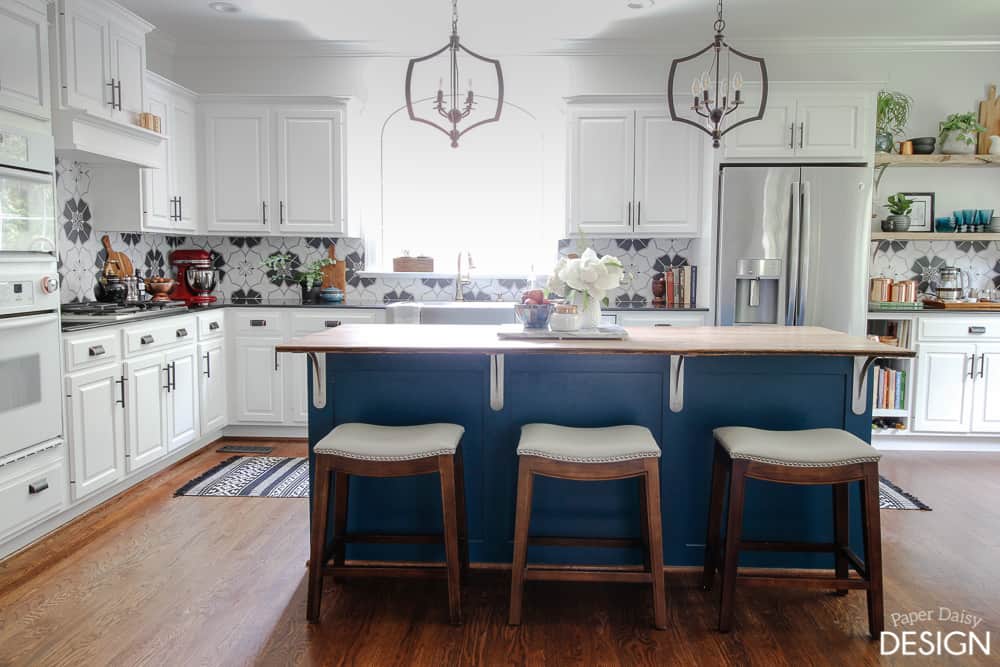
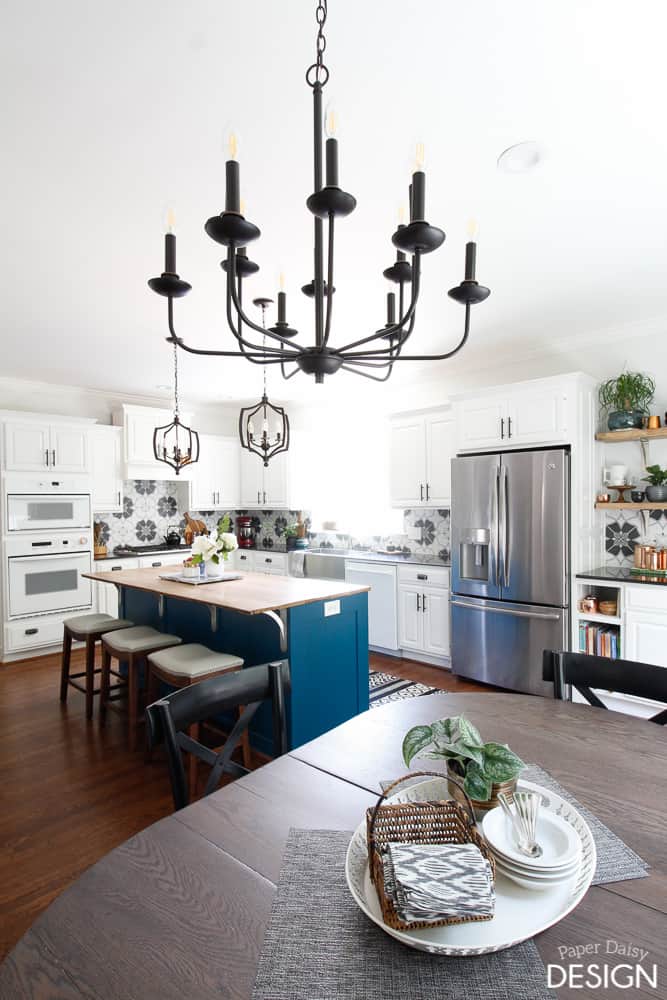
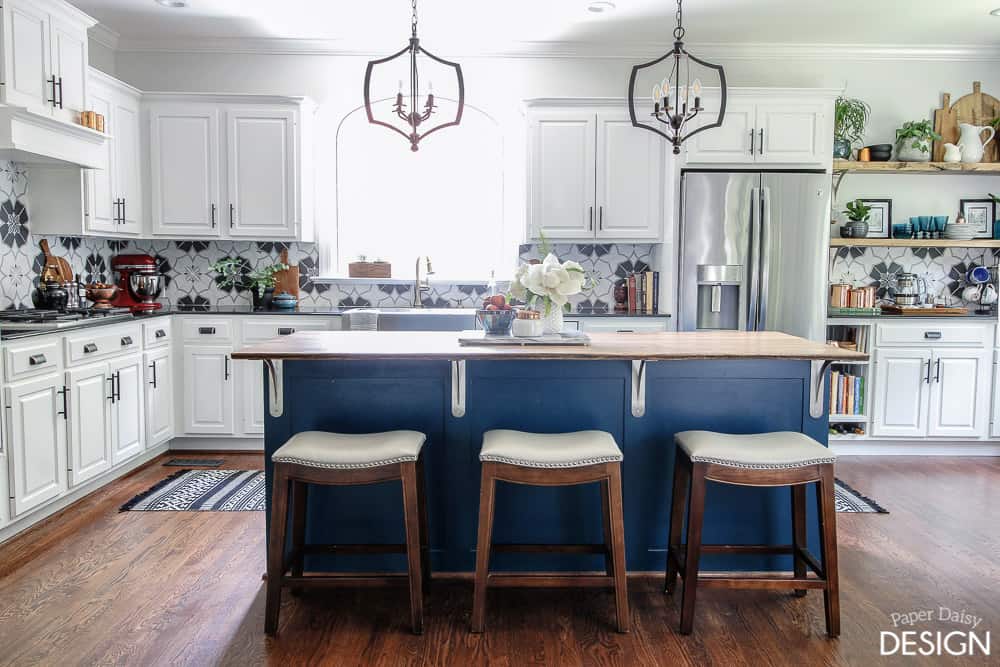
Keeping the existing counters saved thousands of dollars and the black granite became the inspiration for the design esthetic. We updated the backsplash tile, installed new pendant lights, chandelier, the handles and pulls on the cabinets, added a farmhouse stainless steel sink and a new faucet. We actually replaced the faucet with this gold-toned faucet several months ago. The original, chrome faucet did not have a pull-down sprayer and we felt that with a sink of this size a side-mount sprayer was inadequate.
I must tell you, adding a deep single-vessel sink is everything. It is definitely a small luxury not to miss if you are considering a renovation. Although, there was a bit of a hiccup initially, related to the sink installation. After careful measuring, I knew this apron sink would fit in the existing 32″ cabinet base and was determined to retro-fit it into our kitchen. We were able to build the proper support inside the cabinet without any problem. I’ll likely follow-up with a helpful tutorial post.
Finding a company willing to cut the existing granite back about an inch on both sides was the issue. We also wanted the fabricator to cut the old island top to be used as a counter on the beverage center. After making dozens of phone calls and appointments, we finally found a company not only willing to refabricate the granite but one that removed them all and created at template after the sink was installed then reinstalled them looking better than before!
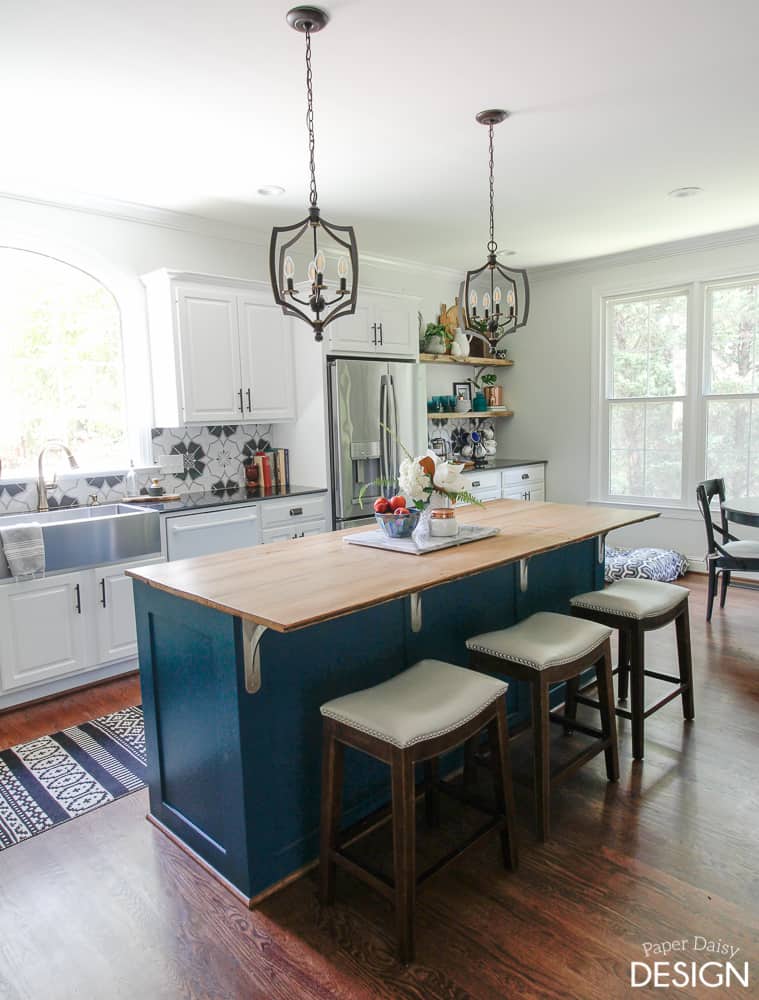
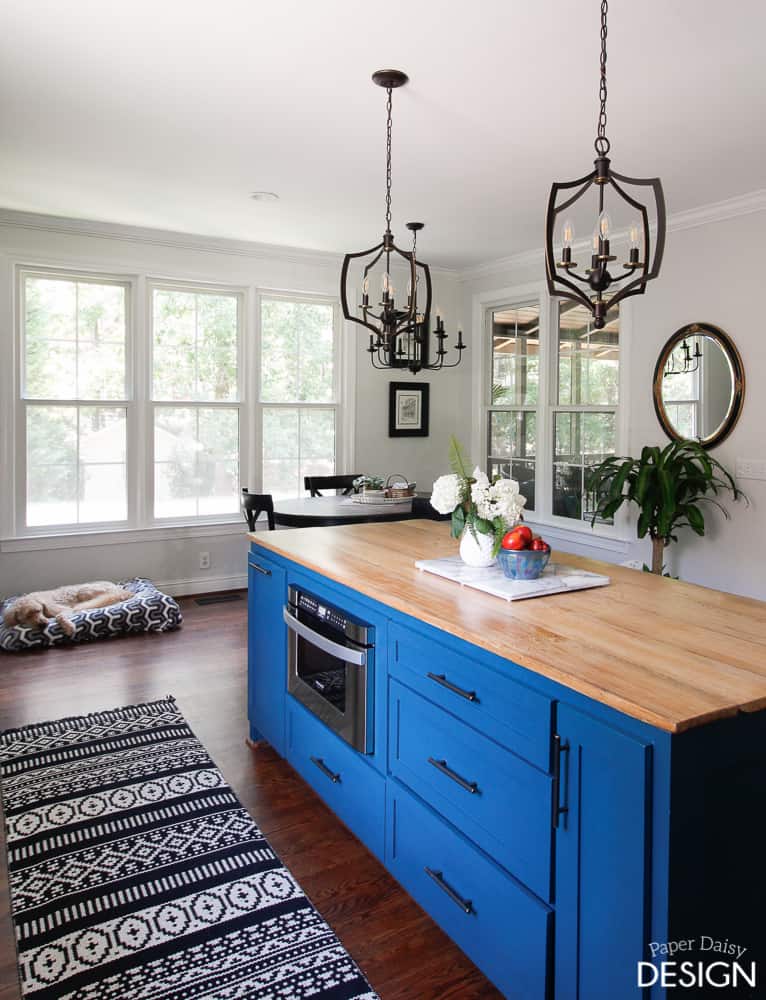
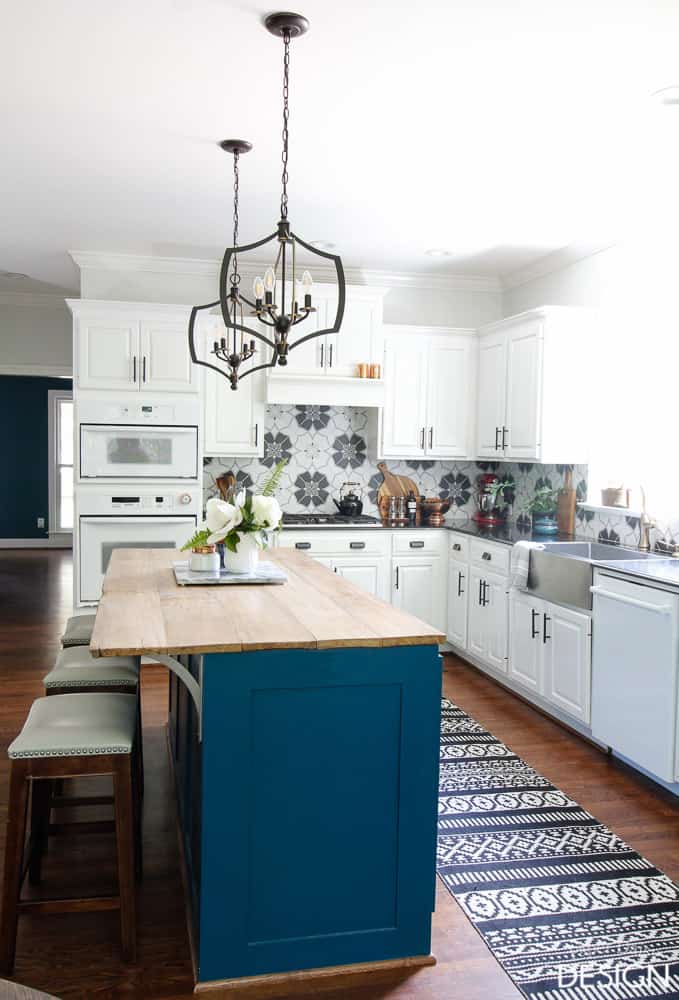
The other high-impact change to the overall feel of the kitchen was replacing the existing island with a larger island that included a pull-out trash can and a built-in microwave drawer.
Not only does the island now feel more proportionate to the entire room, both additions are simple luxuries we now know we wouldn’t want to live without.
The cabinet above the cooktop was bumped up to raise the visual height of the cabinetry. It’s one of those subtle changes that modernize a kitchen. Often, a microwave is over the stove, but here the cabinet was just level all the way across. (The microwave is in the wall unit next to the cooktop. I hope to one day replace them both with double ovens.)
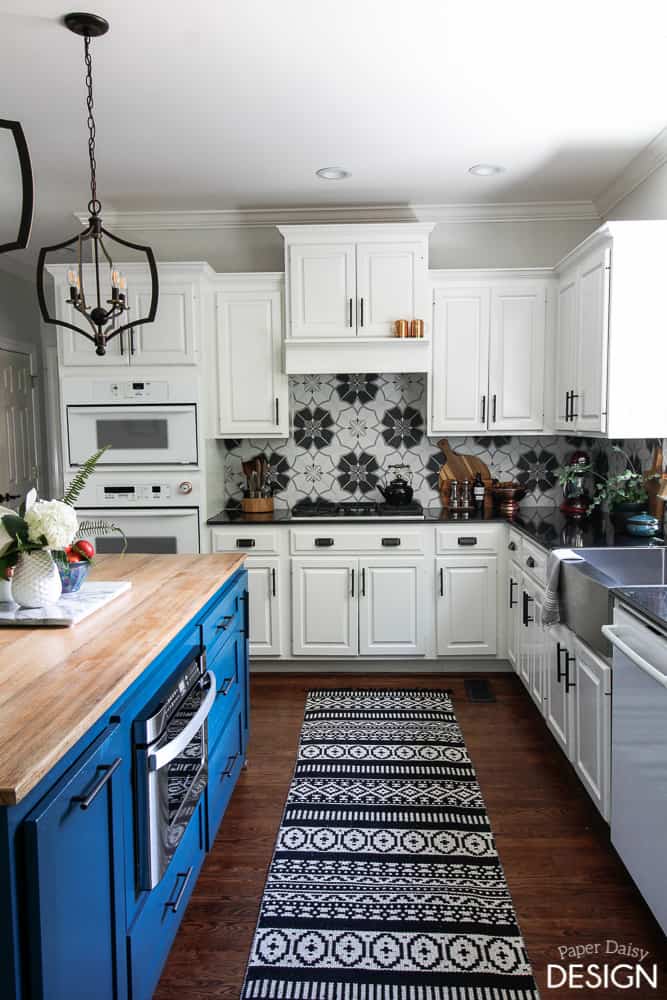
Having a microwave drawer is revolutionary. It really just makes so much more sense, especially for those of shorter stature. This is the microwave drawer we selected. Seriously, I couldn’t love it more. The reviews were a little iffy but we haven’t had one issue.
While we were able to keep the original black granite on the perimeter of the kitchen, we decided to build new kitchen island top from reclaimed barn wood. I drove up to Cullman, Alabama to purchase the wood from Southern Accents Architectural Antiques. The wood is tongue and groove oak flooring from a barn in North Alabama dated back to the 1800s.
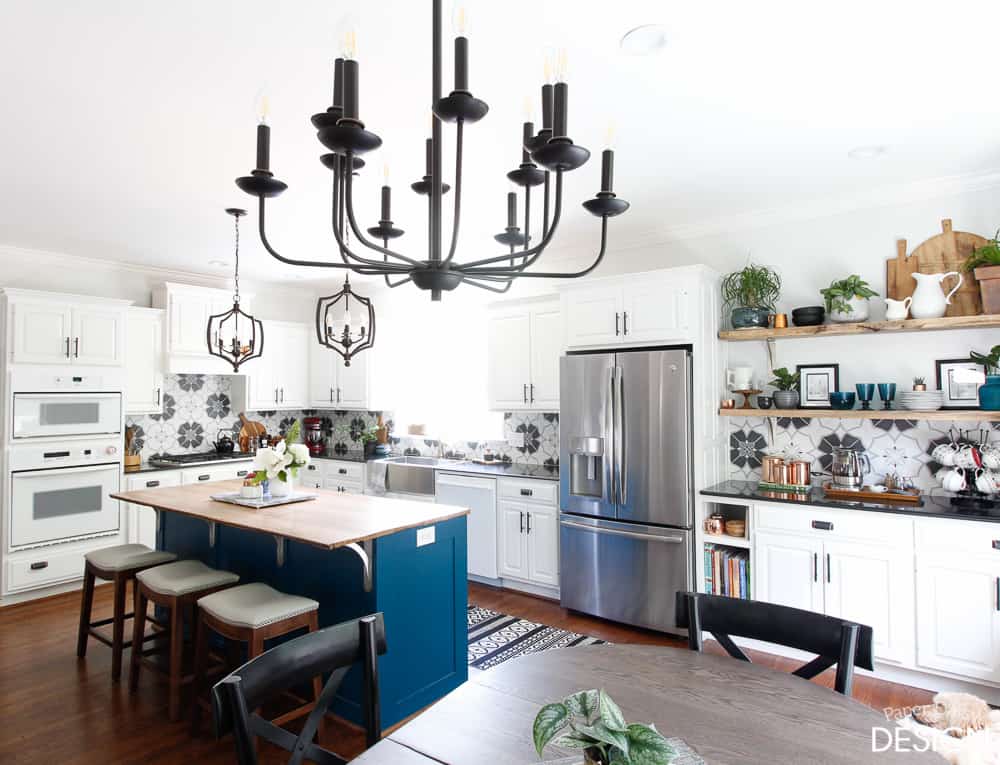
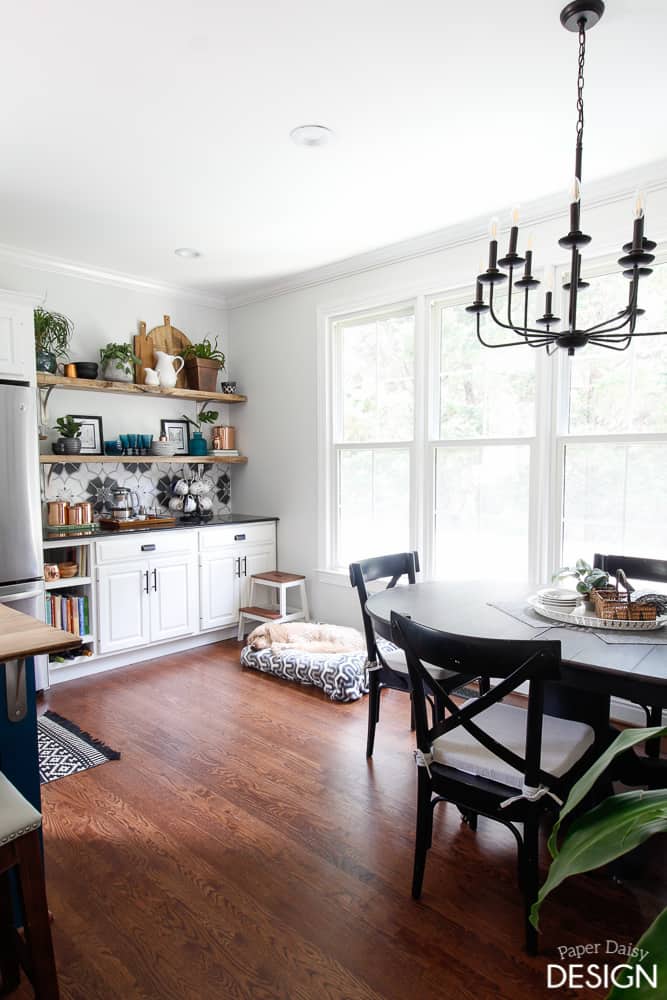
The old island was moved to the side of the kitchen where previously there was just an awkward open space.
I built a small bookcase to complete the space the island didn’t fill.
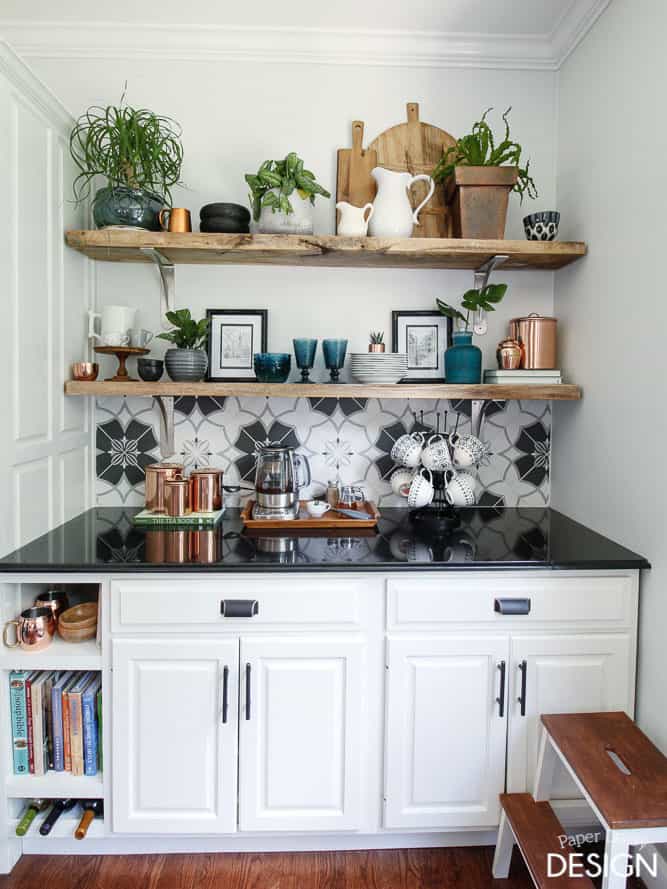
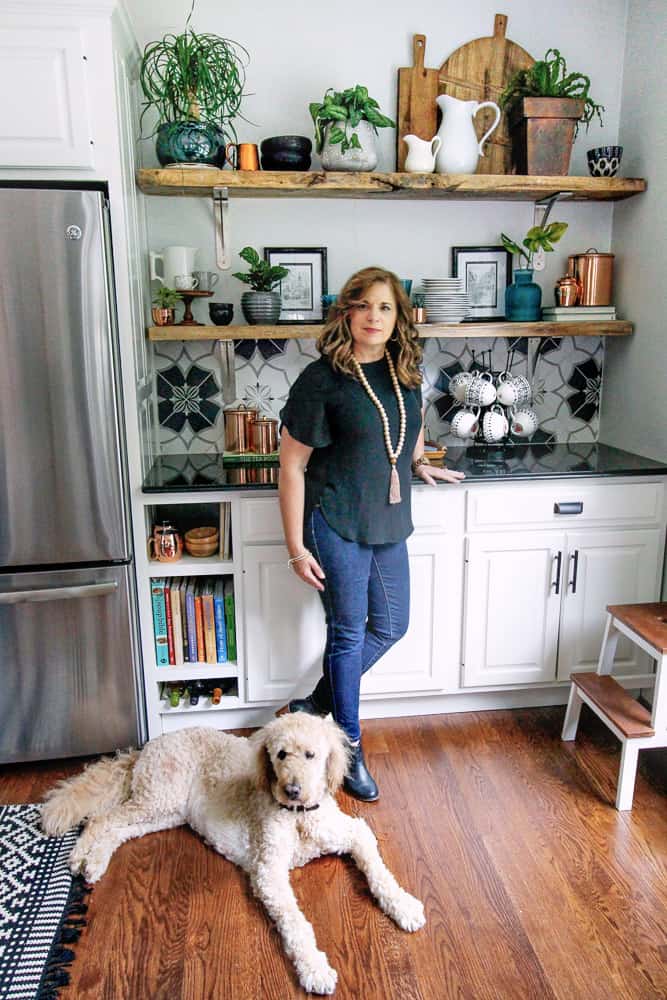
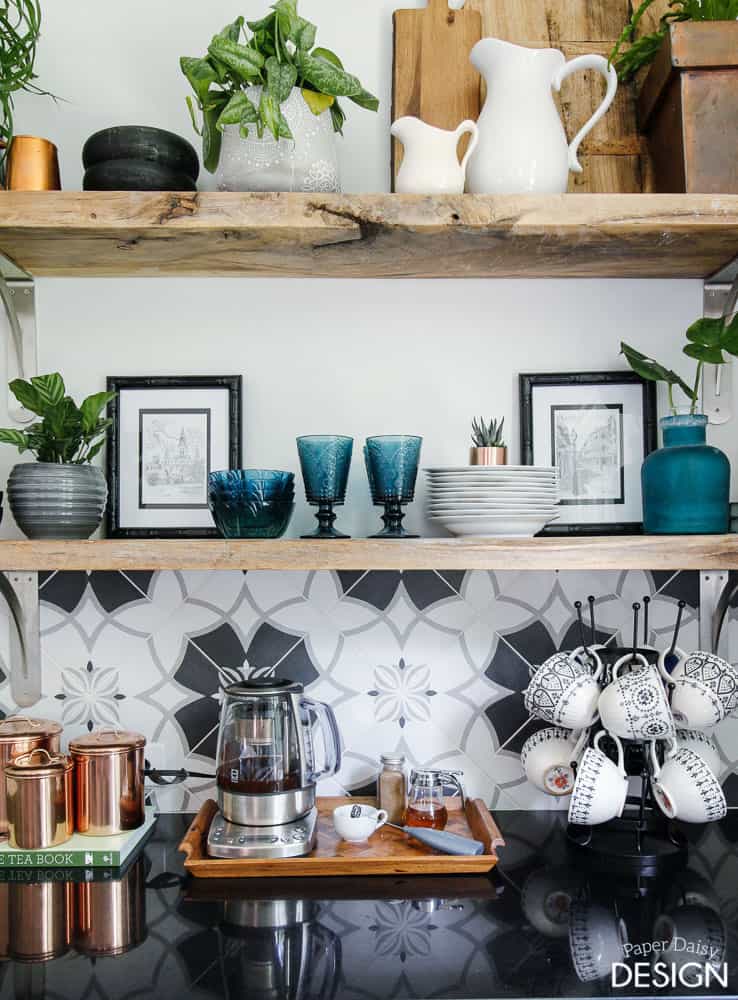
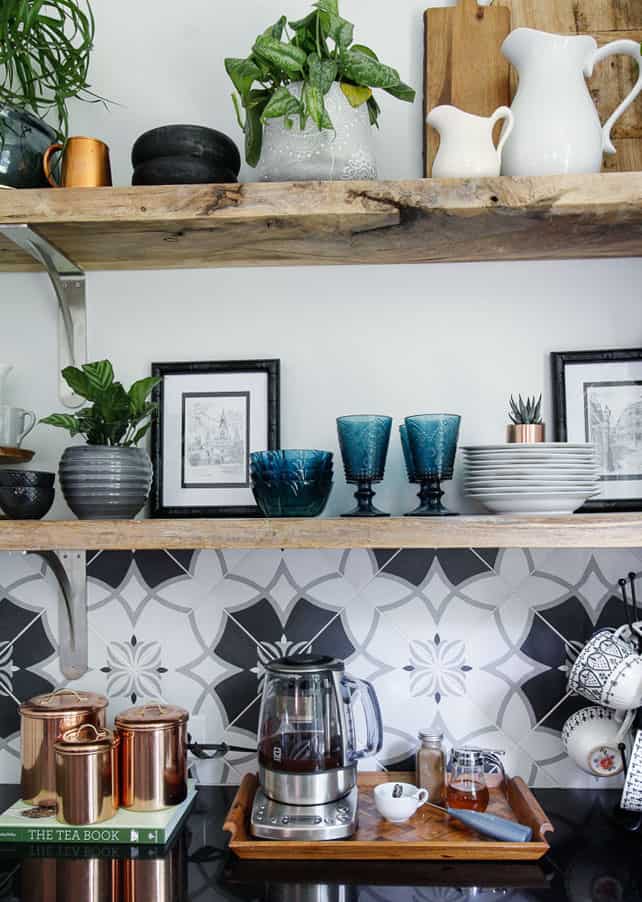
I love that it gave me the opportunity to have an area of open shelving and the perfect place for a beverage center. (I don’t call it a coffee bar because I don’t drink coffee, but I am extremely passionate about my tea.)
These shelves, walnut I believe, were sourced from a local reclaimed wood shop, Evolutia. Because they deal in such volume they don’t keep a history of each batch of wood. But I would guess these thick slabs, over 2″ deep, were once rafters of some kind. Originally the ends had angles that seemed consistent with that usage.
Due to their weight, I used these stainless steel brackets from Osborne Wood Products. They are extremely well built and strong. They were designed to carry the weight of marble countertops.
Visually, this addition expands the kitchen to cover the entire back wall and adds so much extra storage and style and a place to hold plants.
For consistency, those stainless steel brackets were also used on the island.
The eat-in kitchen area was originally centered in the area next to the island. Before the renovation, the space seemed wasted if it weren’t filled with an oversized table. 
Once the old island-turned-beverage-station filled the space on the left, shifting the table and chandelier to the right seemed obvious.
Hopefully, in the not too distant future, I will add my dream banquet to this area and further ground the table here. I’ve always had an infinity for these bistro chairs and the bistro chair cushions soften the seat. The table is an antique.
The dramatic island color was chosen as a way to create flow from the dark teal in the dining room to the kitchen. Both are painted Deep Sea Dive by Sherwin Williams. The barstools were carried over from the last house, but here are some very similar
One of the benefits of knowing this was a budget remodel was giving myself the freedom to be a bit bolder in my choices. The dramatic, high contrast backsplash tile would not have ordinarily been in my dream kitchen design. I knew both the backsplash and the island color would be a small investment in time and money to change down the road.
I had always said my dream kitchen is white and marble and full of light. That is pretty much what I had designed just two years before. You can see that kitchen here. Heck, I even have a full board of white kitchens in my Dream Kitchen board on Pinterest. Give it a follow here.
Besides the budget, the other reason I decided to work with the existing footprint was to be able to determine if there were any changes I would want to make later on. Working in a kitchen over a period of time, the flaws in workflow become obvious. Because we weren’t able to live in the house prior to much of the renovation, I wanted to be sure I didn’t hastily complete a major renovation and miss an opportunity for improvement.
And now that I’ve mentioned budget. I’m giving you full disclosure here. Honestly, It wasn’t until I had my husband give me all the figures did I realize exactly how much we spent.
• The pendants, chandelier, new cabinet hardware and tile backsplash were $1000 and were gifted from Home Depot, the sink from Anzzi was gifted as well, $550. They were part of a budget kitchen sponsored post and you can see that here.
• The faucet $390, reclaimed wood for island $200, reclaimed wood for the open shelves $150 and re-fabrication of the granite $600 were budget friendly options as well.
• Also gifted were the stainless steel brackets, 7 for $800.
• The bigger ticket items were the microwave $829, refrigerator $2000, custom island $2200.
All of this adds up to almost $8,700 which is definitely low budget for kitchen remodels. I did not include the cost of the window as that was part of the whole house renovation, but it was $2000.
To be quite honest, if we are blessed to keep this house as our forever home, I will likely continue what was started here. But for now, I find this kitchen quite dreamy and maybe one day it will have a new look, maybe not. Either way, I truly love this kitchen and I feel so blessed. It functions so well and is such a beautiful place to cook and to spend time with family and friends.
And as a parting note, I am proud to share that I was given this sweet recognition from Wayfair. I was featured in their online article about “The Best Tile Ideas for your Home.” Be sure to check it out for more great ideas with tile.

SaveSave
SaveSave










9 Comments
Andi
June 22, 2017 at 10:40 amYour kitchen looks amazing! And I love how you were able to continue the backsplash tile into your tea area, but the shelves created a good, natural stopping point from keeping the backsplash from going all the way up the wall. And I LOVE the color of your island! Great job!!
Ashley
August 16, 2017 at 10:10 amWhere did you find the rug??
Leslie
August 16, 2017 at 4:40 pmI found it on Wayfair! It’s a good rug for the price for sure! Here is an affiliate link.
http://shrsl.com/jgw4
Naturally Fall Home Tour -
September 29, 2017 at 6:34 am[…] You can read more about our kitchen remodel here. […]
Amy Carter
January 3, 2018 at 12:39 pmYour kitchen looks amazing. I love the tile backsplash. I also love the blue island, I’m getting ready to paint ours navy.
Leslie
January 7, 2018 at 2:52 pmThanks! Navy is going to look so good!!! Good Luck!
Lauren
April 8, 2018 at 9:42 amYour kitchen looks lovely! We are in the process of designing an island for our kitchen. Would you mind telling me the dimensions of the island, including the overhang where the stools are? I want a microwave drawer and seating, but I am struggling with the idea of the island being too wide in our space. Many Thanks!
Simple Kitchen Refresh & 3 Summer Vignettes for the Kitchen - DeeplySouthernHome
June 13, 2018 at 1:05 am[…] you are new here, then you might want to check out this blog post for the reveal of our budget friendly kitchen makeover from 2 years […]
Simple Kitchen Refresh & 3 Summer Vignettes for the Kitchen – UTAHGateway.com
June 13, 2018 at 1:53 am[…] you are new here, then you might want to check out this blog post for the reveal of our budget friendly kitchen makeover from 2 years […]