It’s finally time for the reveal of our kitchen. Just 7 weeks ago we moved into our new Lake Ridge House and one week later the One Room Challenge began. I might have been a little bit crazy to sign up for the challenge so quickly after moving, but I am extremely passionate about the event and what it has done for our homes. I just couldn’t pass up the opportunity to bring our kitchen from builder basic to a classic traditional beauty.

The Before
Throughout the design and build process I was especially careful to keep my whole house design goals in focus. When the builder’s offered selections did not correlate with my vision, I chose the least expensive option knowing that some elements were easy and almost always cheaper to upgrade after the fact.
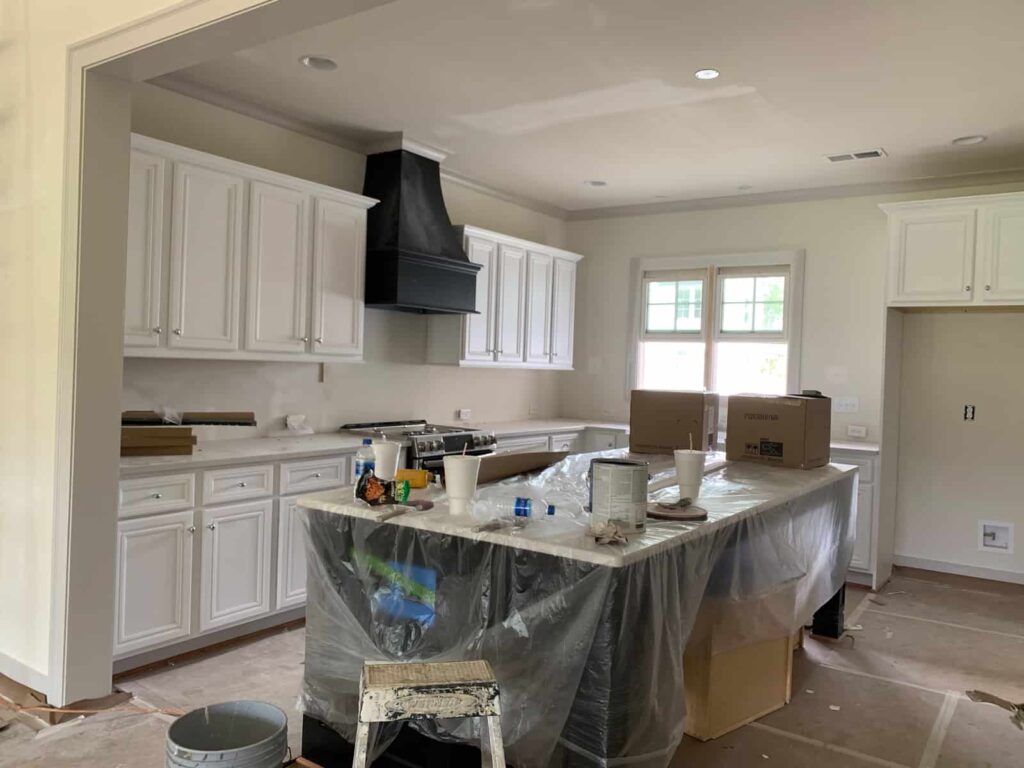
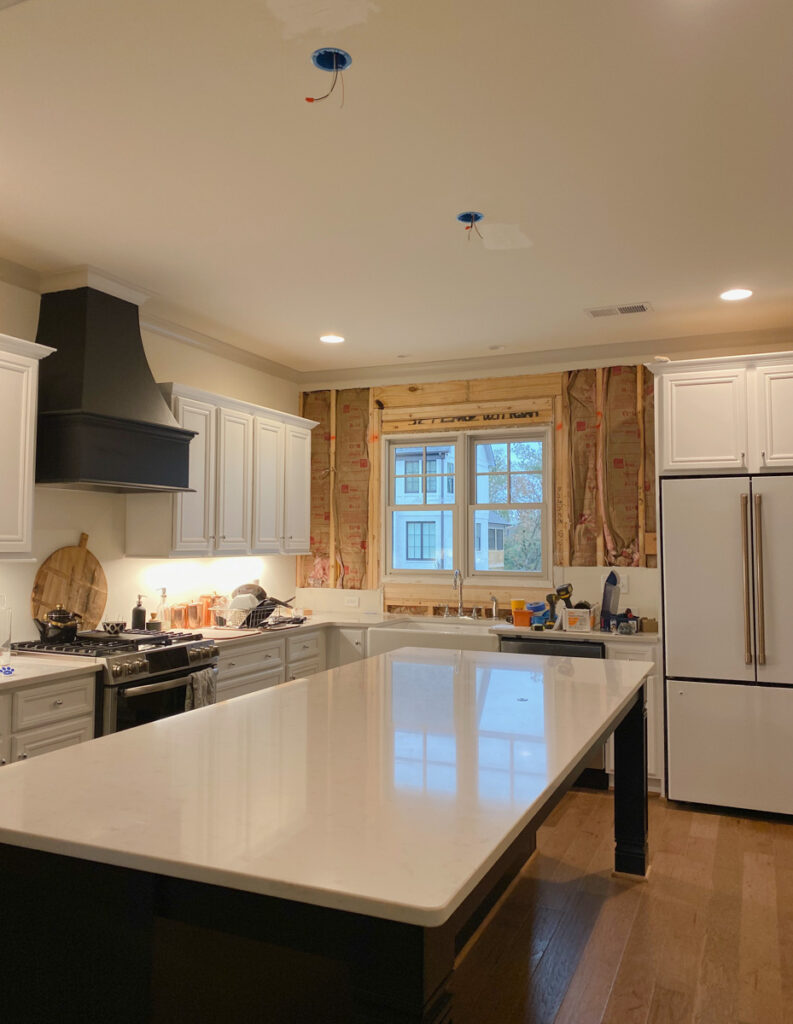
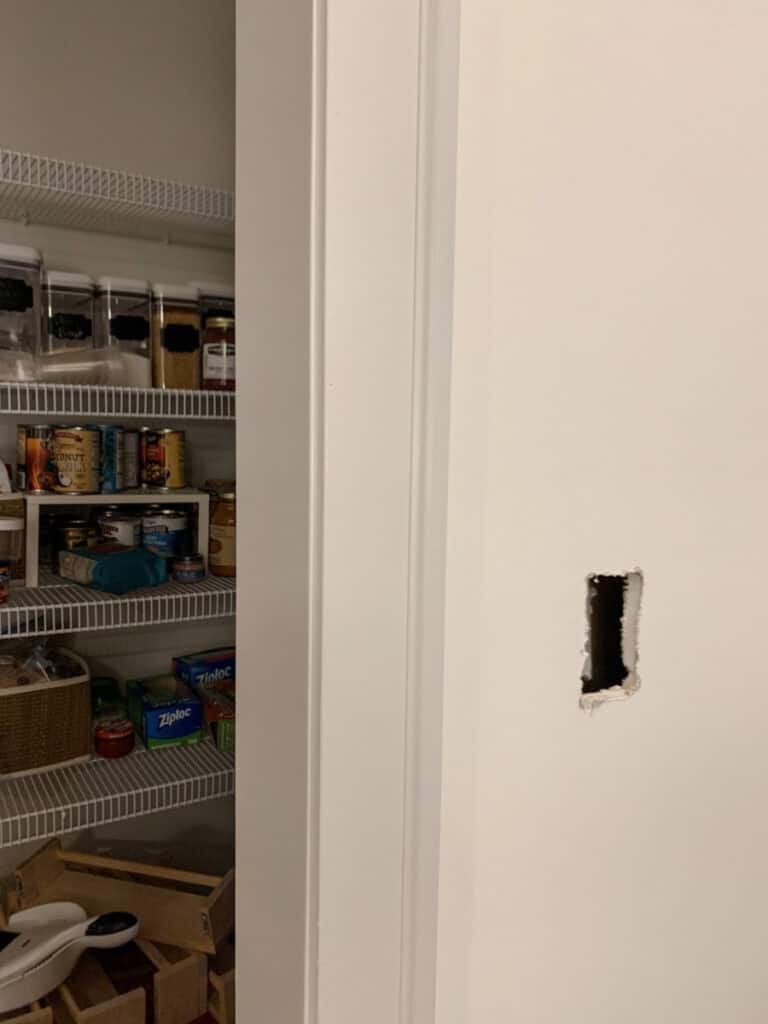
Not many people move into a new house and start tearing down a perfectly good wall the next week. Right? But we did and I am thankful for it. We discovered some electrical issues behind the wall that needed to be remedied.
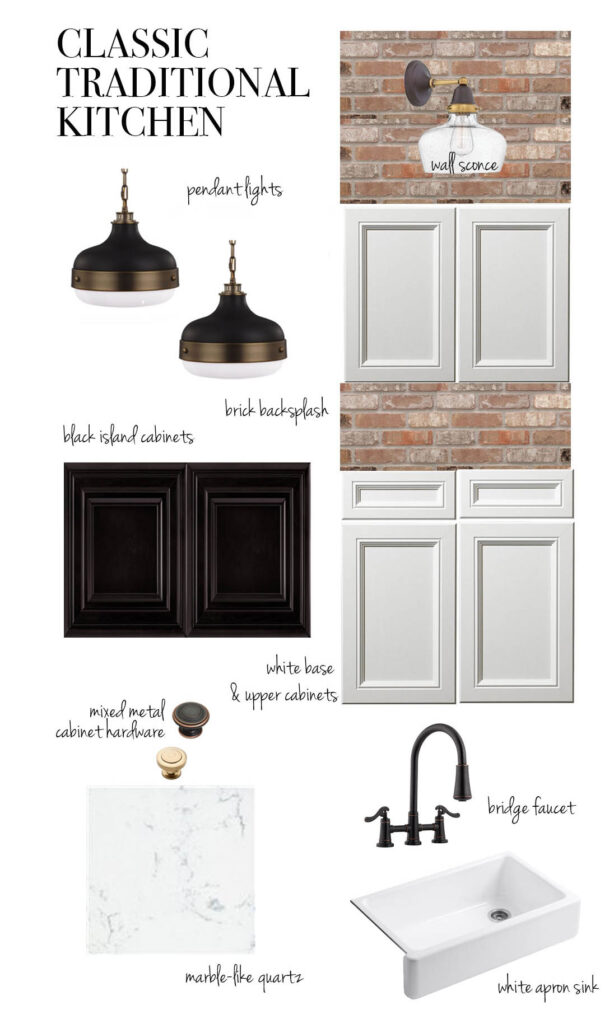
The Design Plan
The initial inspiration for this kitchen came from the one offering from the builder that I loved in pendant lighting options. This gorgeous black and gold Fiess pendant. I knew it’s vintage, slightly industrial look that would ground the entire design. After that selection, it became obvious I was designing a black and white kitchen again.
This post contains affiliate links for your convenience.
Our last kitchen was also black and white, but had a very different vibe. You can see that kitchen here.
Because this is new construction my goal throughout the house is to create a timeless, classic feelings, to bring depth of character often found in older traditional homes.
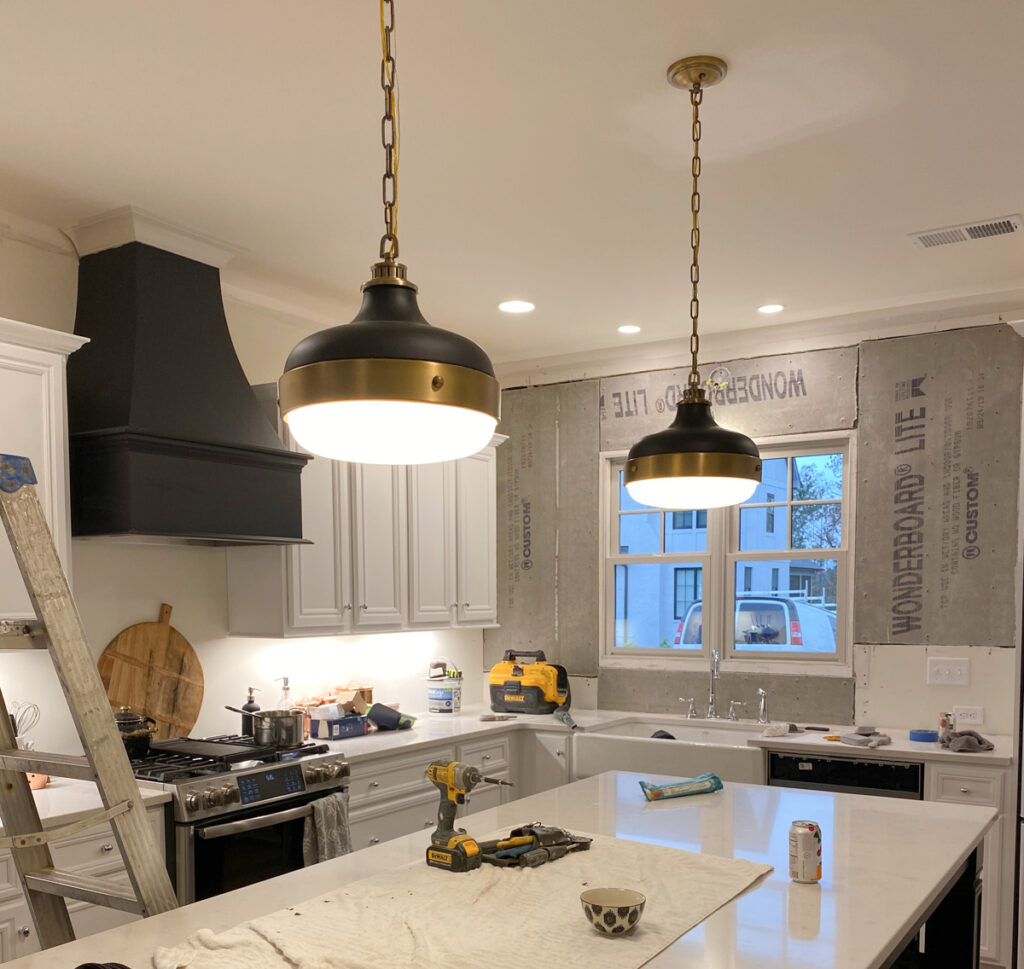
Before we tore the wall down, I did take one photo of the kitchen styled as it was.
The After
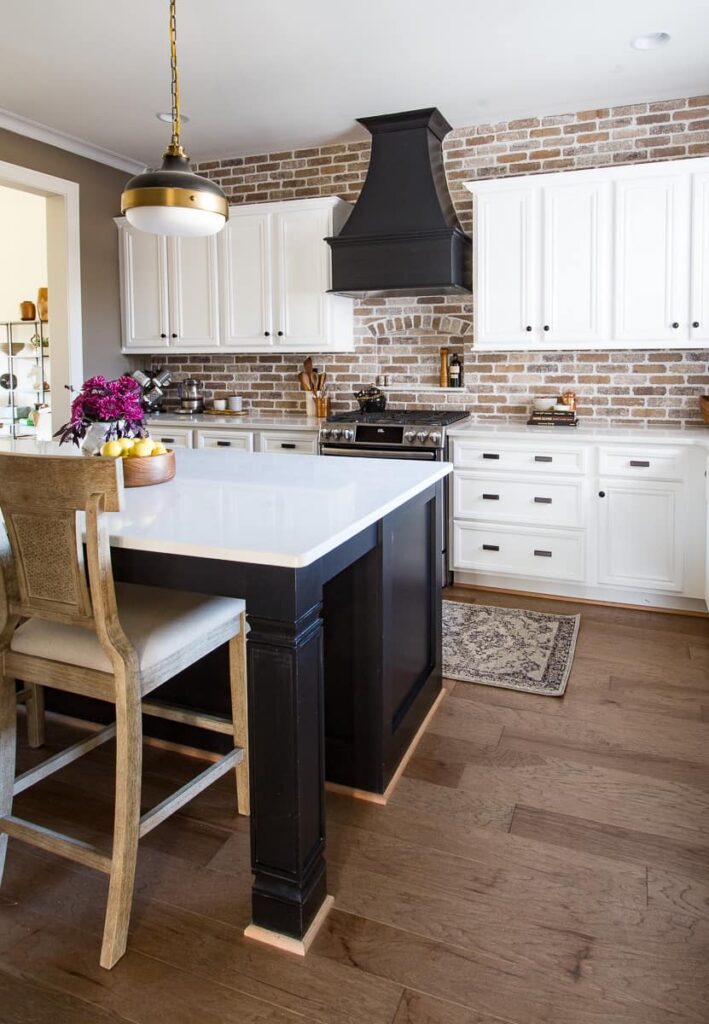
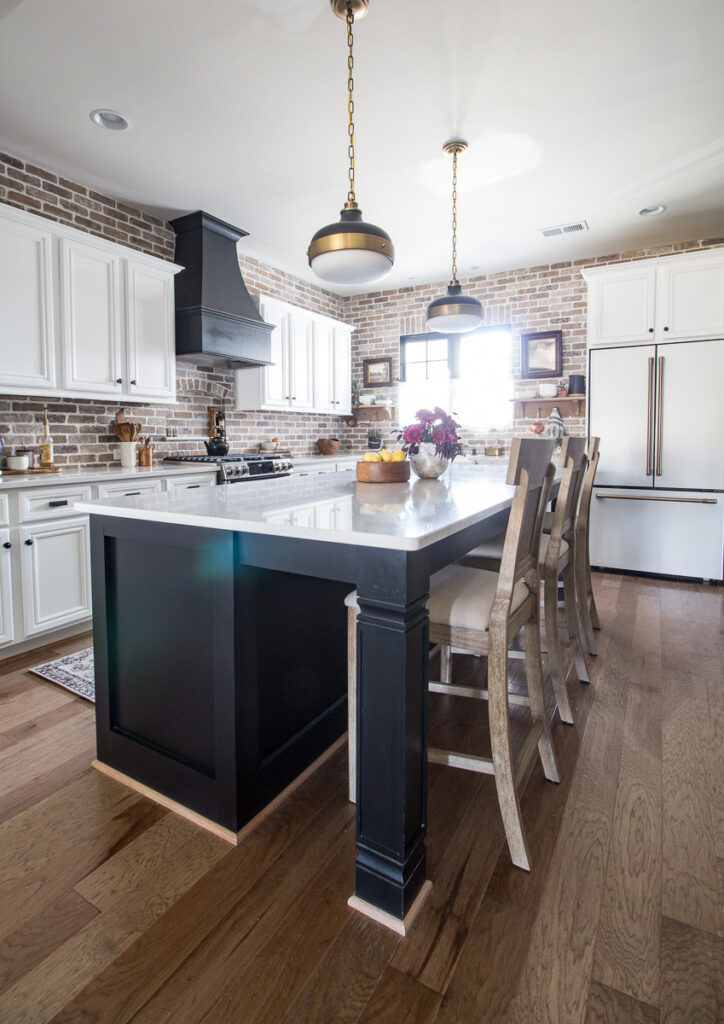
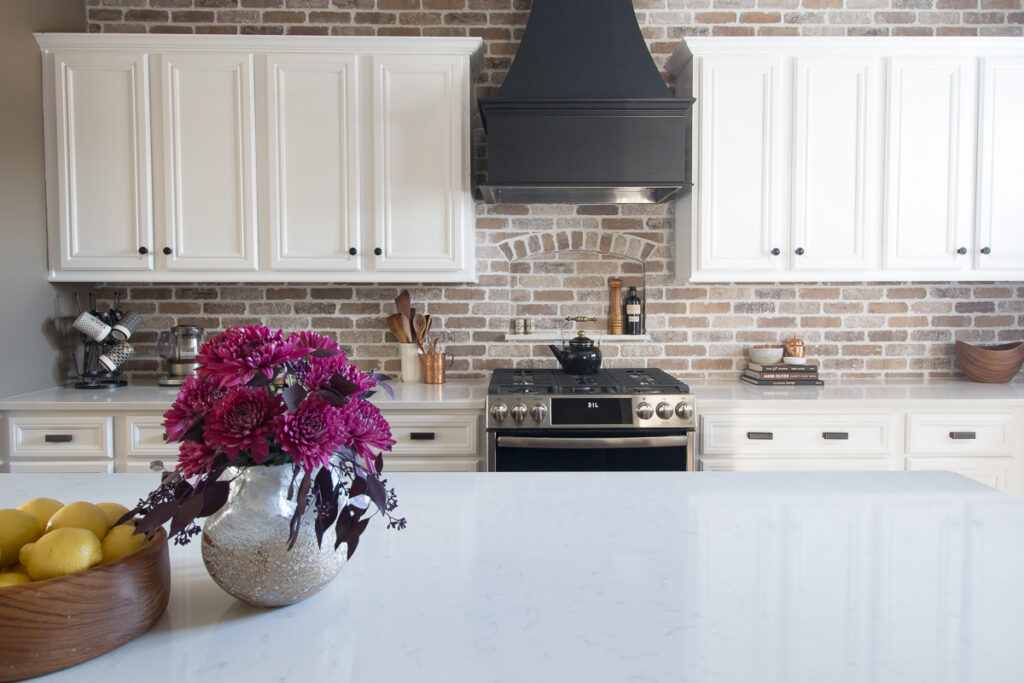
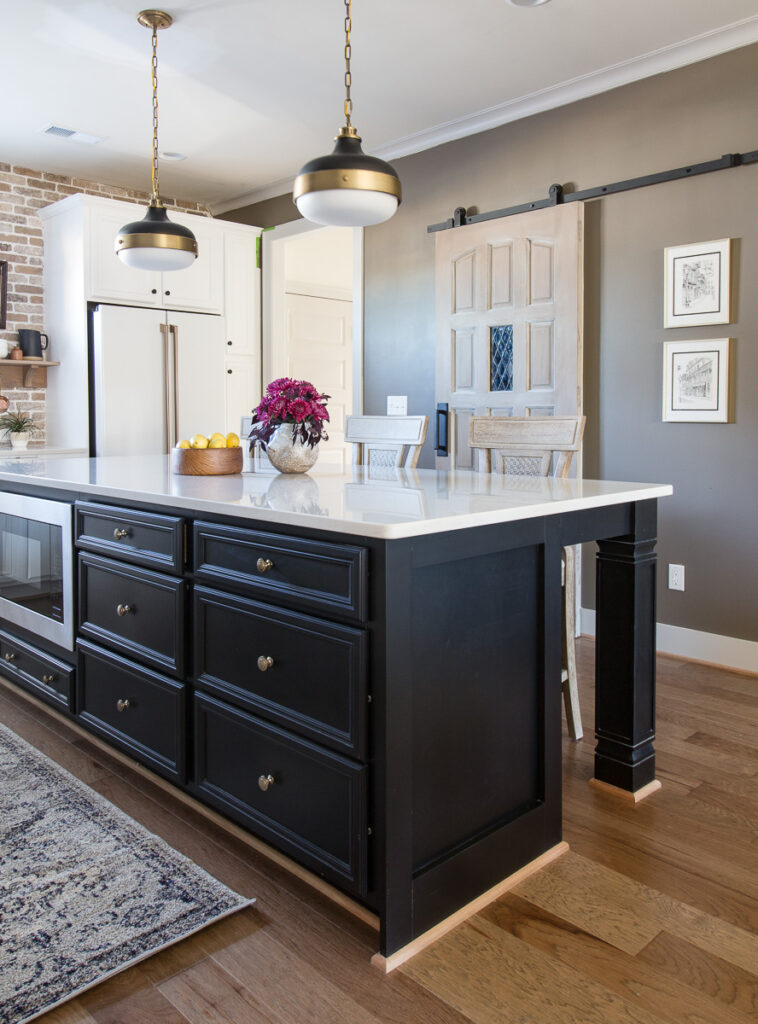
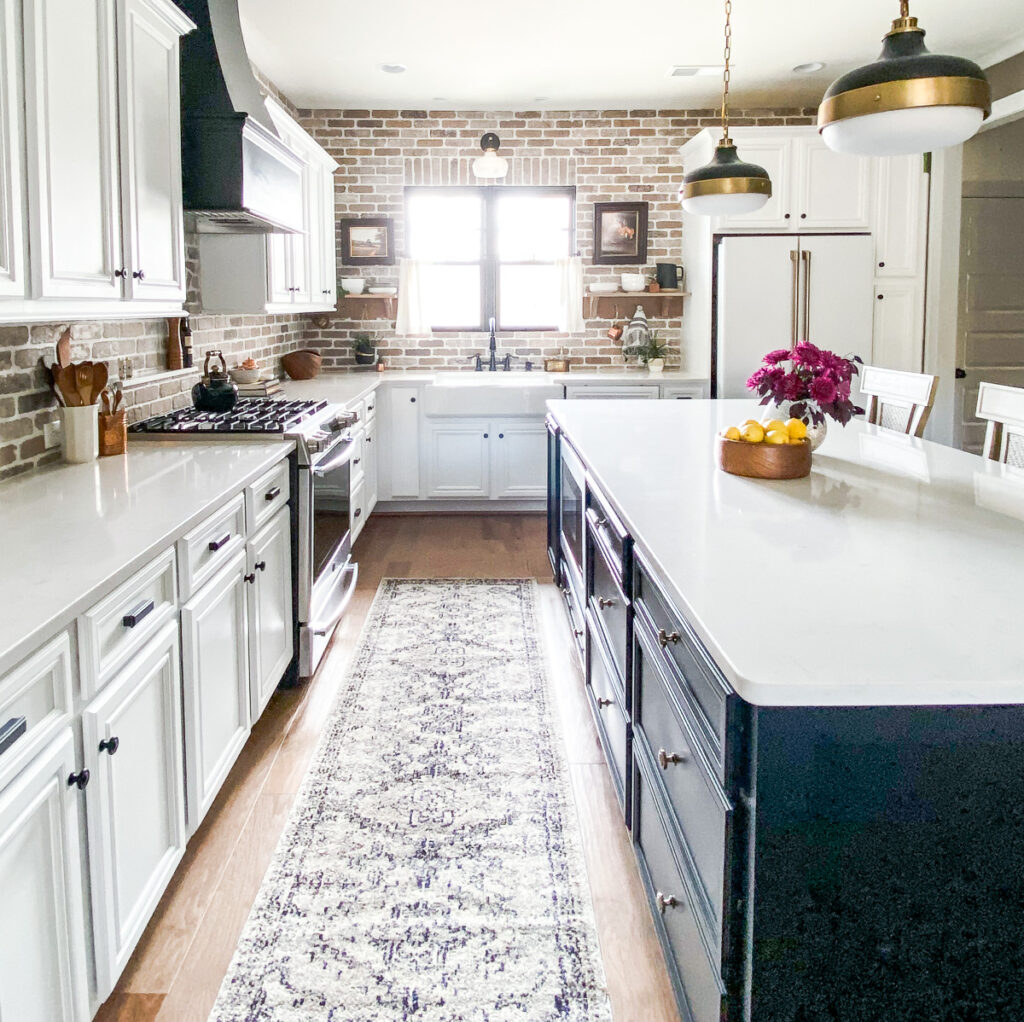
shop the post
The Brick
When I outlined my initial design plan for the Lake Ridge house kitchen back in July, I was still undecided on the backsplash wall component. But soon after, I found and purchased clearance brick tile from General Shale. I was thrilled with the savings and knew that brick was the perfect addition to creating that charming kitchen I dreamed of.
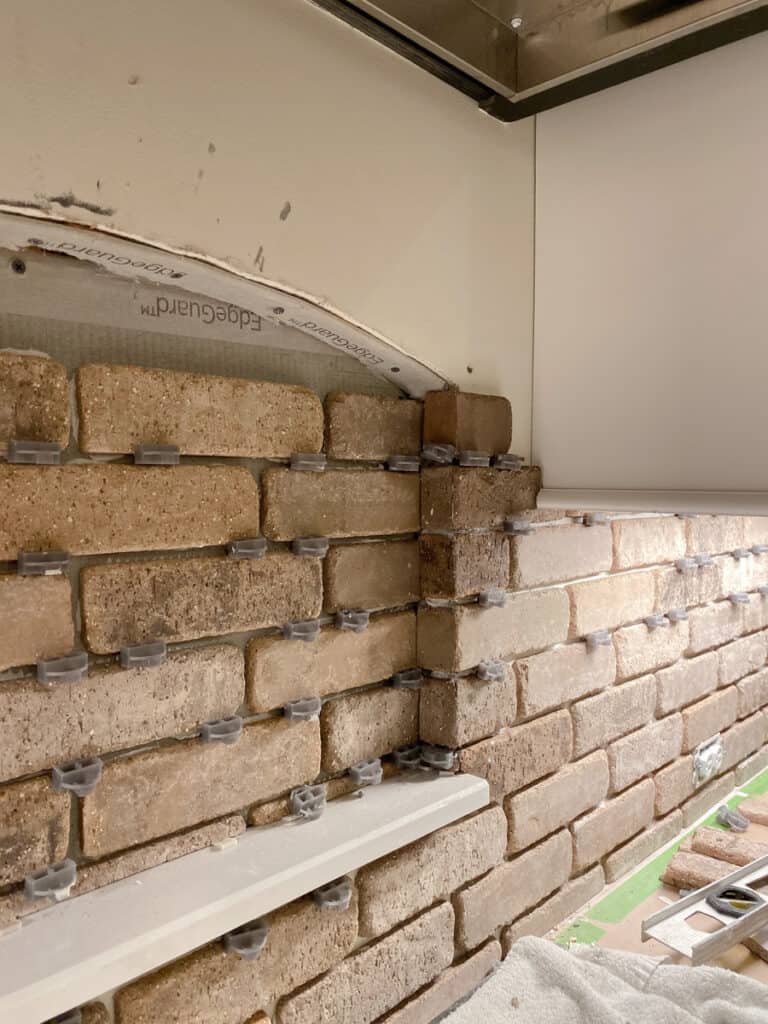
I have participated in several One Room Challenges that involved a room full of tile before, twice actually, Marble Master & the Opulent Master Bath.
When I entered the One Room Challenge this time I sorely underestimated the amount of time it would take to clad two walls with brick tile. I also failed to take into account how the labor intensive work of setting and grouting the tile would be received by my body. Y’all I am physically exhausted now, especially because this came on the heels of a move!
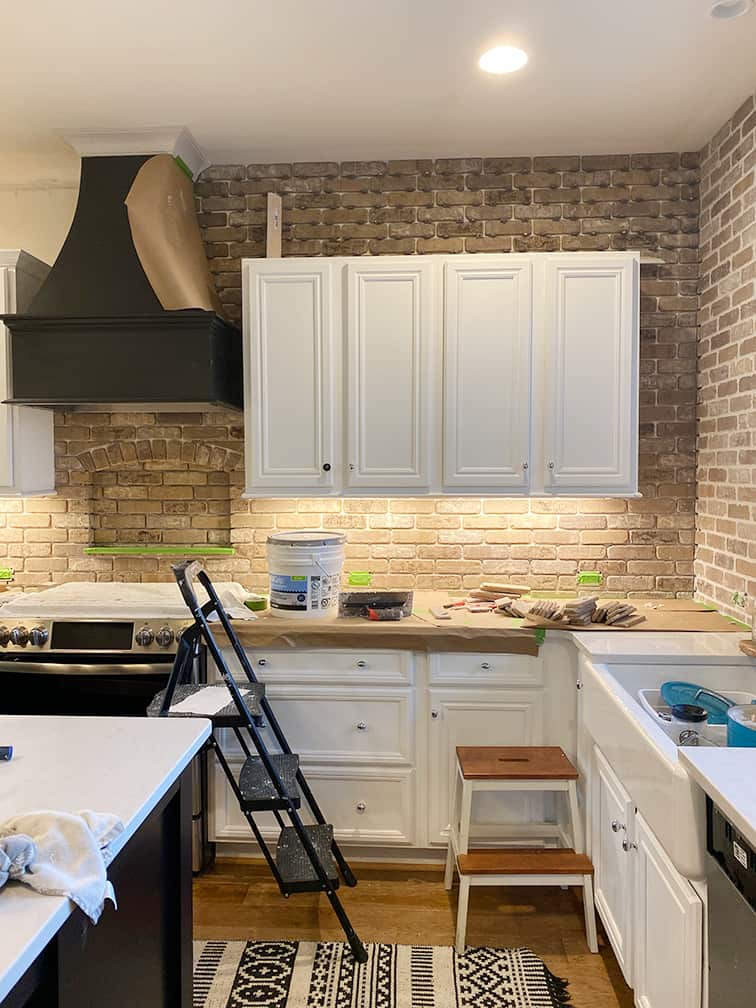
But of course, it was worth every grueling minute!

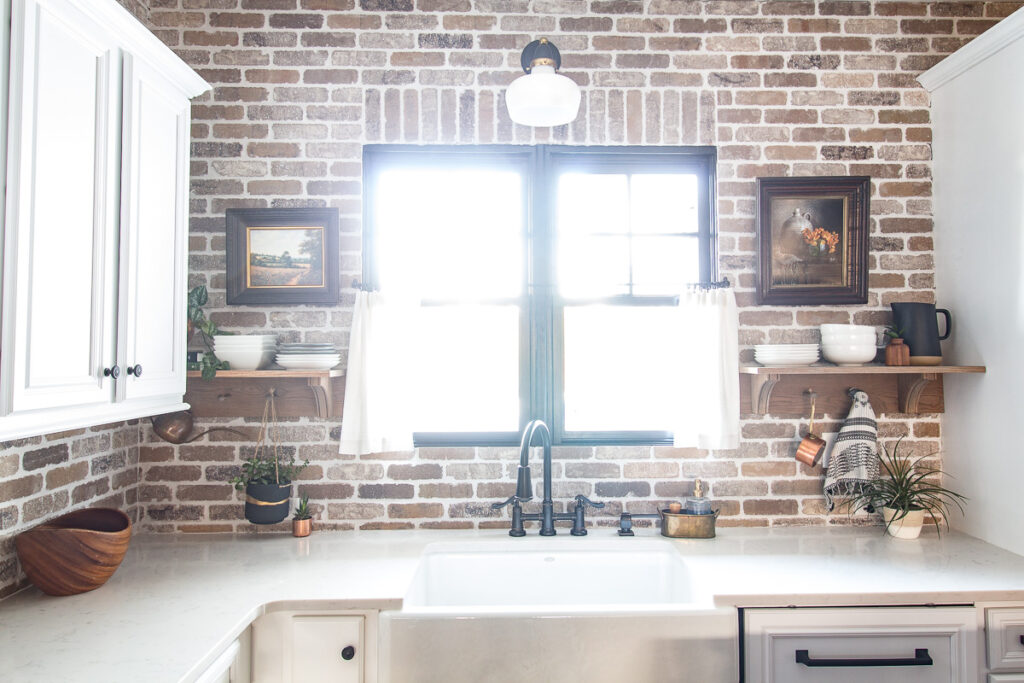
The Niche and the Range
During Week 3 of the challenge, I decided to add a niche to the range and hood wall. The construction took a considerable amount of time due to the care that was needed to navigate the electrical behind that wall.
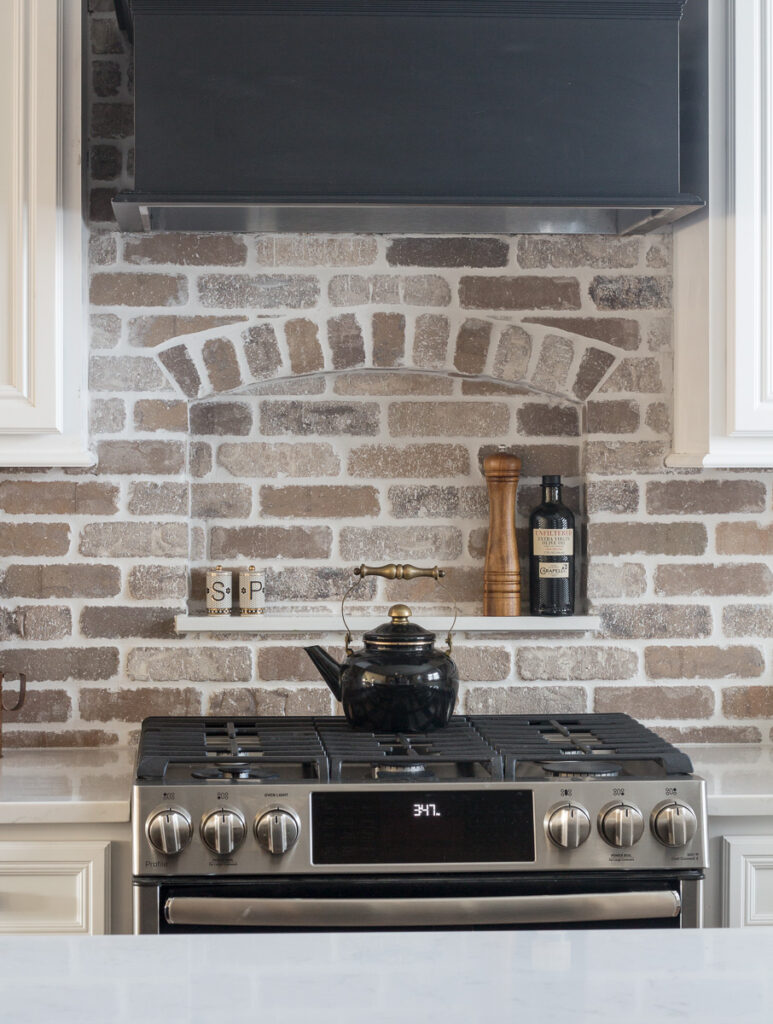
The extra time to build the inset and the arch as well as setting the tiles as perfectly as possible is all behind me now. I am so happy with how it turned out. I may have missed the soft deadline of a Thursday reveal but I am here at the finish line!!
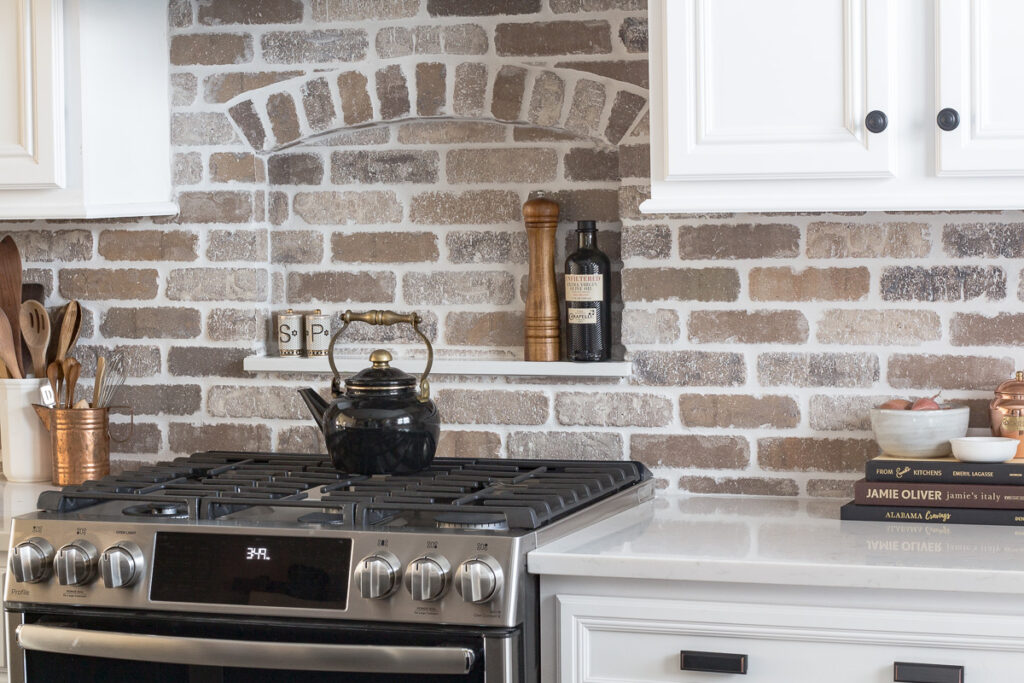
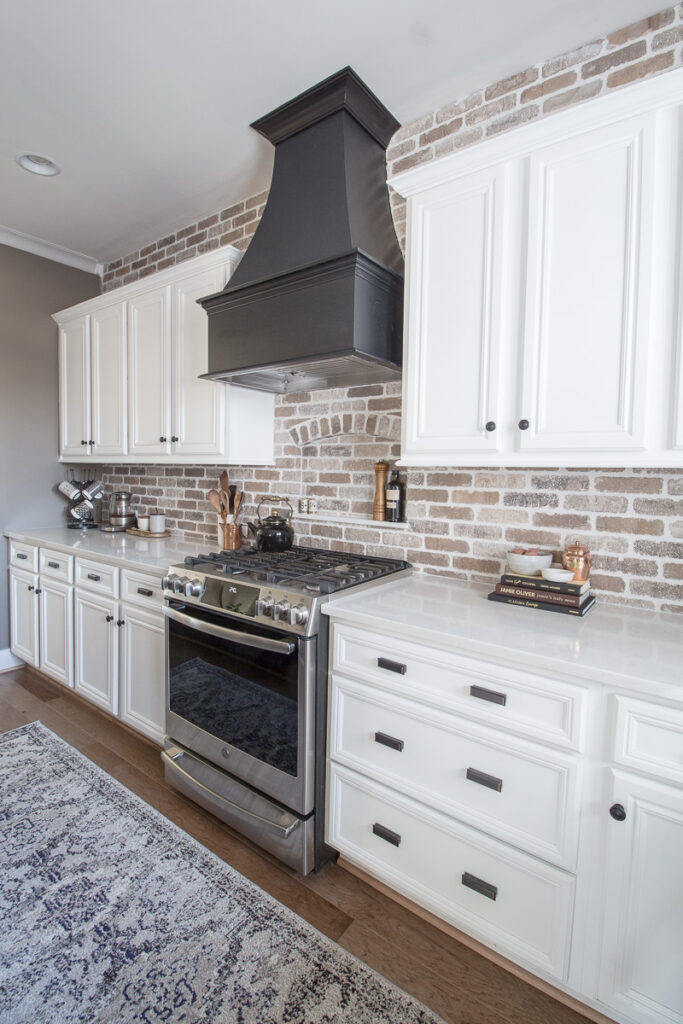
The range was an upgrade we chose from the builder GE Profile 5 burner Smart dual fuel and in the little bit of cooking, I have done since the move I really like it. While it’s not a designer 36″ range, the 30″ range is perfect for our space. I have found the 5 burners to be well designed for cooking multiple dishes at once. It is also wifi compatible but I have yet to need to preheat my stove away from home, maybe one day.
The Vintage Door
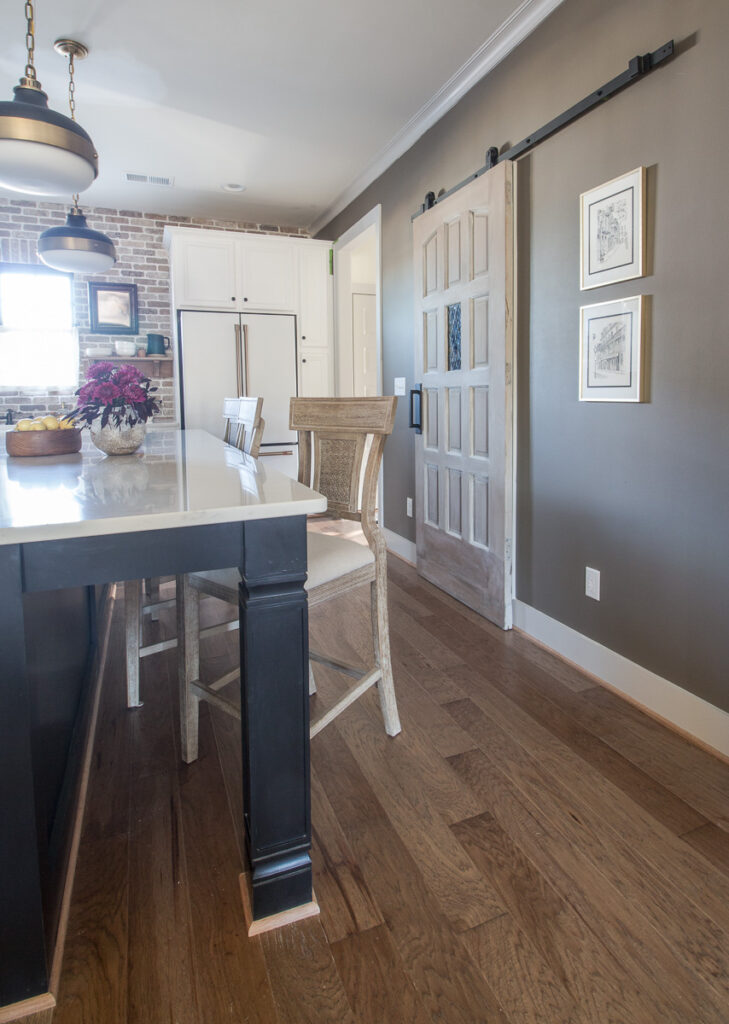
The other key design element to creating a timeless kitchen was to bring in an old door for the pantry. We made the decision to install a sliding door instead of a traditional door during one of the initial design plan meetings with the builder. We had them create a cased opening in lue of a standard door to save precious floor space in this compact kitchen.
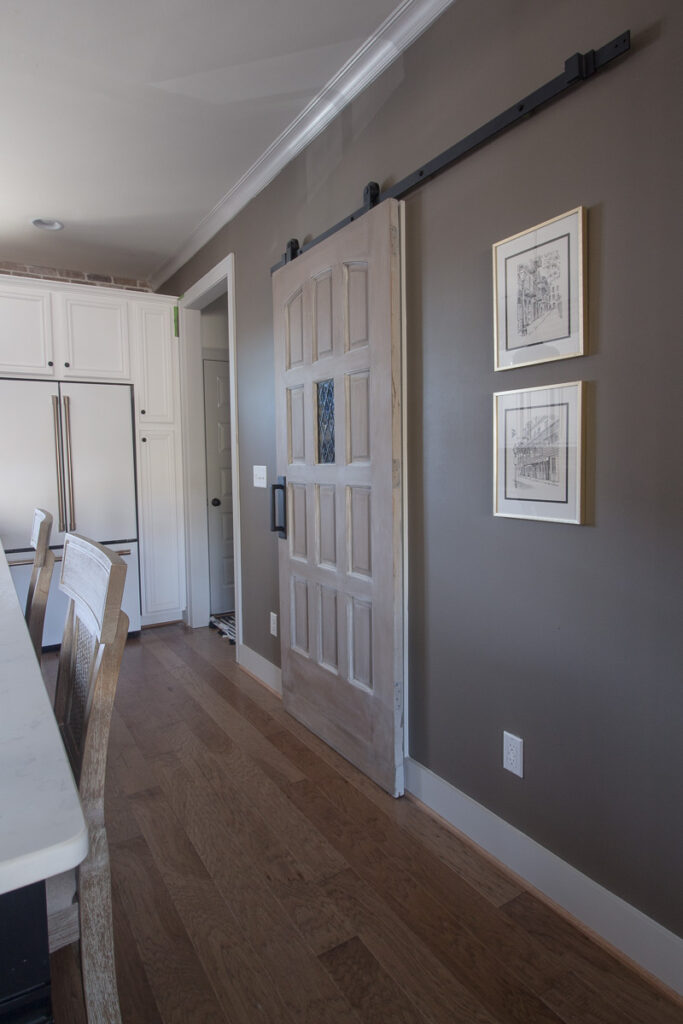
I shared all about the process of stripping the door in Week 2. Once the door was stripped, I gave it wash of grey and then stained it. During the staining process, I realize the door was looking very peachy-pink because of the inherent tones in the wood. A shift in plans from a natural finish for the door to a white-washed look was discussed a great deal on Instagram Stories!

To enhance the Tudor style of the door, I commission a new piece of leaded glass for the “window”.
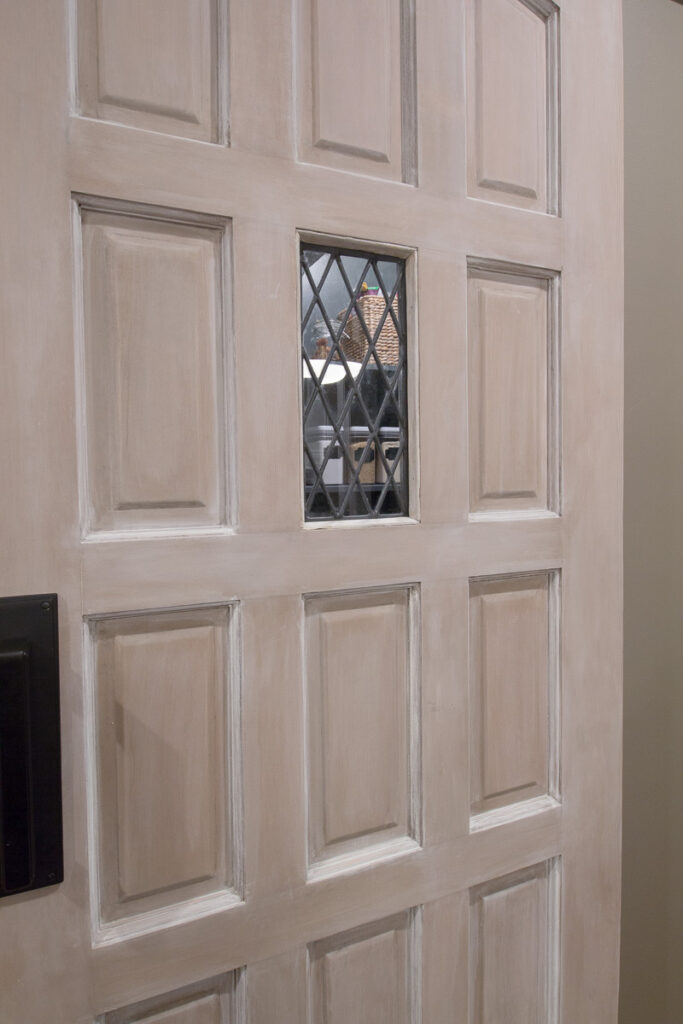
I love the diamond pattern found in Tudor windows and architecture. This is the direction for the whole house design plan and feels perfectly suited for the arched door.
The door was hung with sliding door hardware from Delaney Hardware. The installation was easy, straight forward and of course, the door slides perfectly in front of the pantry entry.
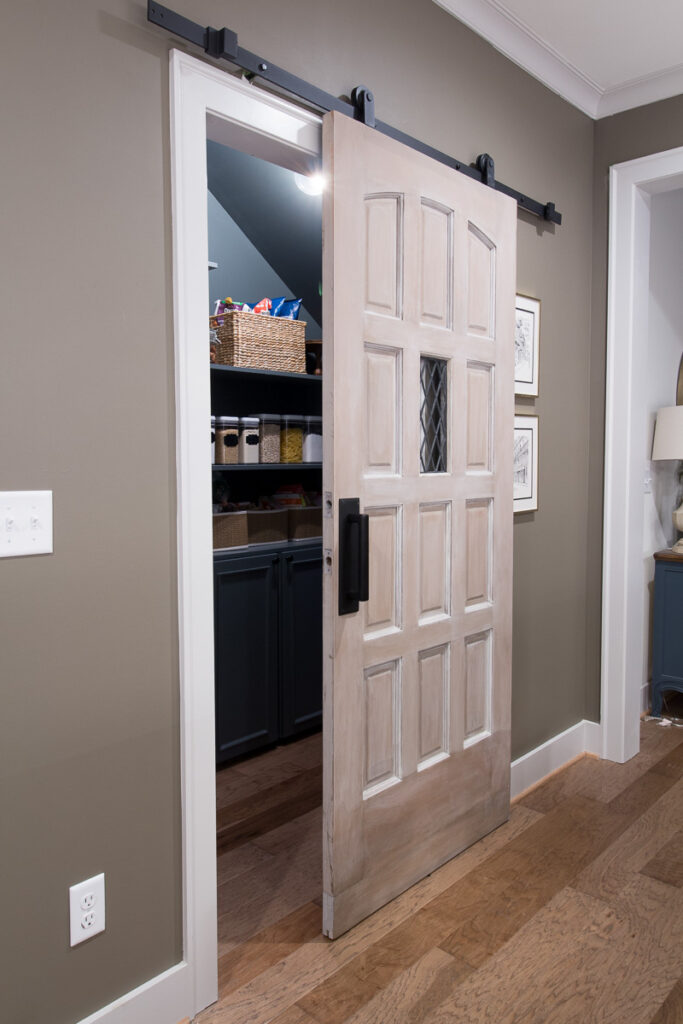
I almost always choose a top mount for my sliding doors because they generally allow enough clearance for existing door casing to remain without adding a header board that always looks like an afterthought.

The pull handle and plate by Emtek is the perfect balance of modern and traditional. The subtle ridge detail makes it special without being overtly ornate. The quality of the handle is evident the moment your hand touches it.
Walls are painted with Fine Paints of Europe Eurolux Interior Flat in a lovely shade of a dusty, grey brown ( CC0032) This color is from their Guggenheim Color Collection. These classical colors were inspired from the permanent collection of much loved paintings at the museum. While it has a lovely matte finish, the paint is extremely durable with lasting color and is completely scrubbable.
Shop the Post
The Shaker Peg Shelves
Another design element I planned from the beginning of the build process was shelving around the sink. The original cabinet plan called for small cabinets around the window, but I was keen on opening up the look of the kitchen. It was especially important to me to have as much light as possible spill into the kitchen. Removing those cabinets allows the light to diffuse across the room more fully.
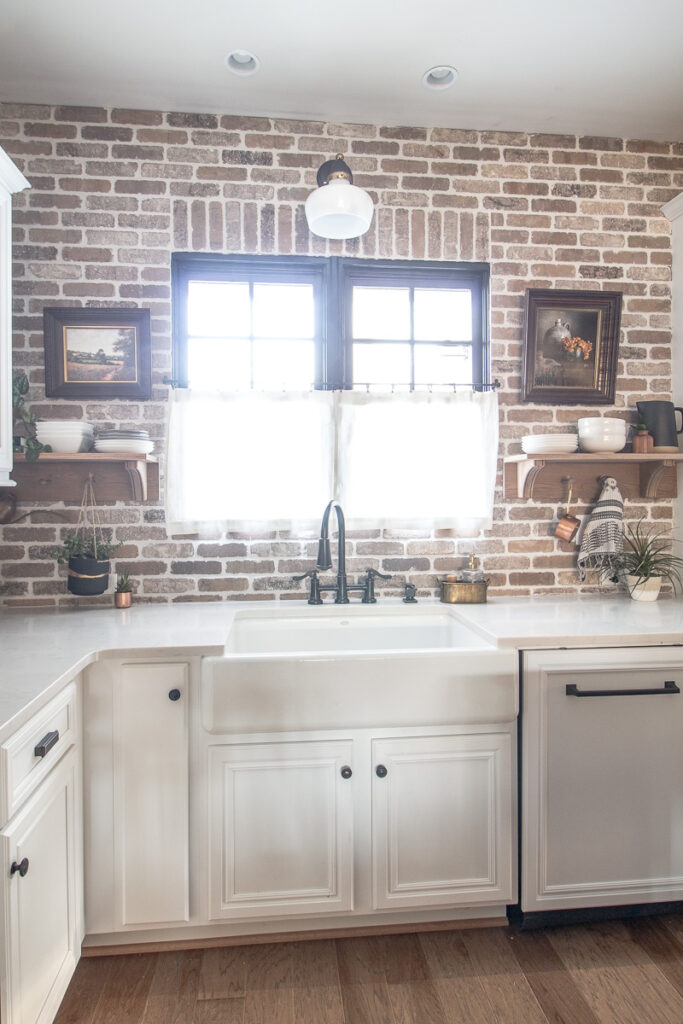
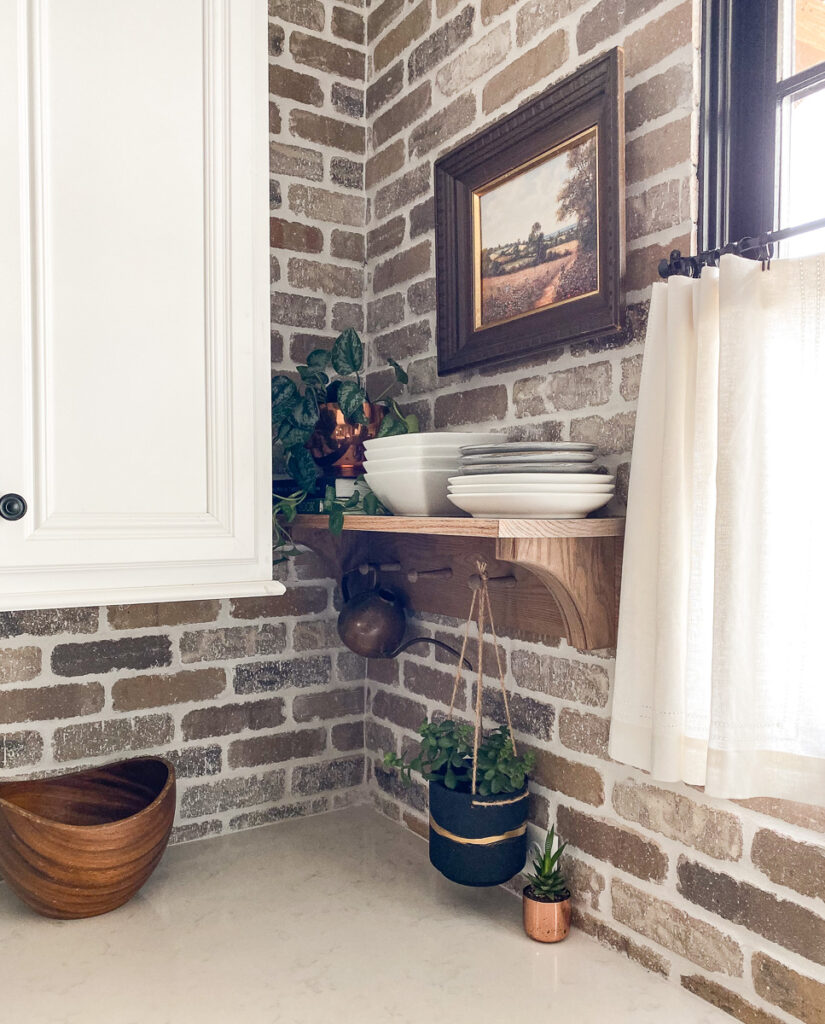
I designed and constructed the shaker peg shelves with red oak brackets from Osborne Wood products and off-the-shelf red oak found at Lowes.
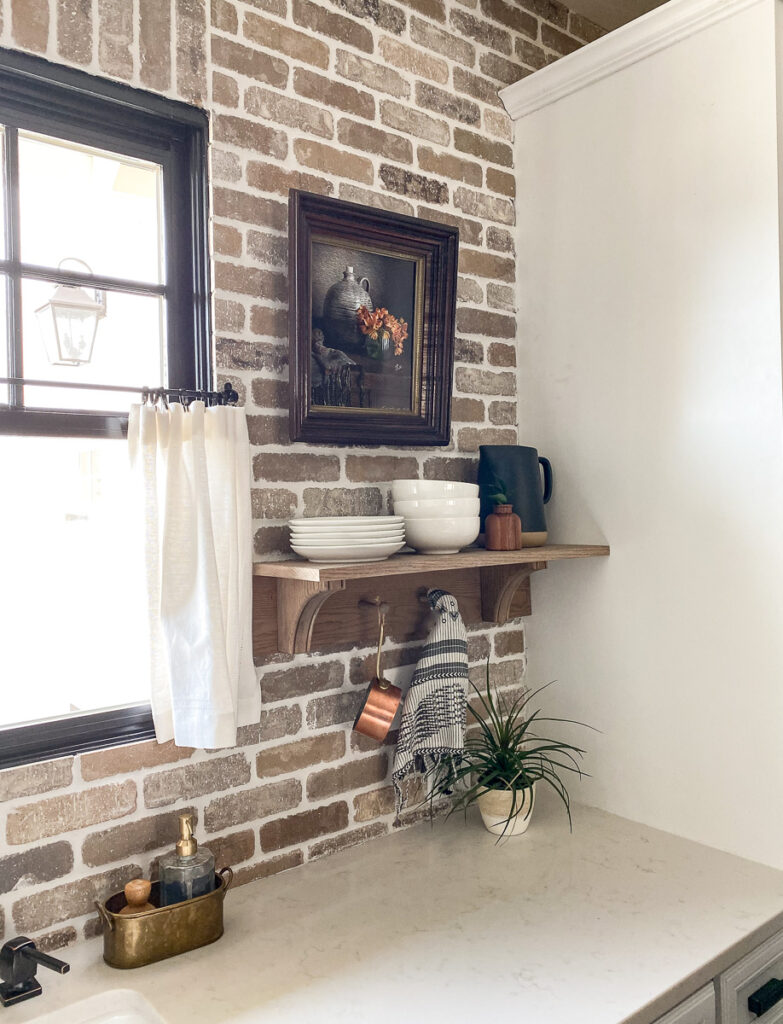
The brackets lend another layer of detail. The beaded edge elevates the look and compliments the traditional style of the cabinets doors.
The pegs were easy to install and add to the charming esthetic of the kitchen. I took great joy in collecting items to hang on the pegs! (Of course, full DIY tutorials are coming on all of these projects!)
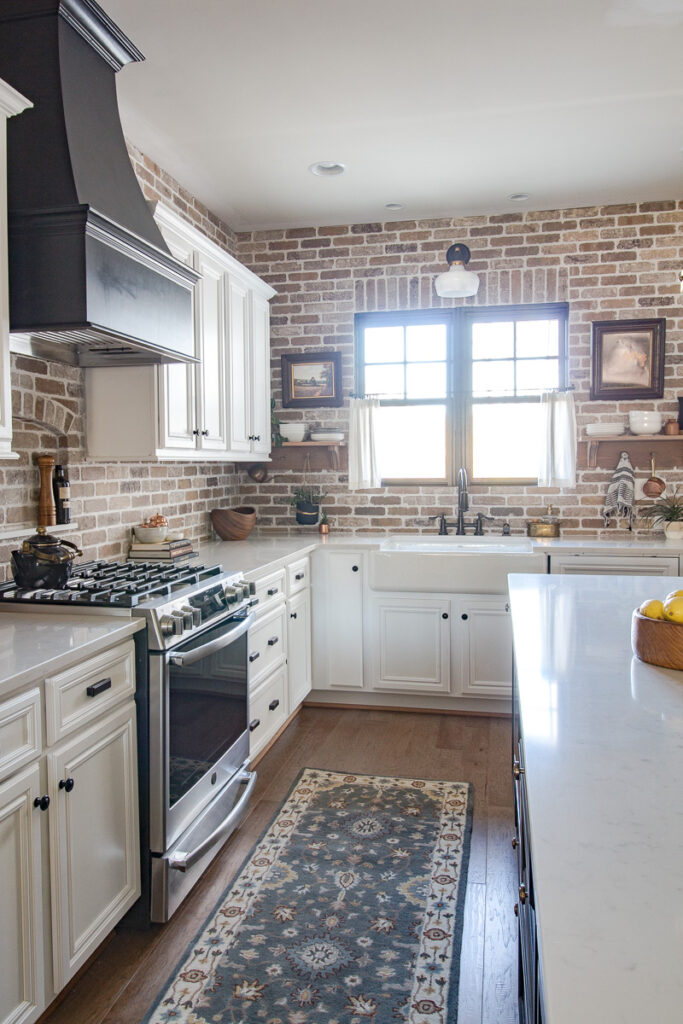
Happily, I even found a home for a plant I had hanging in my old studio that had been sitting on a shelf since we moved!
The Faucet, Sink and Dishwasher
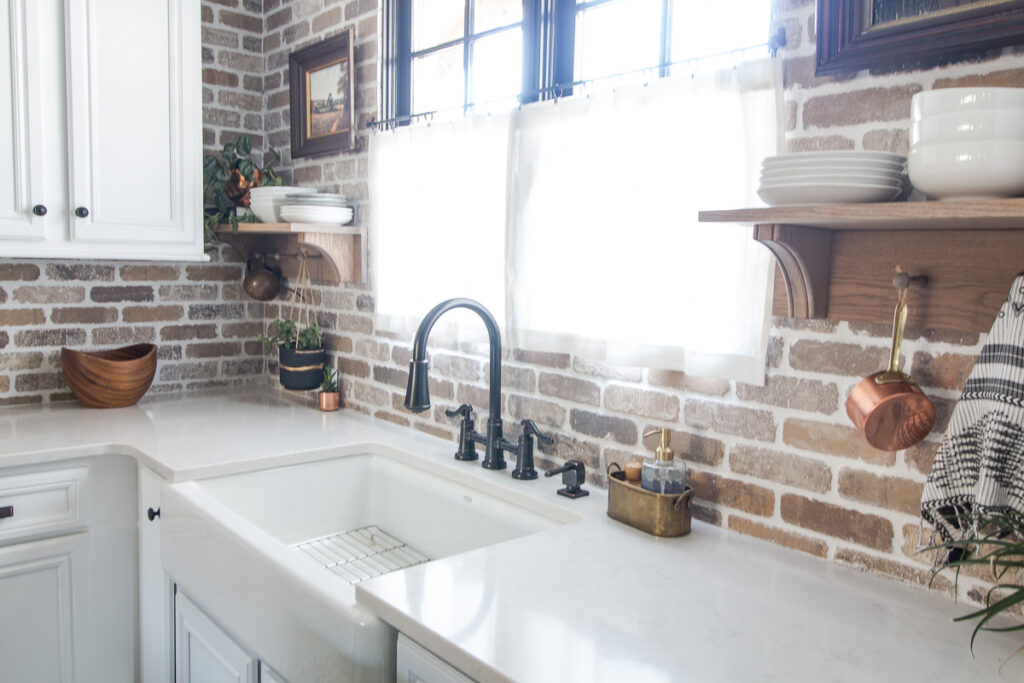
Having a large vessel sink like the ceramic farmhouse-style sink the builder installed is a welcomed luxury. But I have become keenly aware of how necessary it is for me to have a faucet with a pull-down sprayer with a sink this size.

My design plan incorporated a bridge faucet but most of them come with a side sprayer. I searched for hours before I found the Pfister bridge faucet that came with a pull-down sprayer.
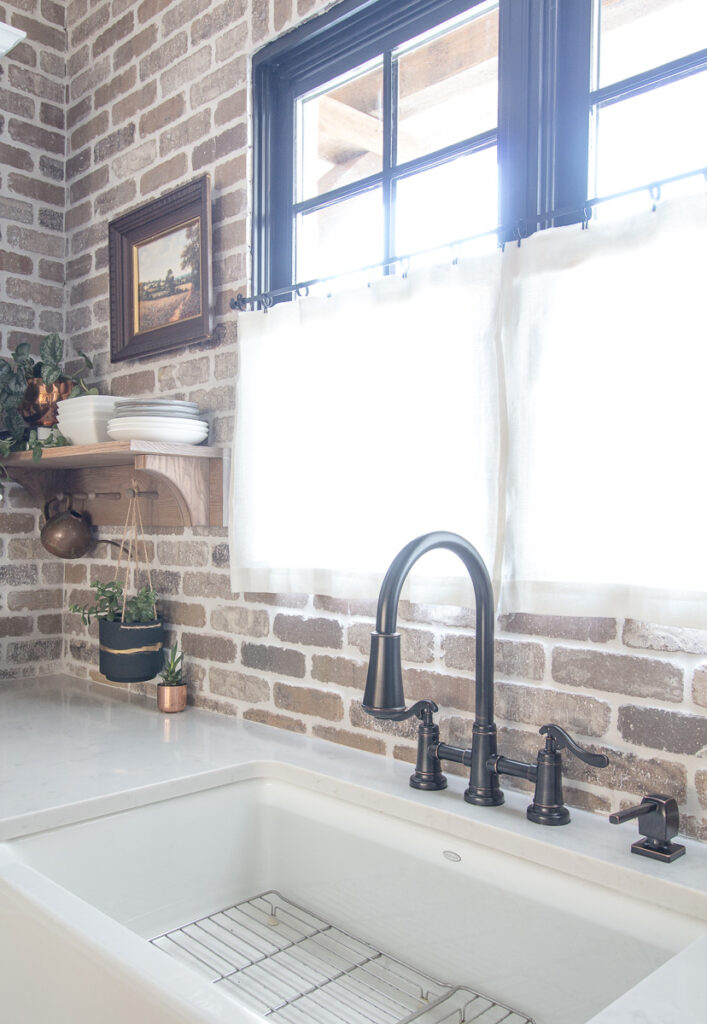
We love this faucet. The design is perfectly suited for the style of our kitchen and the functionality of the sprayer head can’t be replaced in my opinion.
Initially, we had decided not to upgrade our dishwasher. We thought if the one that came standard with the house was not suitable we would eventually swap it out for a Bosch as we had in our previous house.

Needless to say, after only two weeks here we purchased a new Bosch and chose the panel-ready option. It was fairly straightforward to order the exact cabinet panel from the cabinet contractor. Once you’ve had a Bosch it’s likely you will want anything else.
The Pantry
When I lamented that my reveal was going to be delayed to my mom, reminded me that rebuilding the pantry was a lot like completing two rooms. I would have to agree with her.
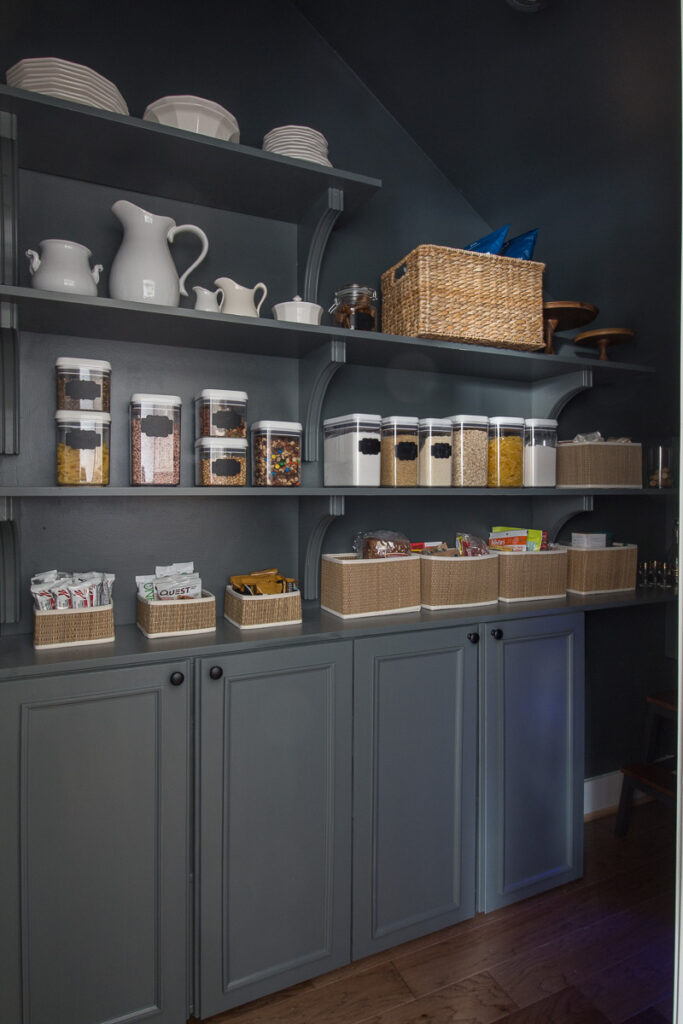
Before, it was a standard, nice size pantry under the stairs with wire shelves.
I upgraded the entire pantry to wood shelving with brackets from Osborn Wood Products again. They add an elegance that elevates the entire pantry.
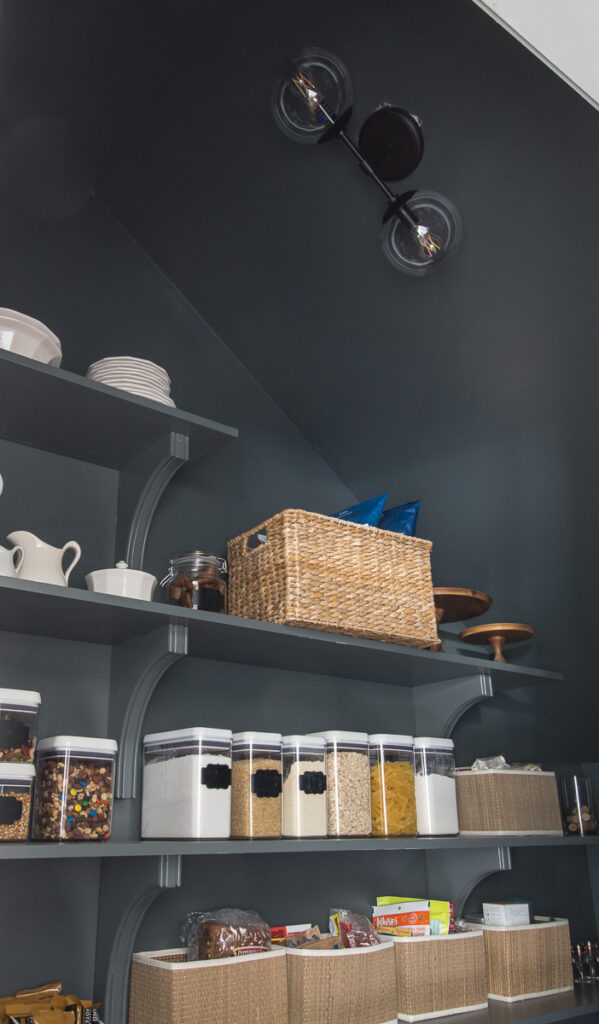
I packed a great deal of needed storage into one beautifully organized space. I even tucked in a little wine bar at the end.
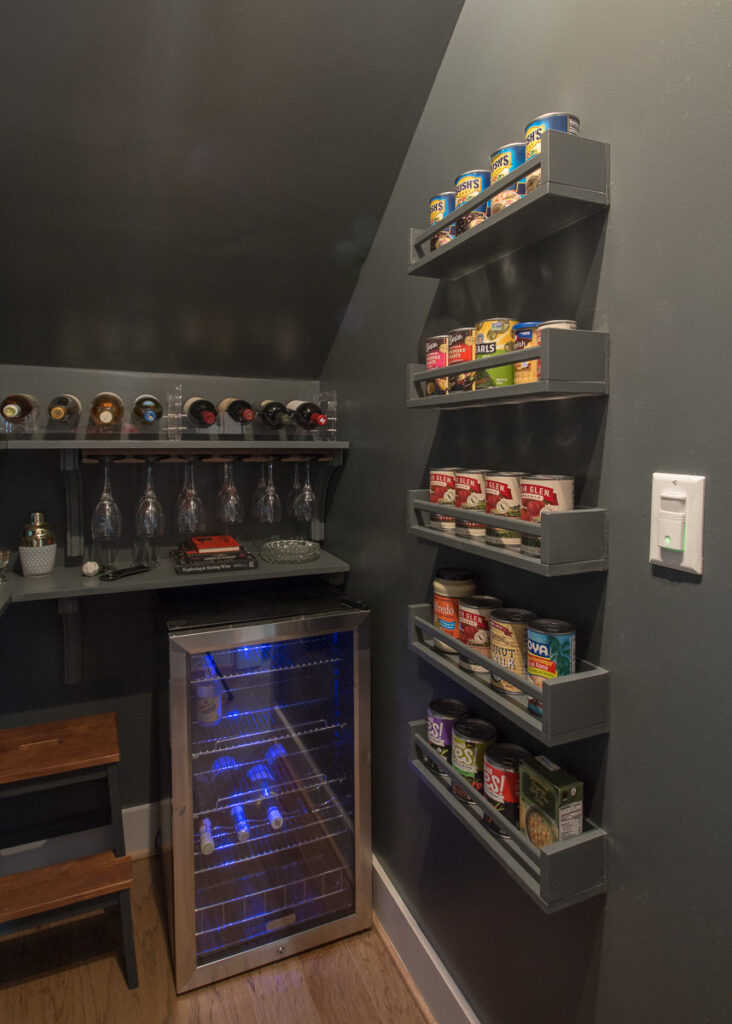
You can see more of the teaser Pantry Reveal here. In this blog post, I even open the cabinets to show you where all of the clutter gets corralled.
The Cabinet Hardware
One of the easiest ways and relatively inexpensive ways to update a kitchen is to replace the hardware. I worked with D.Lawless Hardware to upgrade our builder knobs throughout the kitchen.

I chose black knobs and complimentary bronze drawer pulls for the white cabinetry.
For the black island, I chose a soft gold, champagne bronze knob. Don’t be afraid to mix and match your finishes and styles. It adds to the timeless look of the kitchen.

Shifting the holes to the center of these wide drawers has helped them pull out more evenly. Because the original knobs were placed so far apart, it always felt like the drawer was pulling out misaligned.

The Runner
When you can’t decide which runner rug would look best, you order both!! I thought it would be interesting to see both of the rugs in place and run a little poll by my Instagram friends.
The first one from Wovenly, who partnered with me for the One Room Challenge, is a traditional blue grey wool runner.
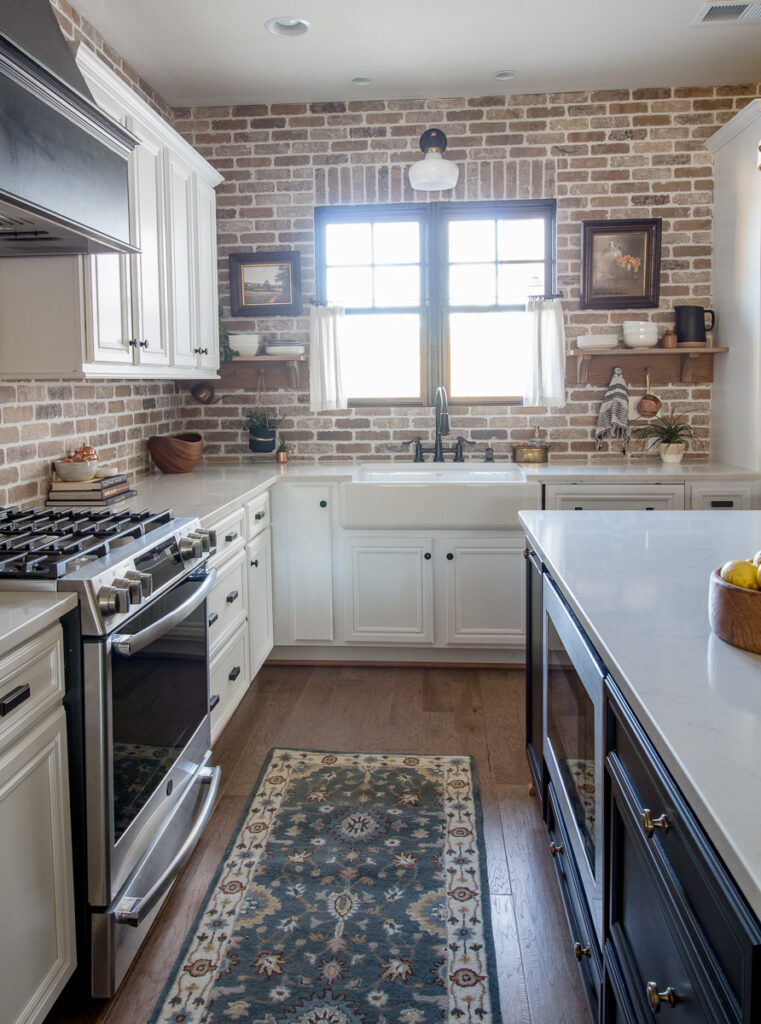
The second is a grey-beige, easy-care rug in a transitional tribal-inspired pattern.
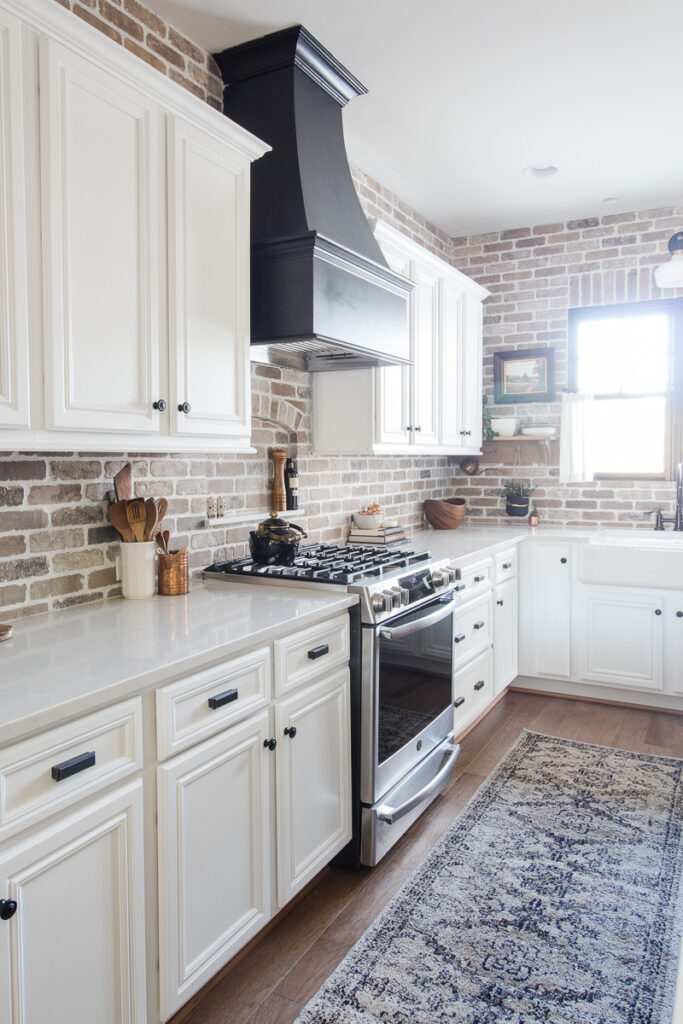
I love both of them in here and will likely swap them out from time to time. At the time of this writing, the votes were fairly close, with the blue-grey winning by only 14 votes difference.

I ended up shooting more of the kitchen with the grey-beige only because I had unrolled it last. The one advantage this rug has over the blue-grey rug is how well it compliments the rug in the dining room directly adjacent to the kitchen.
Styling and Accessories
The last two items on my To-Do list were to paint the crown at the top of the hood black to match and to paint the window.
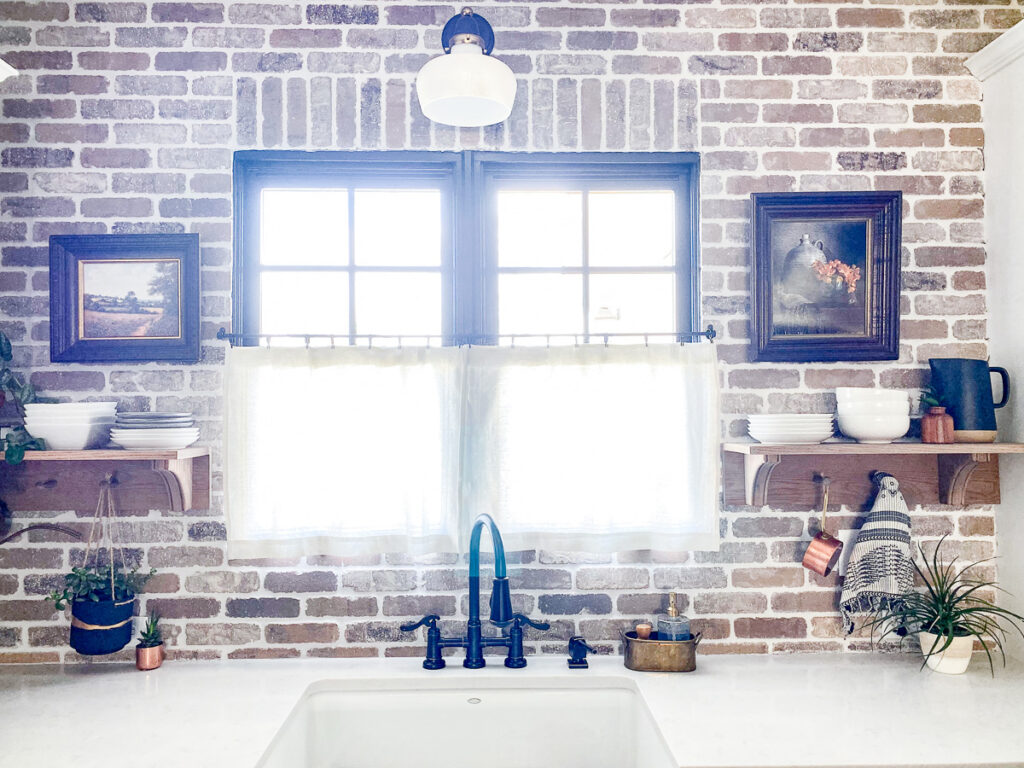
I am not exactly sure why the builder paints the crown of the hood to match the trim but since I removed the crown from the brick walls, it made even more sense to paint it black.
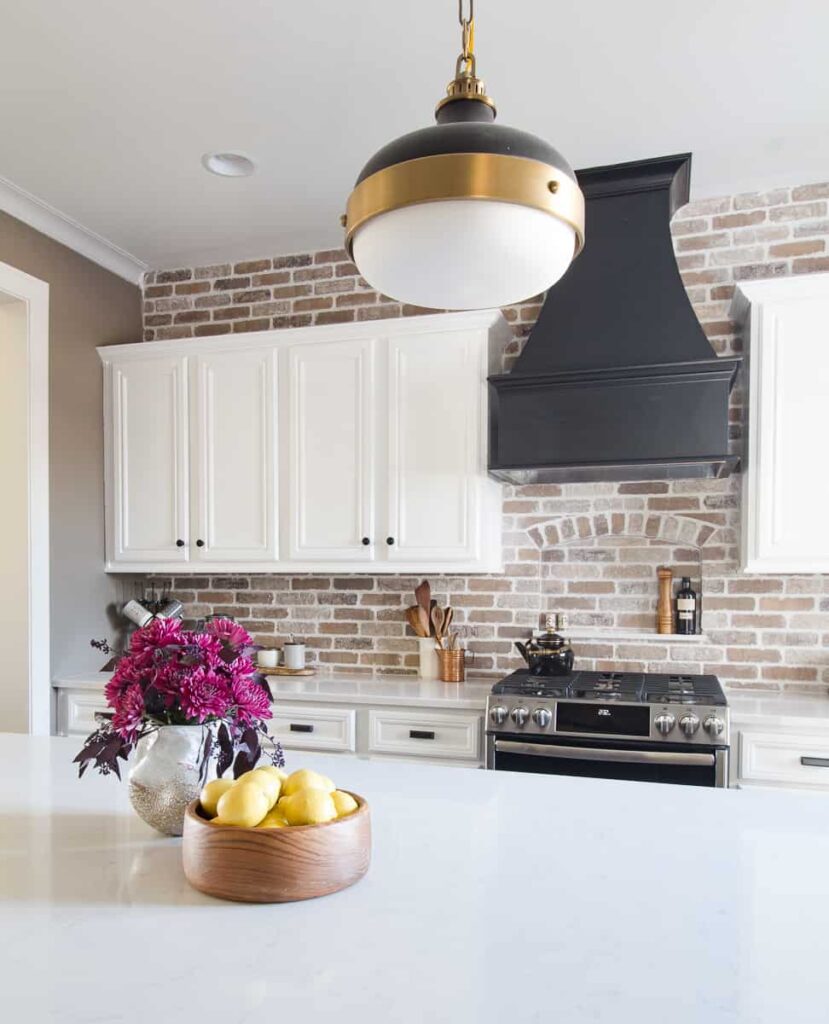
The decision to paint the window black was easy. Because I had removed all of the casing to allow the brick to butt up to the window the way it would on an exterior wall, it opened up an opportunity to add a high contrast trim. My only reservation is that the particular black I used is very intense, almost too intense, even if it is just like the cabinet.
I added a cafe curtain to the window for additional privacy, especially at night. Our kitchen faces the front of the house and it seemed appropriate to cover it in this manner.
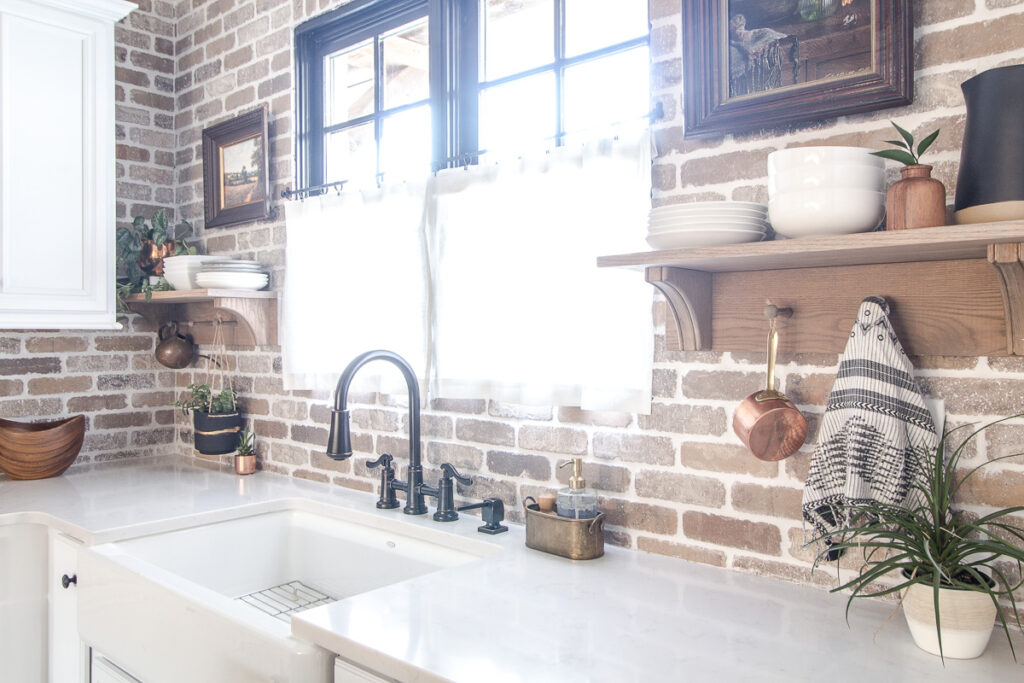
However, I didn’t want a flimsy rod to span the 51 inches of the window. I commissioned a friend to weld me a rod and very petite hooks. I wanted a simple, understated piece and he delivered that perfectly.
The linen blend curtains have a lovely stitched detail that is just enough to be as charming as cafe curtains should be.
To style the kitchen, almost everything you see from the art to the ceramics, to the wood and copper pieces came from items I’ve collected over the years. If you’ve been following for a while you might recognize much of it. Incorporating art and pieces that are familiar makes this new house feel like home.
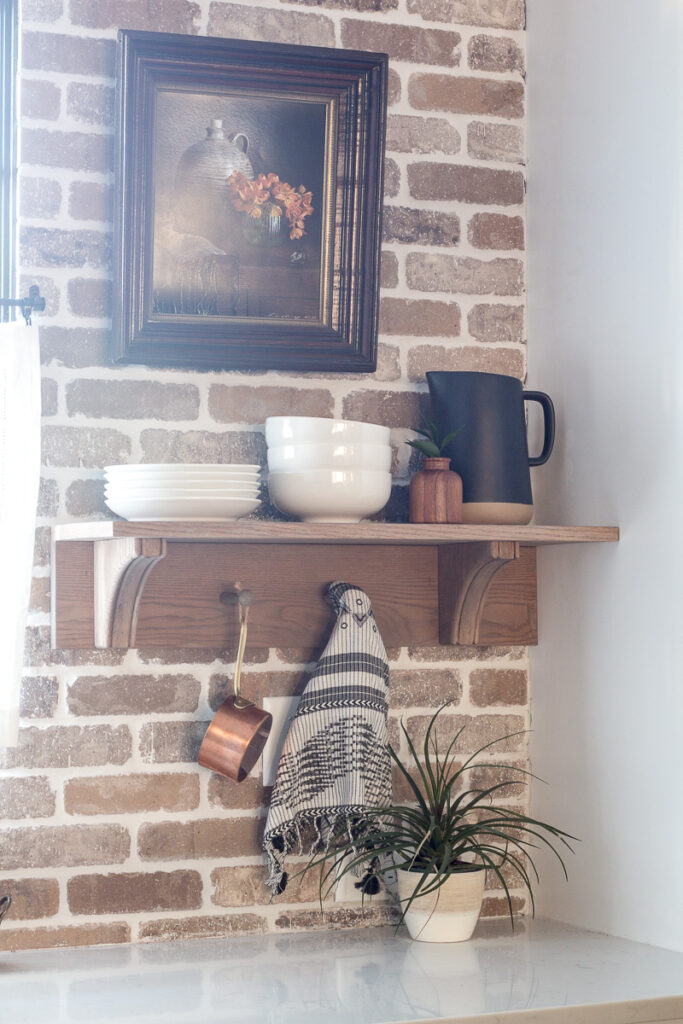
I did purchase a few new mugs for my daily tea ritual. (A girl’s gotta have something new every once in a while.)
I also picked up these beautiful little grey plates. I sold a collection of Fiestaware when we were preparing for this downsize. I was ready to let them go, but I failed to realize that the little dessert plates were what I used every morning for my breakfast! I missed having tiny plates for my one egg and one organic sausage!!
Shop the Post

Special Thanks to my SPONSORS!
With all of the expenses related to moving into and setting up a new home, this transformation could not be possible without the generous help of the sponsors listed below. I will be sharing more about each of them as we move through the upcoming weeks.

Pfister: Faucet || Delaney: Barn Door Hardware || Wovenly: Rug
D. Lawless Hardware: Knobs & Pulls , Emtek: Door Plates, Pull , Osborne Wood Products
Be sure to check out the other guest participants and follow along each week! Click here for the link up list of all the participants and the featured participants can be seen here.
And again, I am incredibly thankful to Linda of Calling it Home and the Media Sponsor Better Homes and Garden for making this such a fun bi-annual event. Without the commradery and support of this community I know I would not have completed so many beautiful spaces in our home(s). You can see all of my past One Room Challenge entries here.
I’d love it if you left a Comment and let me know your favorite part of the kitchen and what you found most inspirational during this ORC!!
I would also like to thank my husband for agreeing to let me tear up our brand new house. We did feel a bit crazy that first week. And to my friend Dana, whose support and encouragement are invaluable to keeping me focused on the end goal.




24 Comments
Dena
November 11, 2019 at 2:39 pmAbsolutely gorgeous! I love every bit of your kitchen, from the brick backspash to the vintage door, from the pantry to the black hardware. Your original kitchen was a dream and I’m sure thousands of people would love to have one just like it. But, it wan’t a “Leslie” kitchen. And you created a beautiful, timeless “Leslie” kitchen. Oh, by the way, to quote Coach O, “Geaux Tigers!”
Leslie
November 13, 2019 at 9:22 amDana,
Thank you!! I love your comment! I’m glad you agree that were I went with this new kitchen was even better. I love creating unique spaces by taking the time to consider the details and how it functions and most importantly how it feels in a home. And yes! GEAUX TIGERS!!!
Judy L Fry
November 11, 2019 at 4:41 pmYou are truly amazing. Your design plans create the space that specially defines your vision. Beautiful, yet functional. LOVE IT!!!!
Leslie
November 13, 2019 at 9:19 amThank you so much! The best part of what I do is seeing the vision become a reality!
Vanessa
November 11, 2019 at 5:46 pmStunning! The kitchen was really pretty when you moved in, but you’ve just given the space such character. Very inviting. Great job!
Leslie
November 13, 2019 at 9:18 amThank you, Vanessa! Yes, I’m sure most people thought I was crazy but I think you can see why I wanted to keep going. I think it was worth it!!
Laura janning
November 11, 2019 at 8:19 pmWhat a fabulous addition the brick wall is. I love the texture and warmth it brings to your beautiful kitchen. Congratulations on a job well done. Enjoy the kitchen and your new home
Leslie
November 13, 2019 at 9:17 amThank you Laura! We are happy to have this project behind us and look forward to getting settled in our new home, finally!!
Leslie
November 17, 2019 at 9:38 amThank you Laura!! I love the warmth and texture too. Exactly what I was hoping the brick would bring.
Karen L
November 12, 2019 at 10:01 amI love the brick! It was a huge job!! Really like the whole design & am amazed that you took on such a job after just moving into a brand new home. My only question is about the light quarter round on the bottom of the island. Why didn’t you paint that dark to match the island?? It just sort of stands out. I notice all the other quarter round in the kitchen is light but not as noticeable as the island. Just wondering.
Leslie
November 13, 2019 at 9:16 amKaren, Thank you!! It was a very big job after an already exhausting move!! Yes, the quarter round all through the house should be painted. The builder didn’t ask and they were installed too close to the closing to really have time to put up a fuss. We were homeless and needed to move in. I plan on painting all of the quarter round. If I were planning a renovation I would have requested the floors go in first and then the island to avoid having quarter round at all. But with a big builder there’s only so much they are willing to do to move them off of a timeline. Stinks for sure.
Angela | MidModernMama
November 13, 2019 at 4:43 pmA beautiful kitchen! Here’s to many happy meals prepared and enjoyed!
Leslie
November 17, 2019 at 9:37 amThank you, I do see lots of happy, yummy meals created here!!
Carla
November 14, 2019 at 7:35 amWow — I love how you took a basic kitchen that could have looked similar to every kitchen on the block and made it so beautiful and full of unique details! This is gorgeous! So many details to love: the brick backsplash, the open shelving with hooks, the inset over the stove, the black range hood and so many more. FWIW, I love the second rug in this space. One question: could you provide sources for the mugs and small plates you bought? Again, fantastic job on this makeover and enjoy your new home!
Leslie
November 17, 2019 at 9:36 amThank you so much for your generous compliments. You hit every mark I was hoping to achieve!! I love both of the rugs, when you see the blue grey one in the foyer you’ll see how it works well in there too. Yes, I need to update the post with those resources. I love those little additions. Again, Thank you!!
Mary Kaiser
November 16, 2019 at 6:27 amSimply stunning, great job!!!
Leslie
November 17, 2019 at 9:34 amThank you so much!!
Leslie Stoangi
November 16, 2019 at 9:22 amBeautiful kitchen! Love how it all came together. Your ideas are inspiring. Going to add the niche shelf to my kitchen too. Wondering where the black range hood is from. Thanks so much. Leslie
Leslie
November 17, 2019 at 9:34 amThank you!! The hood was an upgrade from our builder’s cabinets. It’s a pretty standard upgrade not at all custom. I love the niche. It was a good bit of work but I love what it adds to the kitchen without being too attention grabbing.
Rhiannon McIntosh
January 11, 2020 at 11:37 amLove the whole kitchen! Fabulous job! Where did you get the lighting above the island?
Laura
February 16, 2022 at 8:28 amCan you tell me the color brick/grout you used? It’s beautiful!!!
Leslie
February 18, 2022 at 11:54 amThank you! The brick was General Shale, Carbon and I used a very light grey grout. I think it was Pewter.
Meredith
July 25, 2023 at 7:38 amWe are using this same brand and color thin brick in our house. I love how yours turned out. Can you tell me the brand and type of grout you used in Pewter? Thank you so much!!
Kathy
October 27, 2022 at 10:36 pmHello Leslie, I was wondering now that you have lived here for a while, how the bricks are holding up? I absolutely LOVE THEM!! My husband posed the question because I told him I wanted to do this in our home. He was concerned about the grease build-up and how easy it is (or isn’t) to clean. Any comment in that regard? I kept thinking there was a video showing how you did this, was there ever a video by you doing this? Have you taken down any videos? I enjoy the ideas you pass along for all of us, thank you very much. (Also, I went to shop this room for the kitchen pendants and it just took me to Wayfair with massive choices. How can I narrow it down to find those lights? Maker name? ) Thank again, Kathy