How To Make a Square Boxwood Wreath

I’ve learned a few things that will make the next one easier, and of course, I’m going to share the tricks and tips with you!
Obviously, I made it square, which required making a square form since they aren’t yet available in stores. (At least not where I’ve shopped and I’ve hit three of the big craft stores in town.)
The cheapest way I found to make a square was to use thin Styrofoam sheets like this.

Because I wanted to make two I bought a piece that was 12 x 36 inches. (It ran around $6 and was on sale for 30% off at JoAnn’s.)
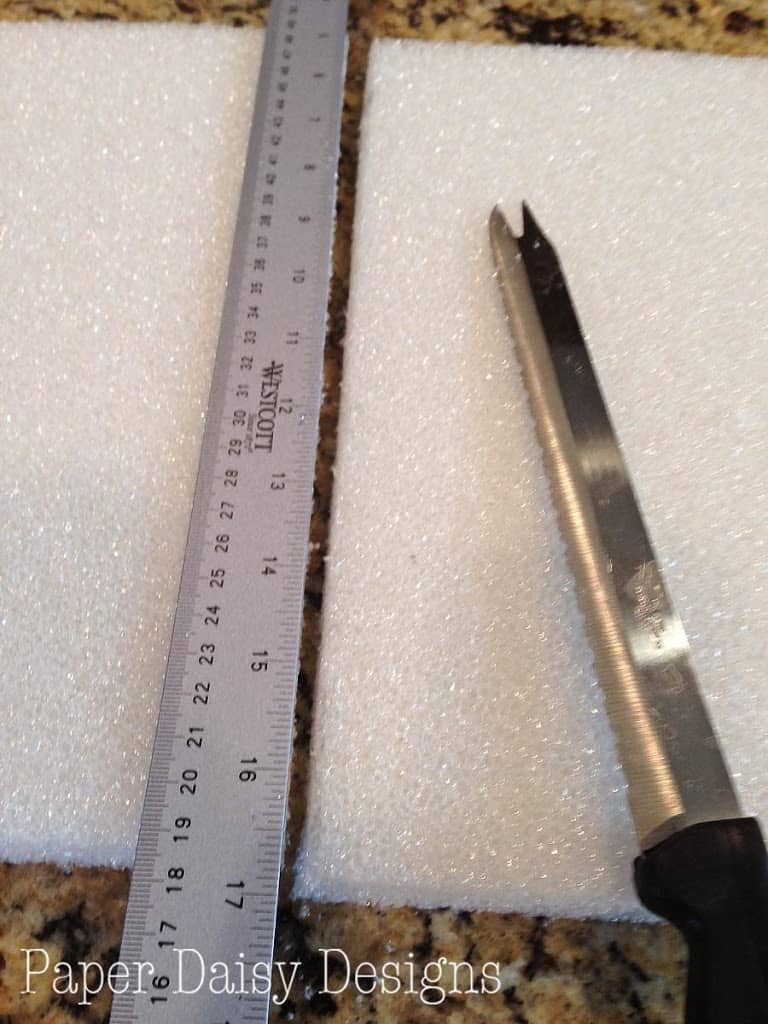
Using a ruler I measured off the 12 inch pieces and sliced them with a serrated edge bread knife. Be sure to run the edge of an old candle of the knife along for easier cutting. I did this step several times during the cutting process, this step was much easier than I thought it would be. 😉
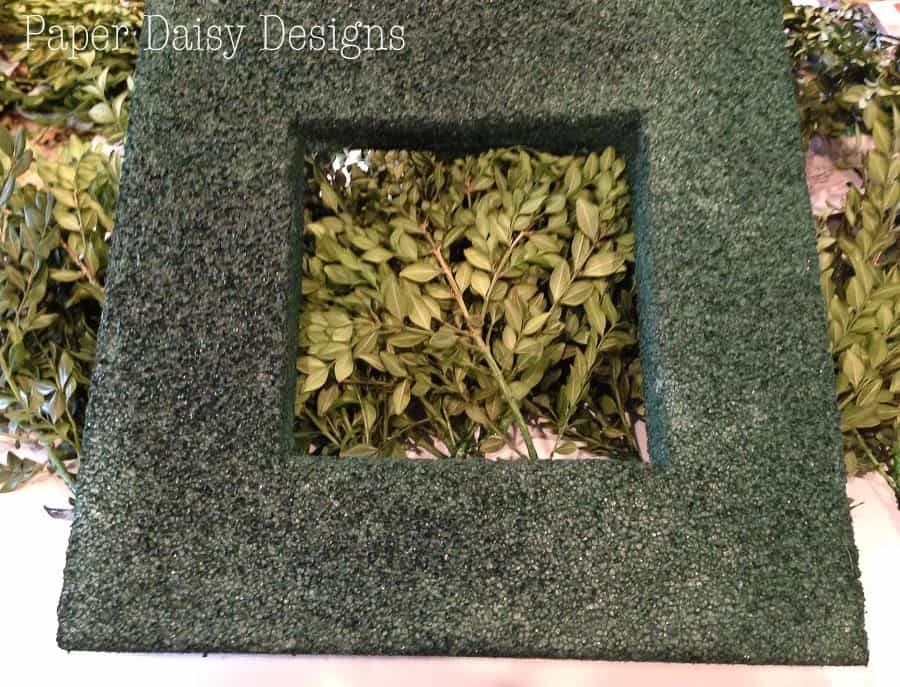
Then I cut the centers using a paper template for ease of tracing. I settled on a 6 inch center.
After I had them cut, I painted them with green craft paint that had been watered down just a smidge. I also had mixed in some dark green glaze, only because I had some on hand. Although, when I ran out of the glaze I noticed I missed it, because the paint didn’t spread as easily as before.
Then I waited for it to dry. I waited until the next day.
This would also be a good time to take your preserved boxwood out of your glycerin solution and let it dry as well. I have a complete tutorial here.
If you plan to hang your wreath on a mirror, which I did not intend to do initially, I would consider painting the back of your foam as well.
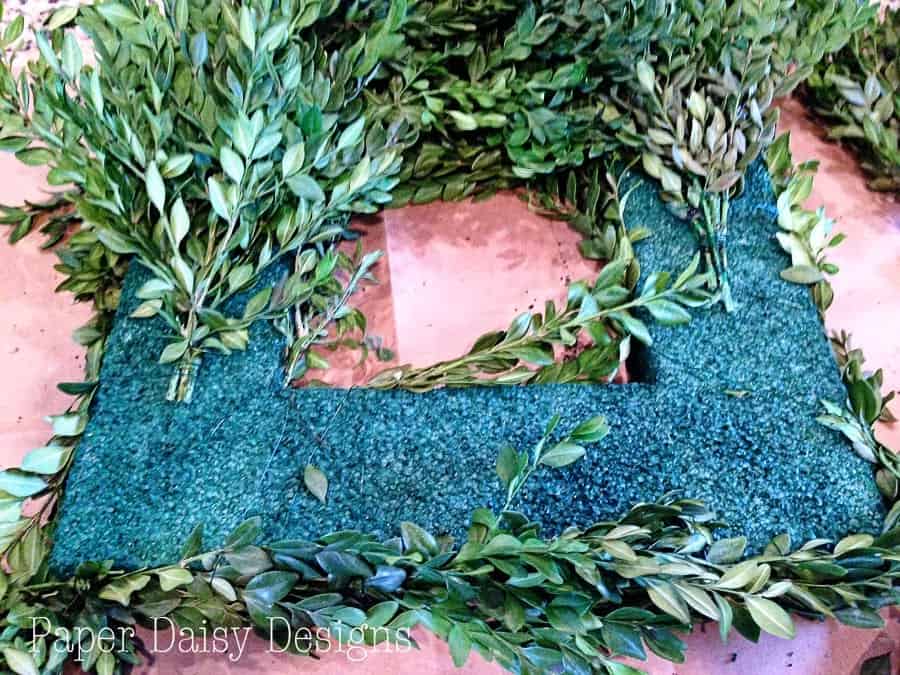
The next day, I began by making bundles of two or three cuttings of boxwood wrapped with wire and kind of arranged them on top of the form as a guide.

Once you feel like you have enough to cover the wreath, place your bundles aside, in order if possible. This would be a good time to create a wreath hanger. I was proud of myself for remembering to do this first.
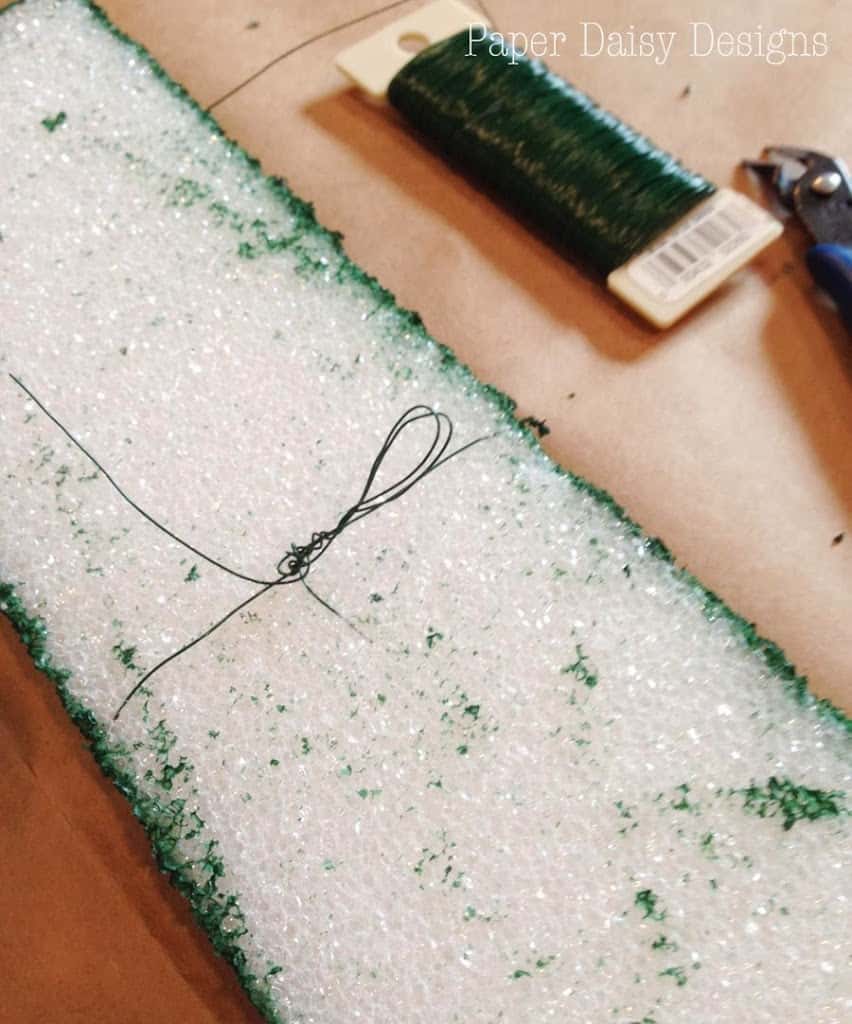
I decided given the squareness, it might be a good idea to cover the outside edges first. So I did that with long, kind of spindly pieces of boxwood. To secure the first piece of wire, I wrapped one loop of wire and twisted the ends.
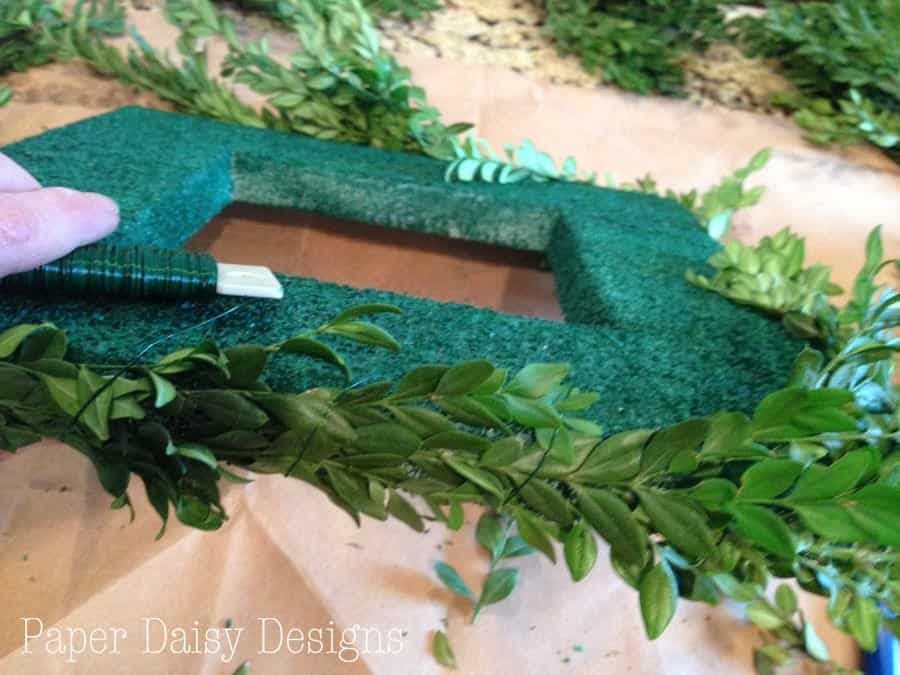
Once I had the outsides wrapped with wire, I pretty much could just tuck the insides in those pieces of wire. Just make sure you do this tightly. Not enough to dent the Styrofoam, but you will want it very snug. Here’s what the back of mine looked like at this point.

As I began putting on the bunches, I tucked the bundles in to the existing wire “loops” and then wrapped more wire around as necessary.
I think the hardest part of the actual wreath making process was matching up the ends. I kept laying the boxwood so that it would flow in one direction. Even though I had planned to end in a corner, somehow that didn’t happen. It took a bit of overlapping to get it to look nice.
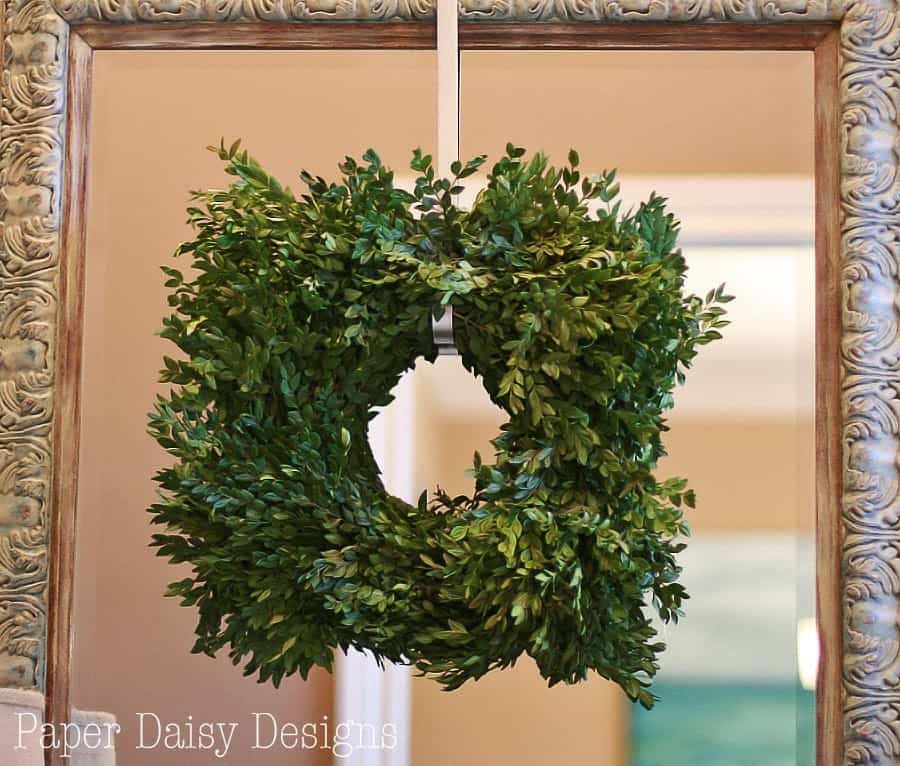
I’m really happy with the outcome, especially given the fact I only invested $6 in the form and under $10 for the glycerin and colorant. Definitely beats the hefty price tags I’ve seen for preserved boxwood wreaths.
Here are a few more things to consider.
Your fingers will get kind of sticky and will turn green. Luckily, because I used concentrated food coloring it washed off easily.
While I will do this again, I’m not sure if I preserved enough boxwood to make another one this full. It will be close. I’ll be sure to report back. When you do the preservation part, make more than you think you will use. It won’t go to waste. You’ll come up with other places to use it. My minds been spinning. 😉
While you need approximately two and a half weeks to preserve the boxwood, making the wreath is a actually quick project. Well, not including the paint drying time of the wreath form.
Don’t forget that the full tutorial of the preservation of boxwood is here.
For those of you who took my challenge, please report back and let me see how your wreath comes out. I hope you love yours as much as I do.

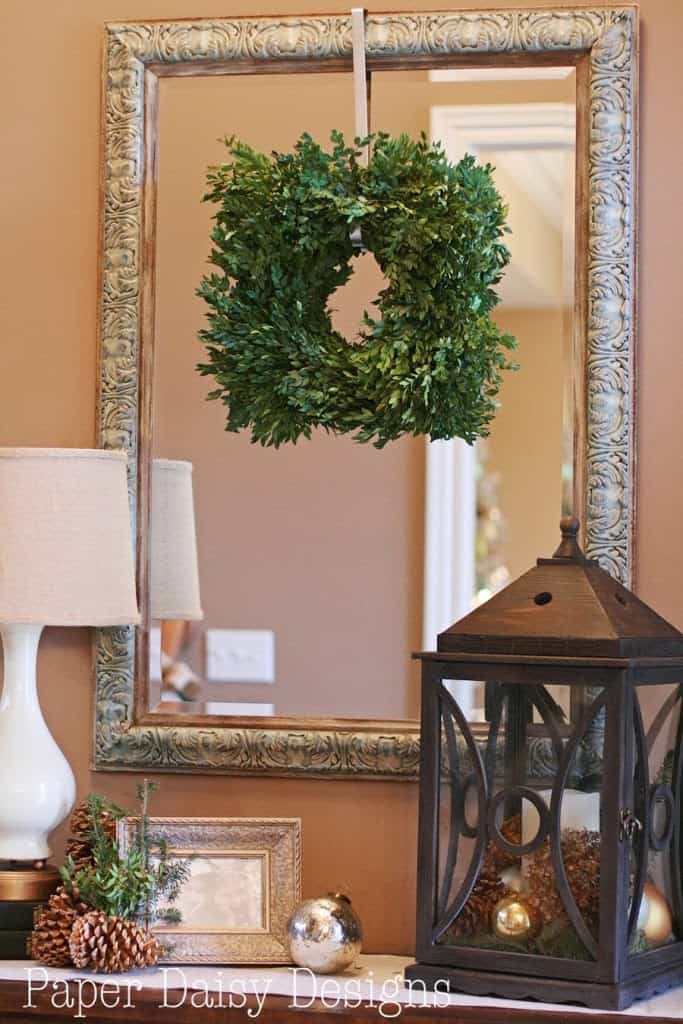
Your also invited to take a complete Christmas Home tour here. Come on in!


Your wreath turned out beautifully! And I love that you made it a square. The simplicity is perfect! … We trimmed our boxwood, but I don't think I have enough clippings just yet.
Your wreath is gorgeous! Love the price tag, too. 🙂 I have always loved square wreaths and have make them before using a wire coat hanger. But, it was too small to get the fullness I wanted. Thanks for showing me how with the foam. You know how it is…we move on to other things and never perfect something. That was ten years ago, so it's time to make one that works!! Christmas
I just found your blog from Pinterest and I love your post on boxwood turned wreath. thank you!!
Gorgeous and such a fabulous tutorial too. I love you decor, so pretty and the door looks amazing too. Thanks tons for linking to Inspire Me. Hugs, Marty
I love your beautiful wreath.<br />Thanks for your super tutorial. I pinned it.
thanks so much for sharing your "how-to", LOVE a square Boxwood wreath! I'll be featuring this post tomorrow on Be Inspired.
Did your boxwood cuttings soak up all the glycerin solution? Mine didn't really soak up much and it didn't soak up the color at all. My preserved boxwood turned out kind of yellow and not as green as yours. Maybe its because of the food colorant that I got from Walmart. Not sure.
Nadine,<br />My branches didn't appear to soak up much of the solution either. I could tell it actually did because the stems and leaves had a tackiness to them that wasn't there before. I'm pretty certain a stronger dye is important. I used a concentrated dye, not just food coloring. A friend of mine used RIt dye and had good success. I'm going to experiment with adding