Sewing Tutorial Today :)
Okay, so several of my friends are going to get a good chuckle at this. They know how much I really don’t like sewing even though I’ve tackled quite a few large scale projects over the years. (Most notably silk lined and interlined goblet pleated drapes that were for windows that were 13 feet high. That was a BIG project.) So the idea that I would voluntarily do a tutorial on sewing is pretty laughable.
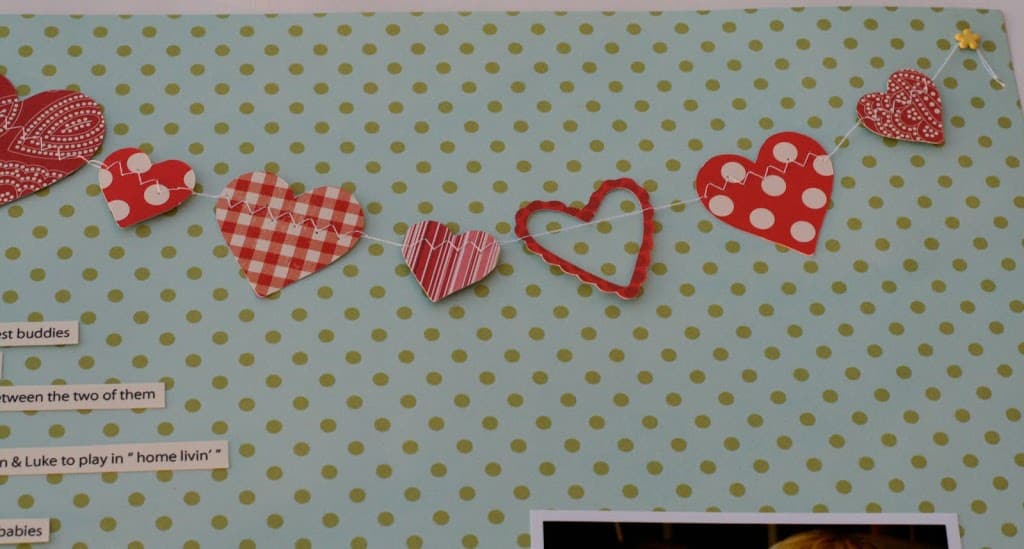
I wanted to make a heart banner for the Studio Calico CHA Heart Challenge. For the most part, I have seen banners that were made by punching two pieces of paper and gluing them together on thread, ribbon or whatever. I’ve also seen banners where they were sewn directly onto the page or onto a paper strip. I wanted mine to float independently and having played around with the sticker banner I made recently I was thinking it could be done. Here’s what I’m talking about.
I found some vague directions for doing this for fabric, so I thought I’d give it a go. It turned out to be very easy.
How to make a sewn banner:
Start by holding your thread at the end and make a few stitches with nothing in the machine.

Place the heart or whatever shape you want to use so that the little teeth (I’m sure there’s a technical name for this.) grab the heart and it will be guided into the stitch.
Once the first shape is stitched allow the machine to keep stitching even though you haven’t loaded the next shape. You will need to pull the end of the thread again. Do this for the desired space you want between shapes.
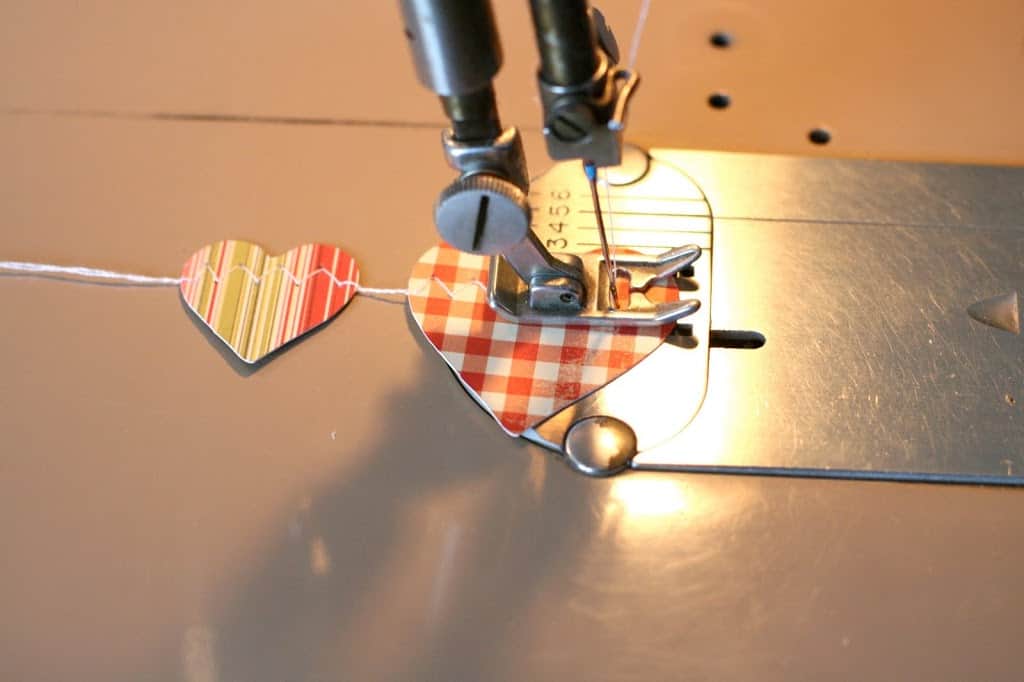

You see here that I forgot to hold the thread in between the gingham and the open heart. Thankfully because the heart was open I was able to slide it to make the space more even. (I got distracted by taking photos.) 🙂
It really couldn’t be any easier. Just remember, as each shape is stitched to grab hold of the thread and pull it to provide the space between the shapes.
(As seen in the March 2010 issue of Scrapbook News and Review.)
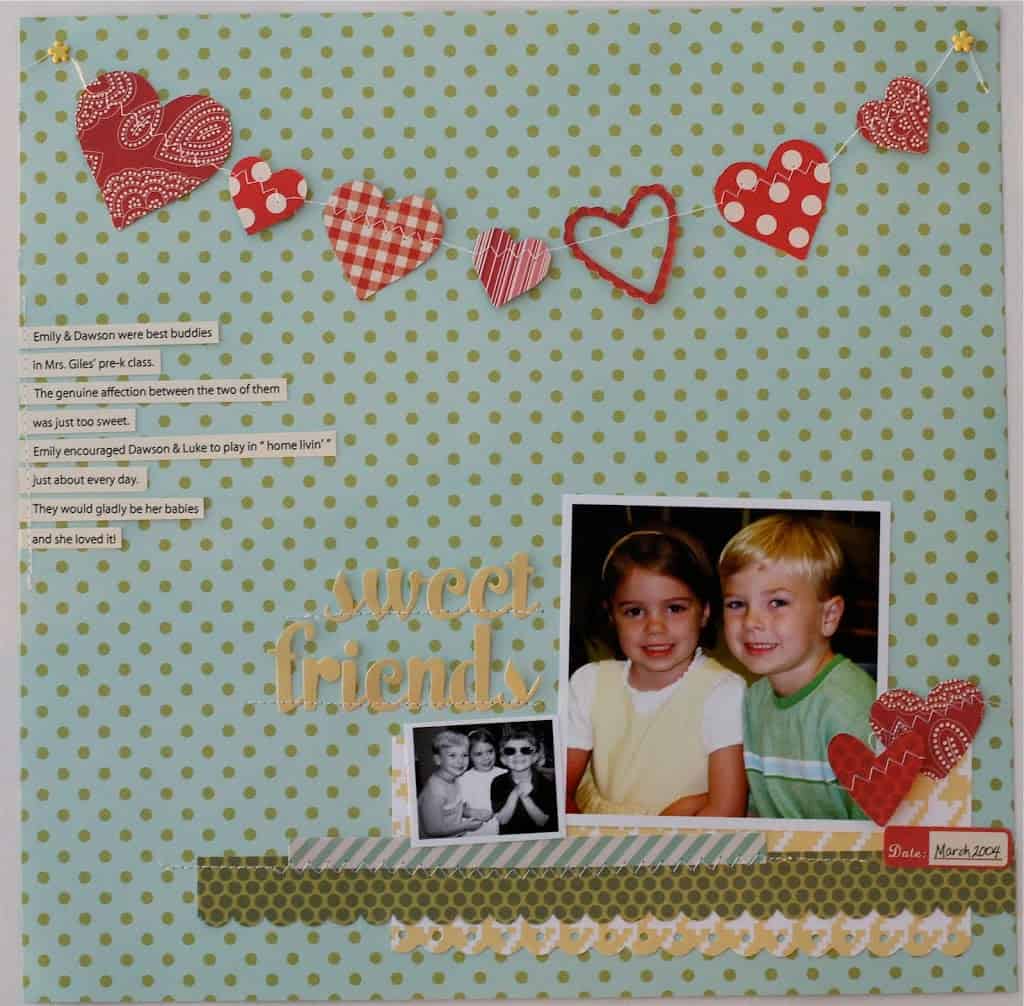
I used the Making Memories Slice to cut my shapes. Cute huh? I really like how they are floating on the page and if you were going to make a mobile or something like that the thin thread would allow the shapes to really float and look more airy.
Another interesting thing to note, I realized there wasn’t much contrast between the yellow letters and the light blue background, so I used the little spatula that came with my Slice to lift the stickers off the paper and place pop dots underneath them to add depth.
If the directions aren’t clear, please feel free to leave a comment below or send me an email. 🙂


that is adorable, thanks for sharing !~
So cute, thanks for the tutorial!
Adorable page!! Makes me wish I had a sewing machine! 😀
very cool – lovely page!
Well, this is just awesome! Love the layout and your banner. Thanks for the tutorial. I am going to give it a whirl!
that's so sweet….thanks for the tutorial! lovely page!<br /><br />btw…wow…about that daunting sewing project you mentioned! LOL! <br />amy<br />www.looktothesky.typepad.com
I liked this at SC but I LOVE the tutorial! What a great banner!
this is super sweet! i love, love your banner!!
LOL! Oh my goodness. Great minds, yes! lol! I was still in a CHA fog. Didn't see that you had done this. Nicely done!