Watercolored roses for special days
Today I’m sharing some scrapbook love!
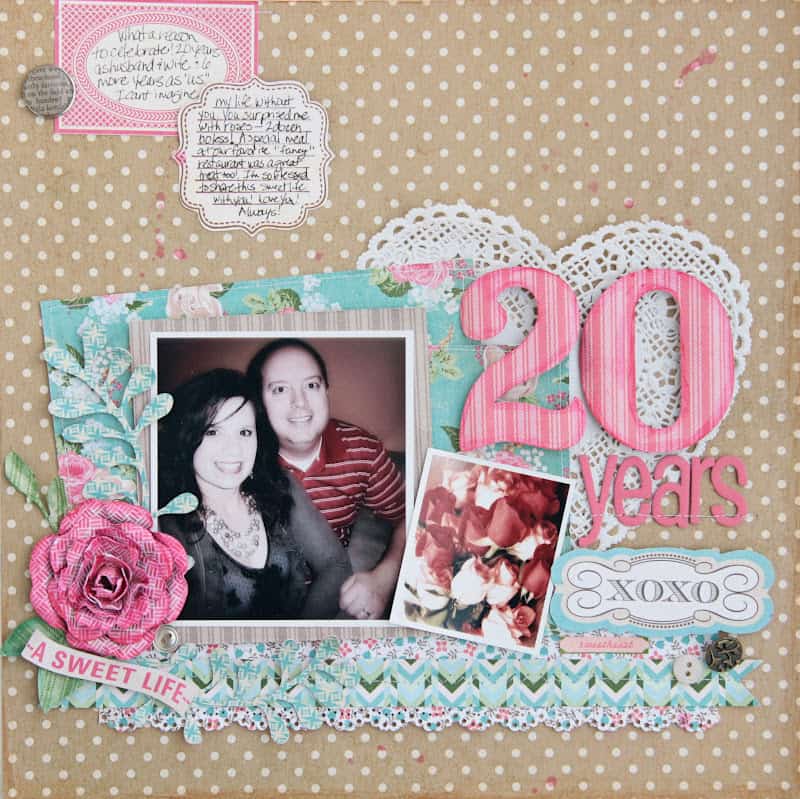
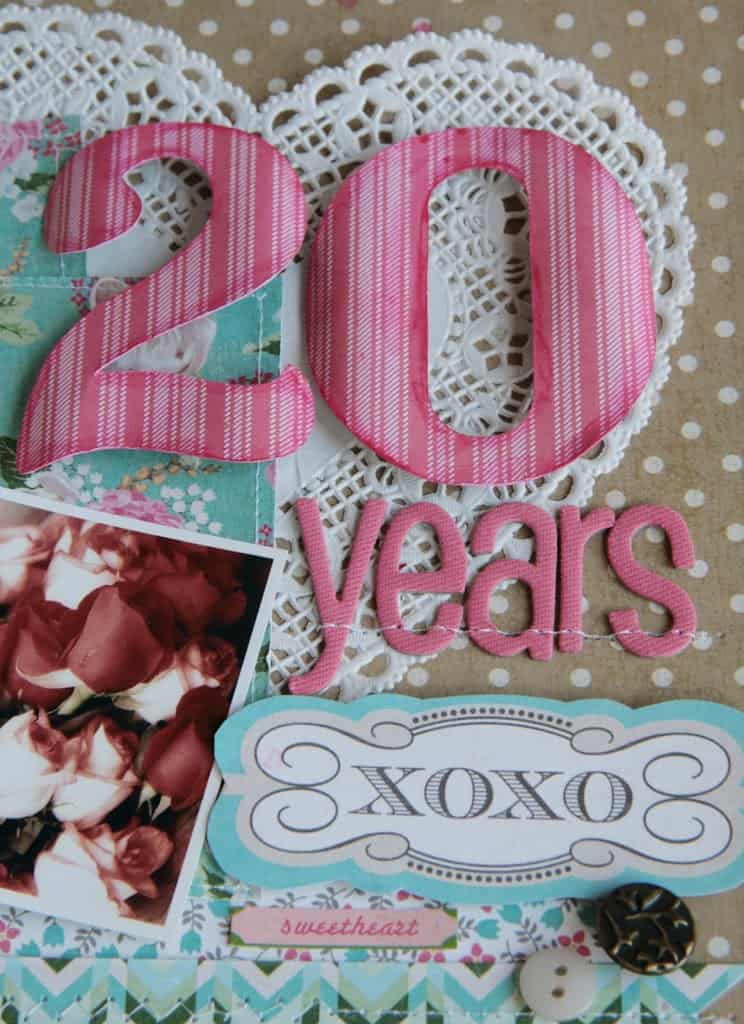
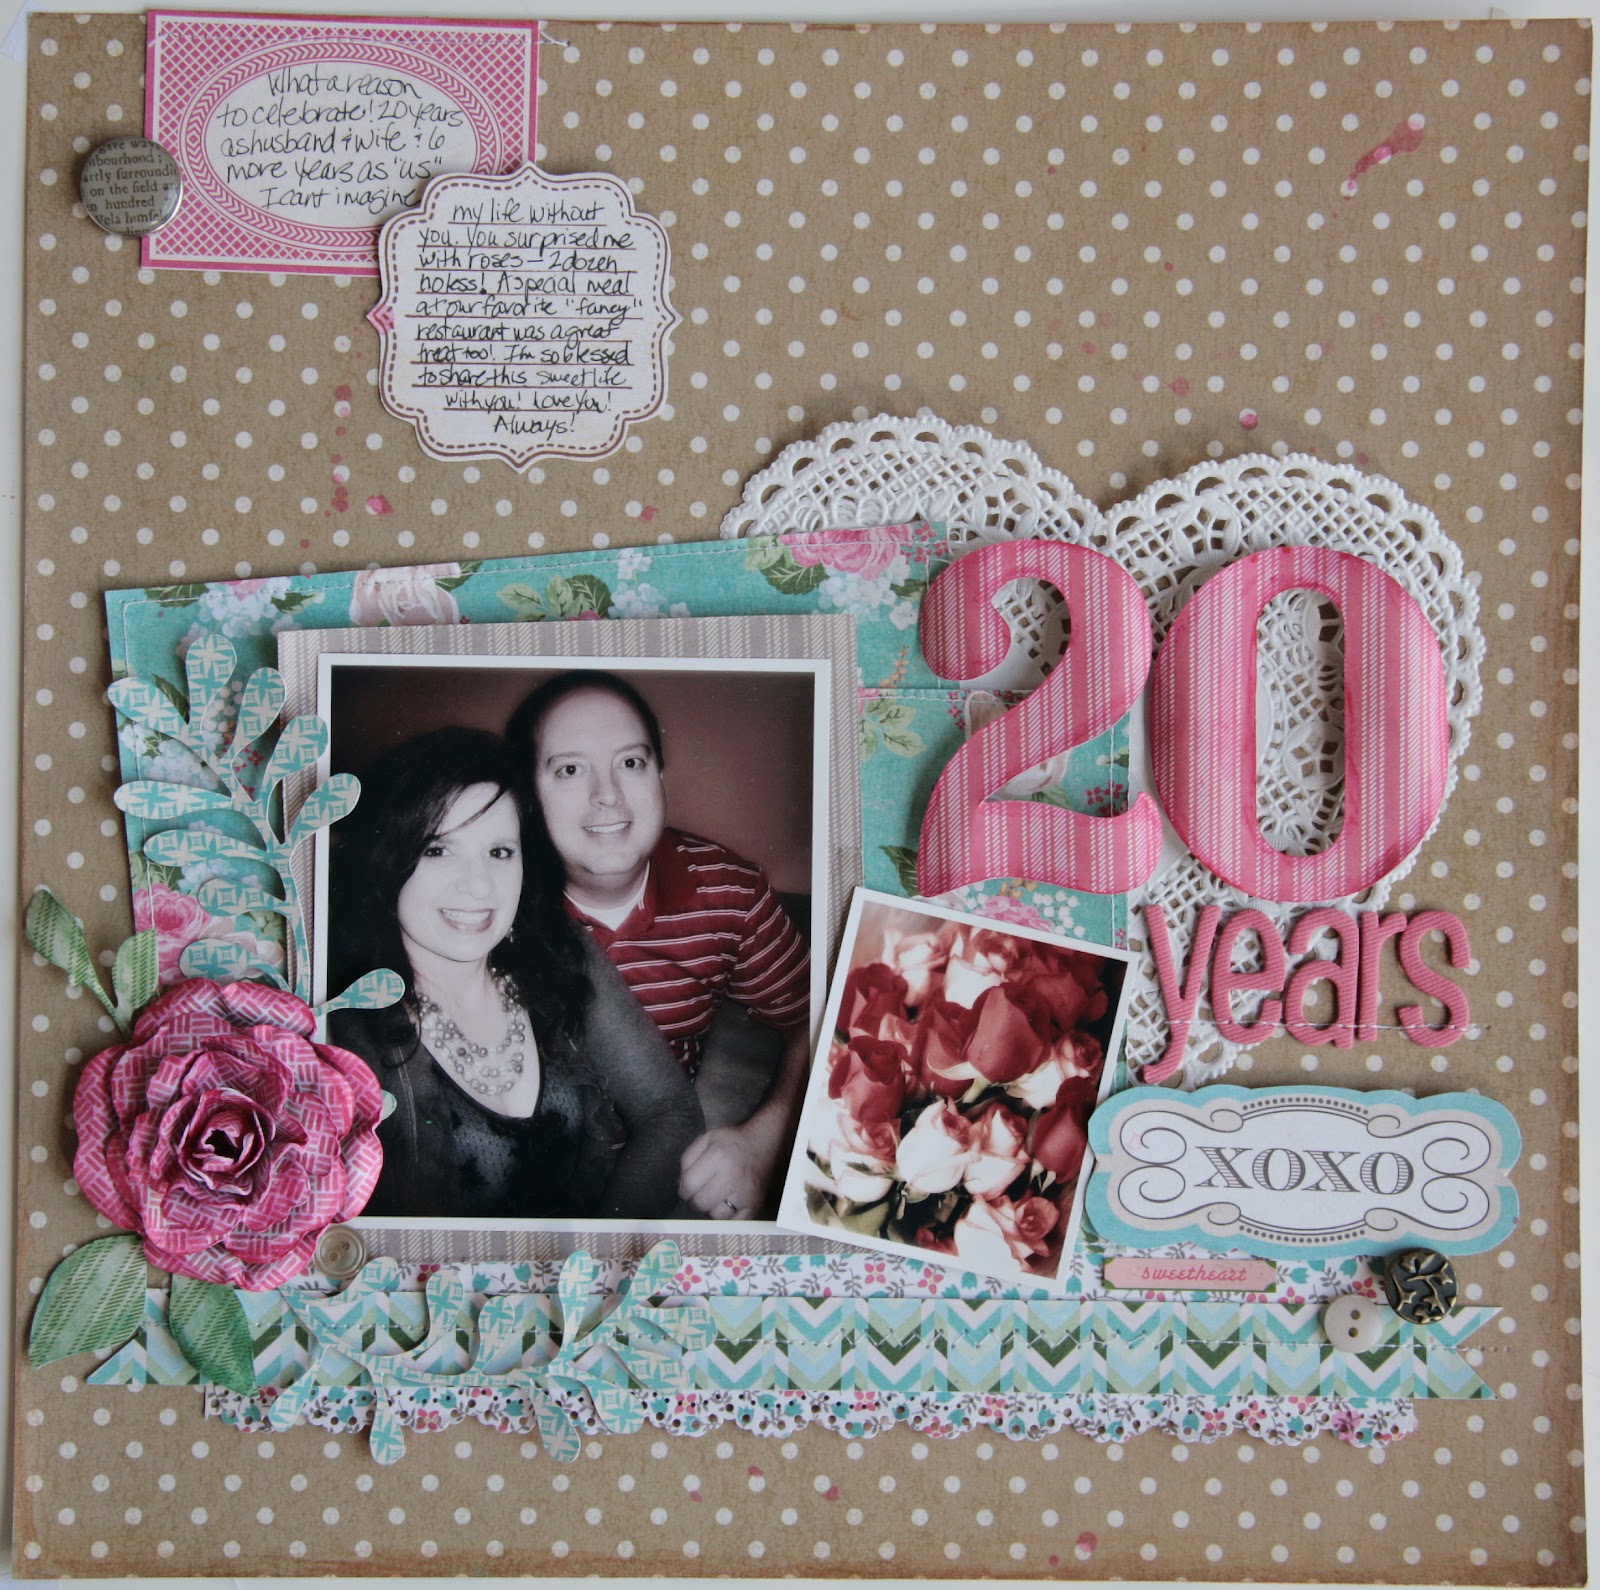
This layout is a celebration of our 20th wedding anniversary. It was a special day for us and it was made even more special when my dear husband came home with 2 dozen roses! This coming from a man who rarely buys flowers. He’s just too practical to buy something that is only going to last a couple days. I guess I need to teach him how to make paper roses and then they will last forever.
So in honor of those beautiful roses and our special day I created this a layout using the GCD Studios Splendor Line. It’s so romantic and lovely.
Here is a close up.

To create the rose, I started by die cutting flower parts. I’m sure there are lots of shapes that would work. Generally, rose patterns you find use a heart shaped edge. These are the parts I chose to work with.
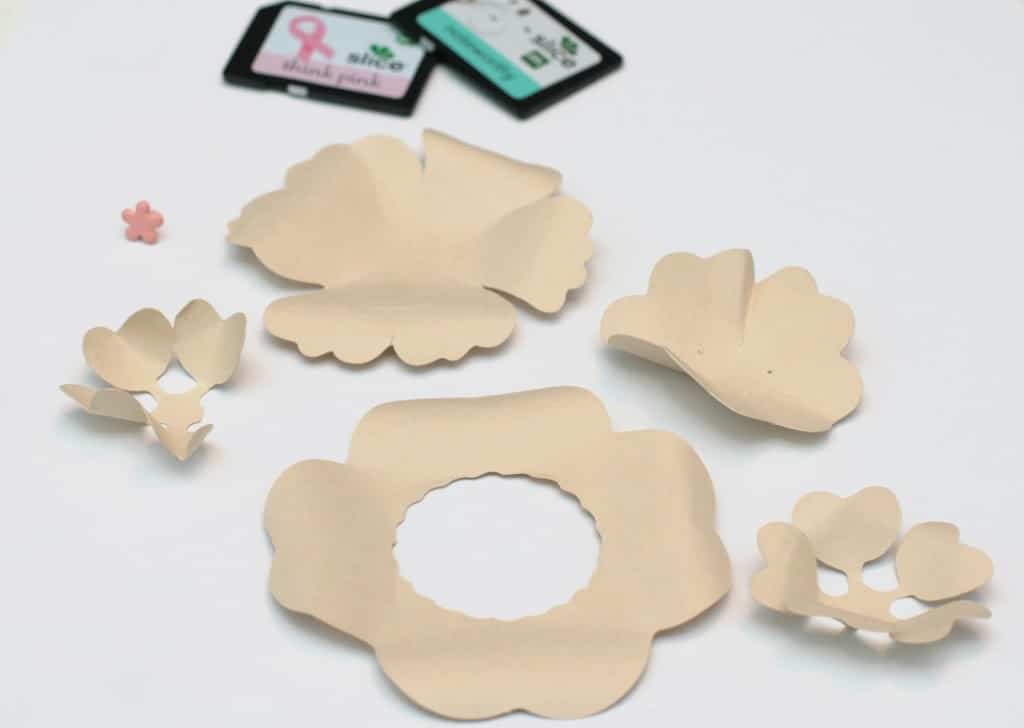
You’ll notice that I cut one of the heart shapes off the left flower. That allowed me to close it in tightly to form the center of the rose.
Then I began water coloring. I used water soluble oil pastels, but any water color media would work. I like to use the oil pastel crayons because you can wet the crayon and drag it along the edge of what you want to color. Like this.
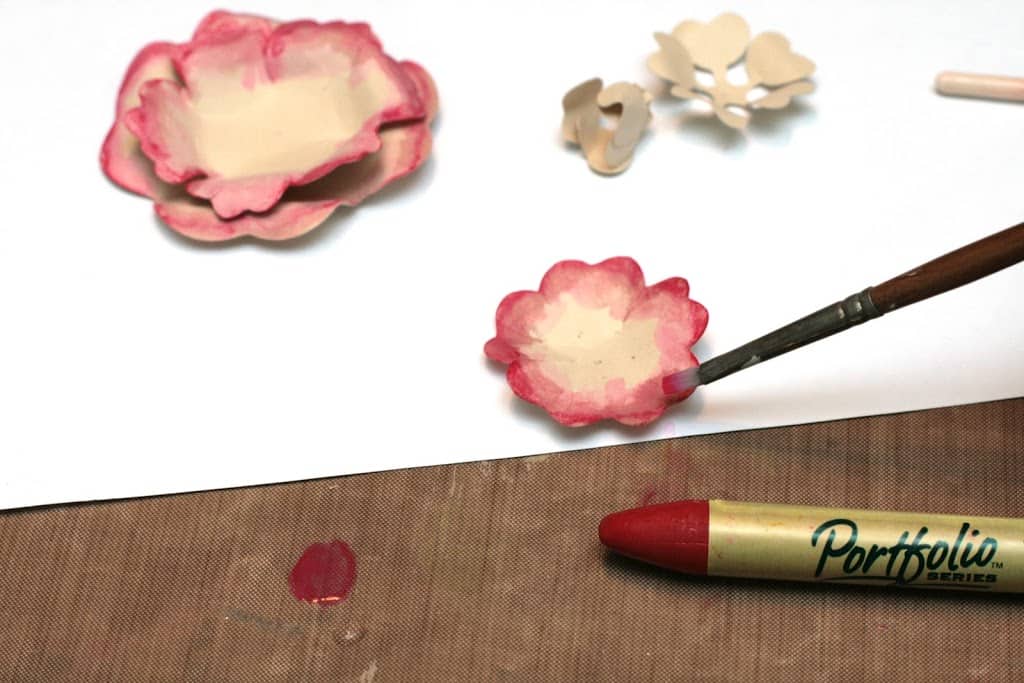
Then I blend the edges with a damp brush. Sometimes, I create a little puddle of paint on my plastic craft matte and add a little more color.
After I finish painting the edges, I carefully rolled the edges round a thin tool. I use a handle of a distressing tool, but a small paint brush edge would work too.
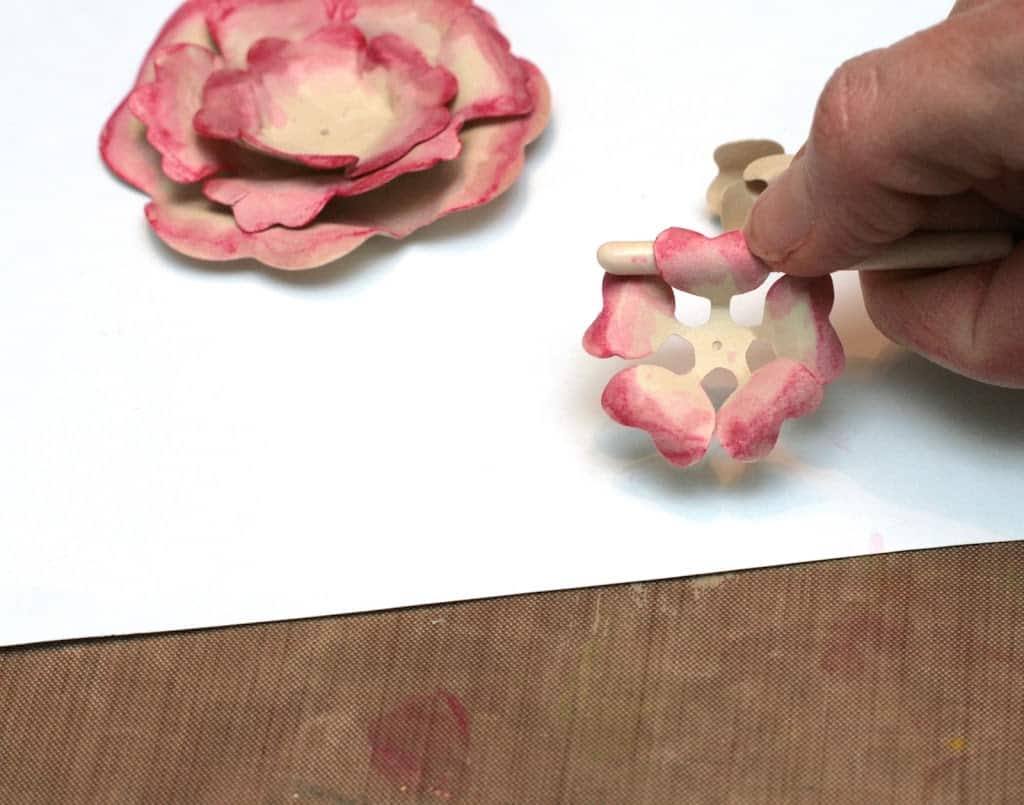
You want to take a little care here because the paper is rather delicate because it’s wet.
I continue to shape it until it’s dry. I also found that I needed to add a little glue to the inside edges of the middle to make them stay closed the way I wanted.
Here’s another look at the final rose I created with the Splendor patterned paper. I like the depth the pattered paper added.
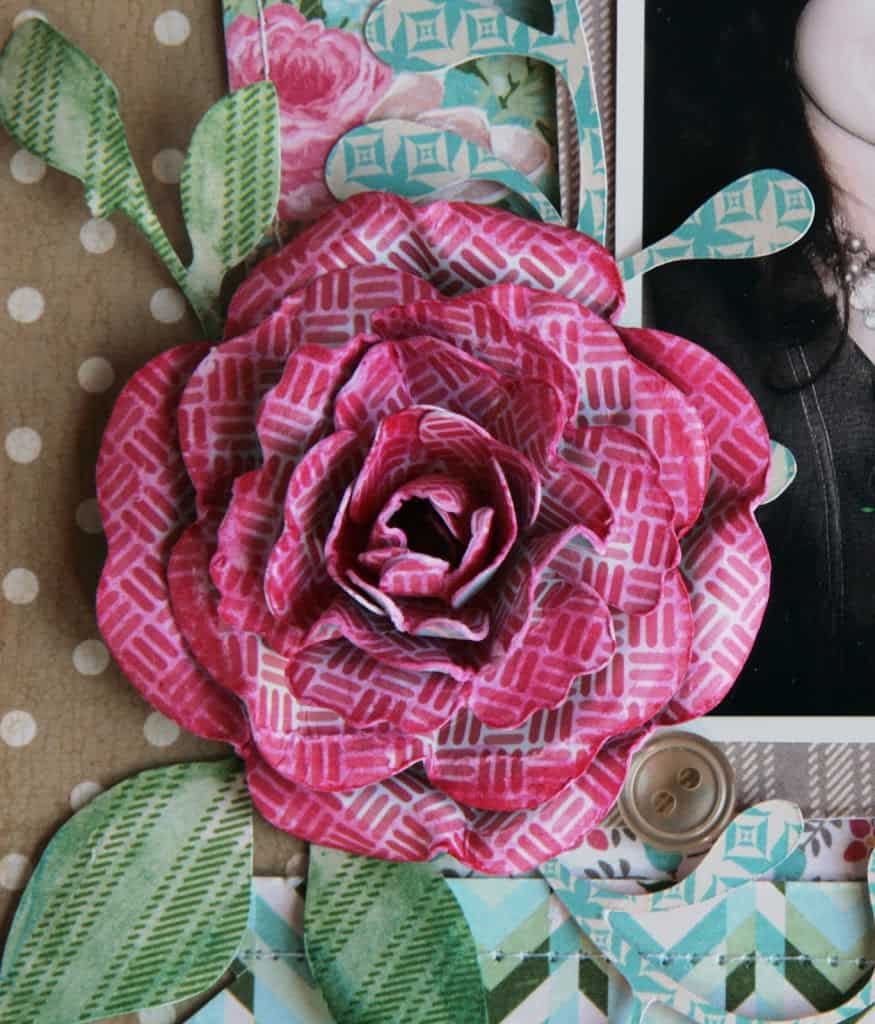
For the 20 in the title, I cut a similar color paper from the collection and painted the edges. When the edges began to curl, I exaggerated that curl and let them dry to that shape. I love the dimension that created.
Supplies: Patterned papers: GCD Studios Splendor Collection, Water Soluble Oil Pastels: Portfolio Series, Die Cut Machine: Slice; Noteworthy, Think Pink &Vintage Findings cards, Stamp: Making Memories, Chipboard letters: American Crafts, Sticker: Studio Calico, Brad: Crate Paper.


Leslie, you are so talented with paper! When you were done painting them, did you stamp them too? Or did you use the plain paper to show us how you did the other? I love the flower you created. I never would have guessed you could do that with such simple tools. And I haven't ever seen oil pastel crayons, I'm so glad you showed them. I'll bet there are so many things you can do with
Leslie, you are so talented with paper! When you were done painting them, did you stamp them too? Or did you use the plain paper to show us how you did the other? I love the flower you created. I never would have guessed you could do that with such simple tools. And I haven't ever seen oil pastel crayons, I'm so glad you showed them. I'll bet there are so many things you can do with
Debbie,<br />The roses on the actual scrapbook page were done with patterned paper. For the tutorial, I used solid paper so you could easily see what I did in each step. 🙂 Thanks so much for you comment!!