DIY Wide Stripe Curtains
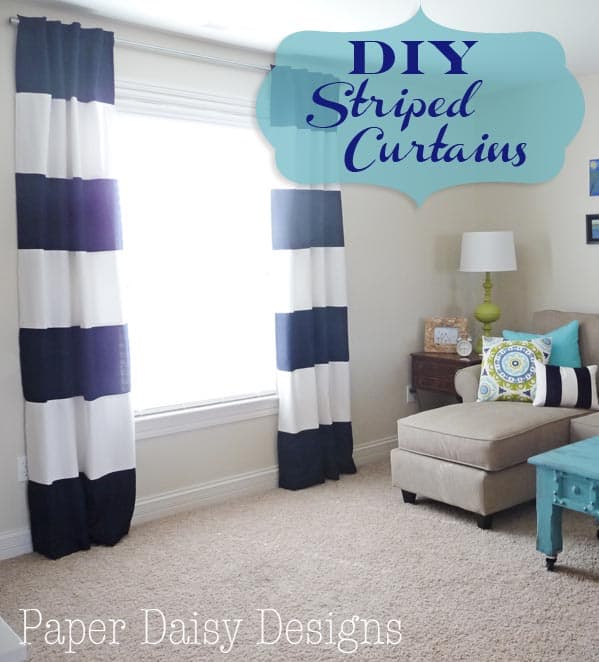
Today ,I’m sharing the details on how I made the Wide Stripe Curtains. I decided sew them instead of painting because I just didn’t think I’d get the saturation I desired with navy paint on white fabric or vice versa. I know in the photos the glare from the windows desaturated the color, but they look so much more professional with fabric. (I have painted on curtains before with a stencil with great results.)
And while it took an investment in time to sew the stripes together. I think the results are worth the effort.
I started with a set of panels from Wal-Mart. Get this, they were under $15 a pair. That’s right a pair! They were only 85 inches, but since I was adding the stripes, that was completely fine.
The white fabric, also purchased at Wal-Mart was only $5.96 a yard and I only need 5 yards.
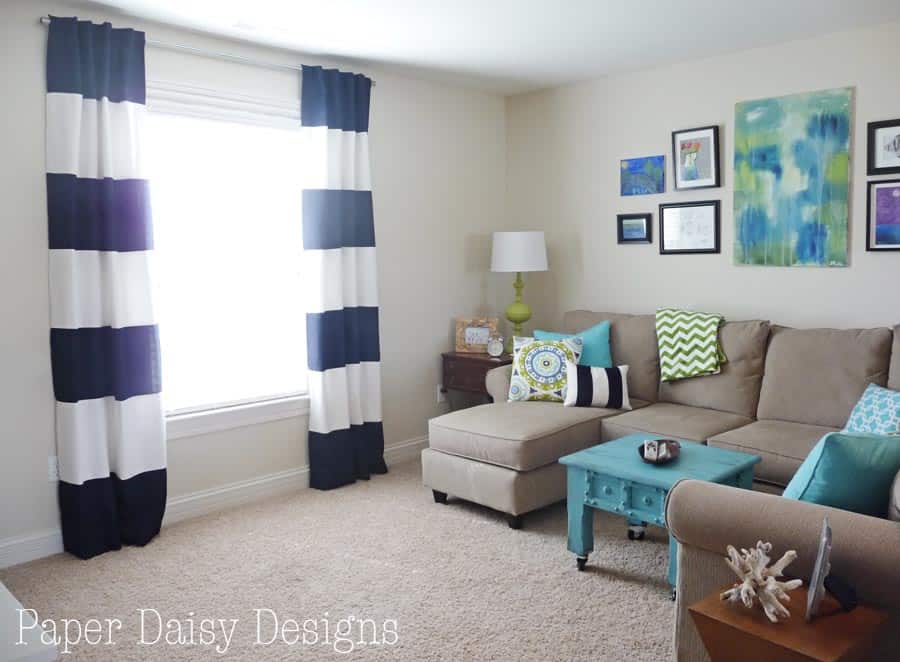
Let me do the math for you, these set of curtains set me back a whopping $60. Pretty darn good considering I had 4 panels nearly floor to ceiling, about 92″.
So now that I’ve told you how inexpensive they are to make, here’s how you do it.
The hardest part was cutting all the pieces to size. I cut each stripe to about 14.5 inches to allow for a seam on the top and bottom, the goal was for each piece to be about 13.25″ tall.
The top of the curtains already had a top hem finished, so just add several inches to each of the four bottoms for a nice hem there.
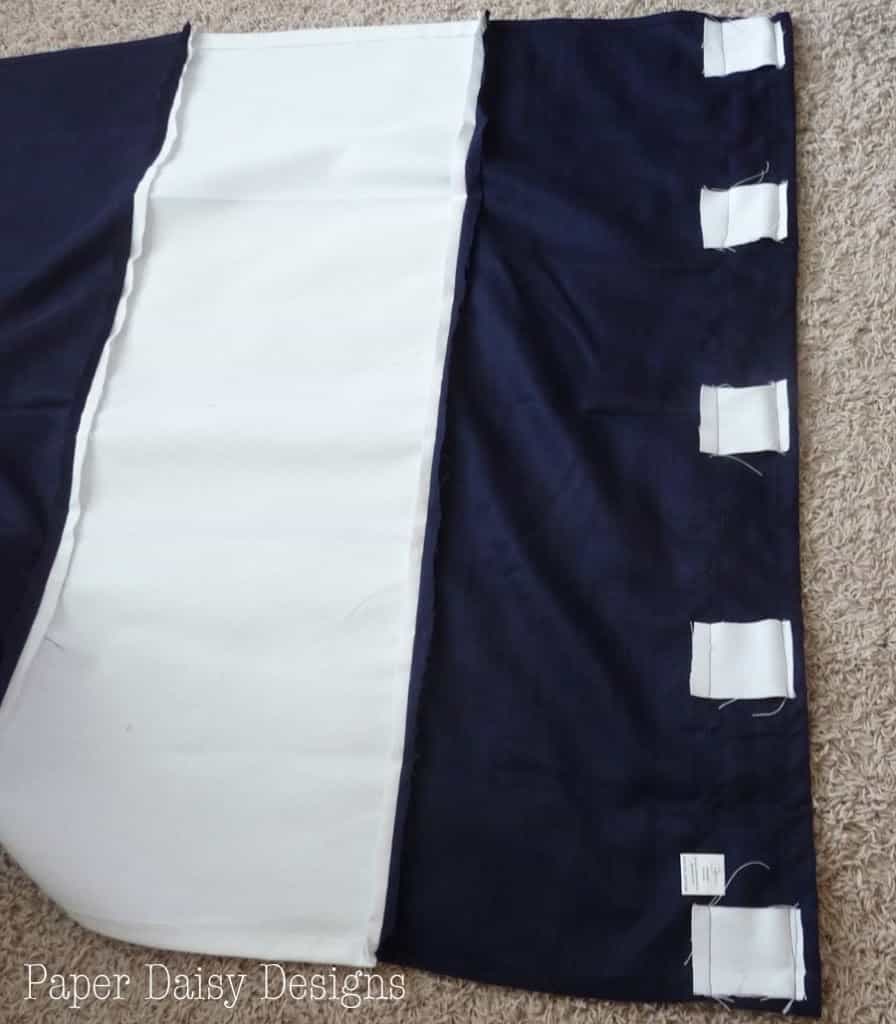
I am a big fan of tab back curtains. They hang so nicely. I just used scraps of fabric, evenly spaced along the back. I find 5 tabs works best for this size panel.
To hang the curtains, I used silver pipe conduit and cup hooks. Sturdy and very cheap. The gaming area side of the room has a window that is double wide, so it would have been some pricey hardware.
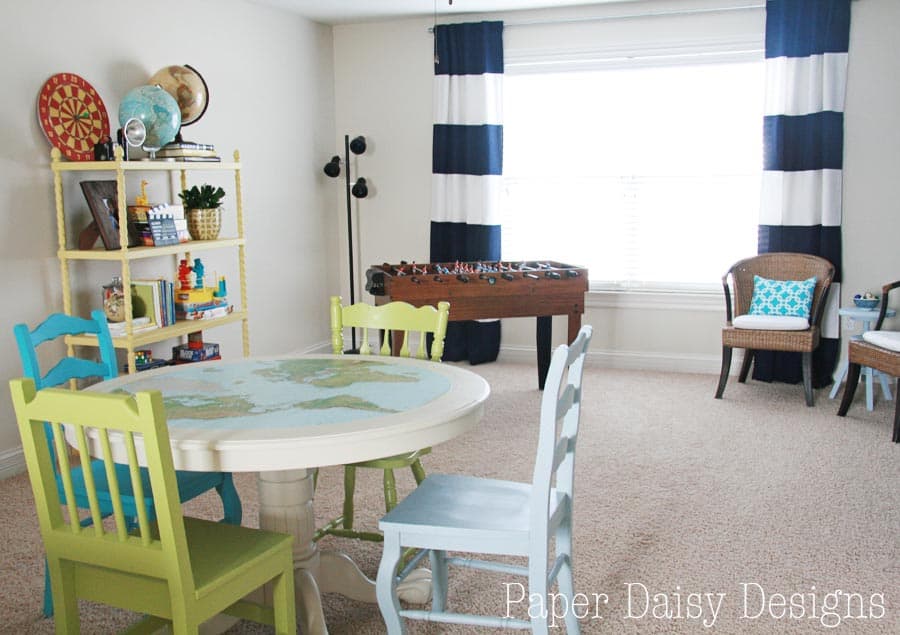
Here’s what the installation looks like. My husband is a stickler for hanging things into studs, so the hooks didn’t fall exactly in the center. Go figure. Thankfully, no one ever notices little details like this. Until you go blabbing about it on your blog. 😉

To serve as a finial, I just used a pipe fitting.
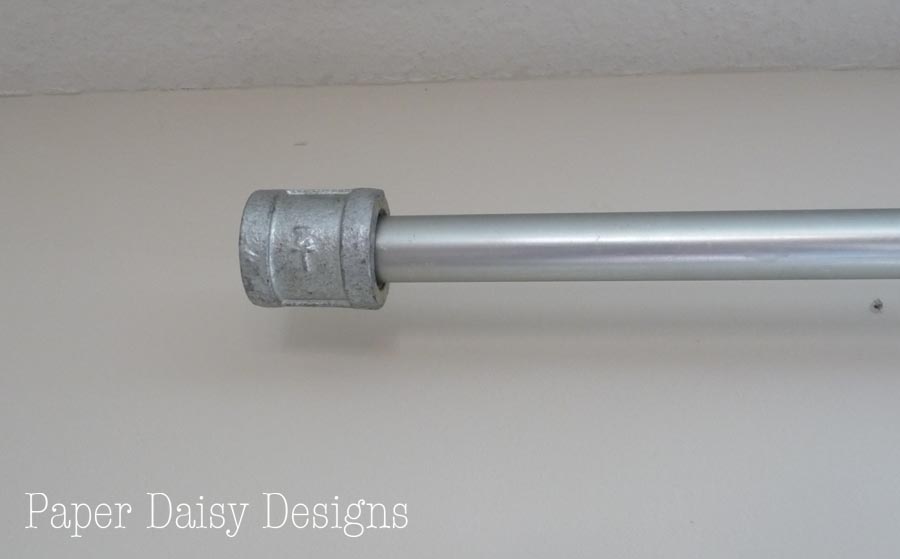
I don’t have the exact pricing on the pipe curtain rods, but I feel pretty certain they were under $20, for both windows.

The curtains were the inspiration for the exact color of navy I used for the Chalkboard wall. See how I got that custom color here.
I even used the tie backs that came with the curtains to make a striped pillow. I just top stitched the tie back on top of more white canvas from Wal-Mart.

So now I think I’ve covered most everything in the Media Room Makeover. Not to worry, I’ve been busy making our outdoor patio fresh and cozy and putting the finishing touches on my studio. I’d love for you to follow along.
Sharing Here:
Wow Us Wednesday @ Savvy Southern Style / Share it Link Party @ Winthrop Chronicles / Show & Share @ Southern Lovely / Transformation Thursday @ Shabby Creek Cottage / Hooking up @House of Hepworths / Feathered Nest Friday @ French Country Cottage / Be Inspired Friday @ Common Ground / Friday Link-up @ Redoux / Home and Garden Thursday @ a Delightsome life / Frugal Friday @ The Shabby Nest / Frugalicious Friday @FInding Fabulous
/ Pity Party @ Thirty Hnndmade Days / Nifty Thrifty Sunday @ Nifty Thrifty Things / That DIY Party @ DIY Show Off / Sunday Scoop @ I Heart Naptime
/ Weekend Wrap-Up @ Tatortots and Jello


They look awesome Leslie! Very professional. 🙂 One quick question, can you pull them closed? Or are they more for decoration? Thanks!<br /><br />Debbie
Sorry, Debbie, They are just for decoration. We have blinds so we can control the light that way. The small window could be pulled but because the cup hooks aren't in the middle on the large window it wouldn't work. That is easily fixable though. 🙂
You did great, I love it! Thank you for sharing! I am stopping by from Pin it party. I am your new follower.
They look awesome! Your whole room is so fabulous Leslie – I love the look you have created and your use of color! Gorgeous,<br />Krista
You did an amazing job! Very professional looking. And your media room is gorgeous! I love the color scheme. :)<br /><br />We'd love for you to share this over at Much Ado About Monday, if you get a chance.<br />http://www.huckleberrylove.com/2013/06/much-ado-about-monday-no-12.html<br /><br />~Emily<br /><br />www.huckleberrylove.com<br />
You did an awesome job, Leslie! Very, very creative – looks marvelous in your room. I do appreciate you sharing with Home and Garden Thursday,<br />Kathy
Nice job! I love when a project turns out budget friendly and perfect at the same time.
This comment has been removed by a blog administrator.
Love these! Just found this project through google. I'm doing my own with a similar method. <br />Did you get 4 panels from just one pair of curtains? You said a pair, but you're only showing one set of the curtains, so I wasn't sure. <br />Also, how long did this take you? I have to make enough for three double windows! :(<br />Thanks!
Stacy, I used two sets of panels that were sold in pairs that were 85" long. Initially I thought I could maybe get away with only buying one pair, but it was just easier and not very expensive to use two sets. I did have a lot of leftover fabric after I cut it apart to add the white stripes. I made some pillows with the extra. It did take some time in measuring, but the sewing was really