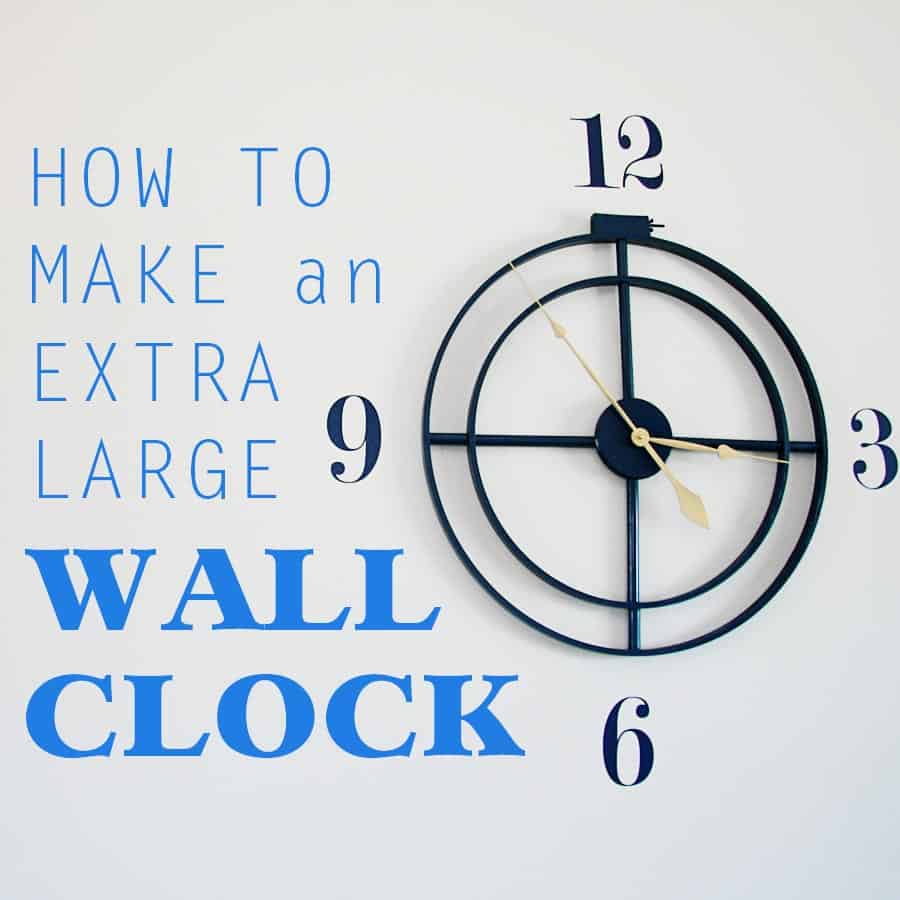
I can’t even begin to express how happy I am to share this with you today. The idea for an over-sized wall clock has been milling around in my head for quite a while.
I’m hoping you love it as much as I do.
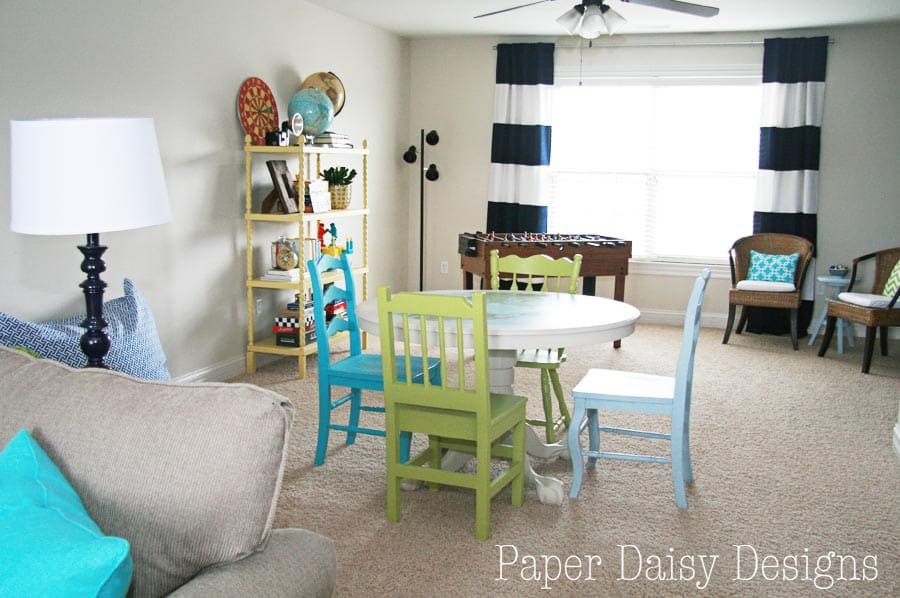
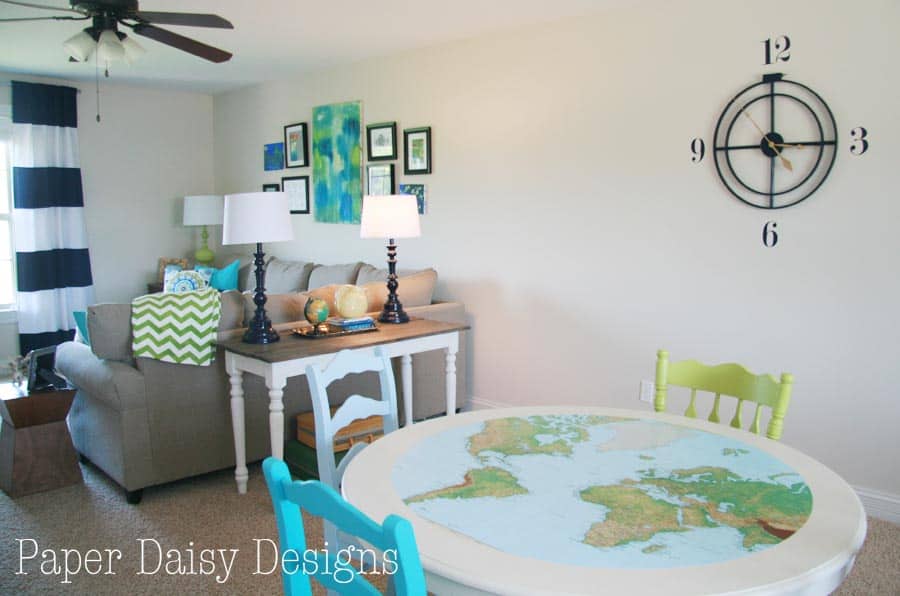
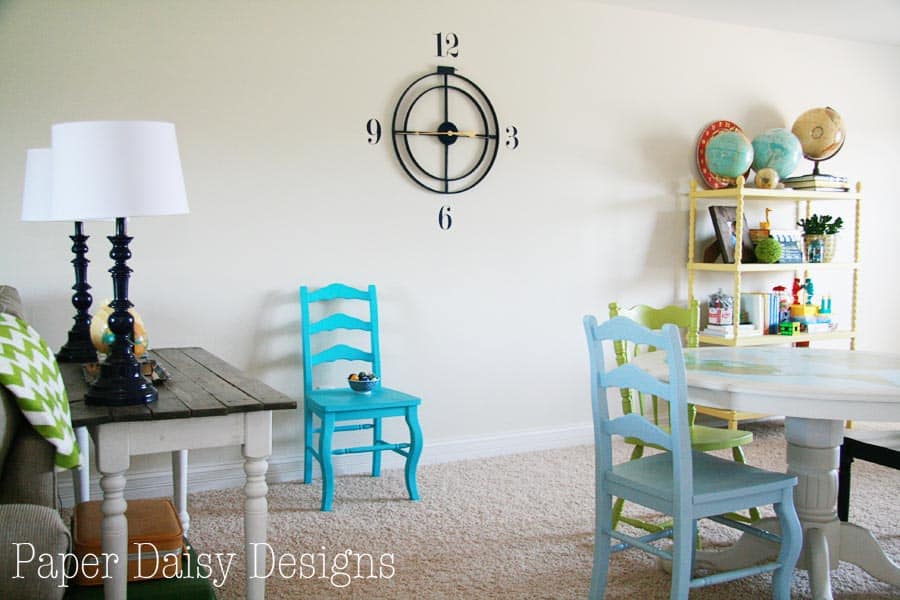
I think it’s pretty cool looking and it solved a pesky design dilemma in our Media Room.
You see, when I did the big reveal of the Media Room, I conveniently took photos to deemphaize the fact that I pretty much had a blank wall behind the Map table on the gaming side of the room.
If you look closely, behind that lamp shade on the sofa table what do you see?
Don’t be fooled any more. The wall between the two sides of the room is empty.
I was completely perplexed on what should go here until I decided on a large wall clock.
And then I was on a mission to make a clock without spending a lot of money. And this is why I’m so excited. I did just that!
Want one for your own blank wall? Or maybe over a fireplace? I know you’ve got a spot.
Follow me along on this clock journey, won’t you?
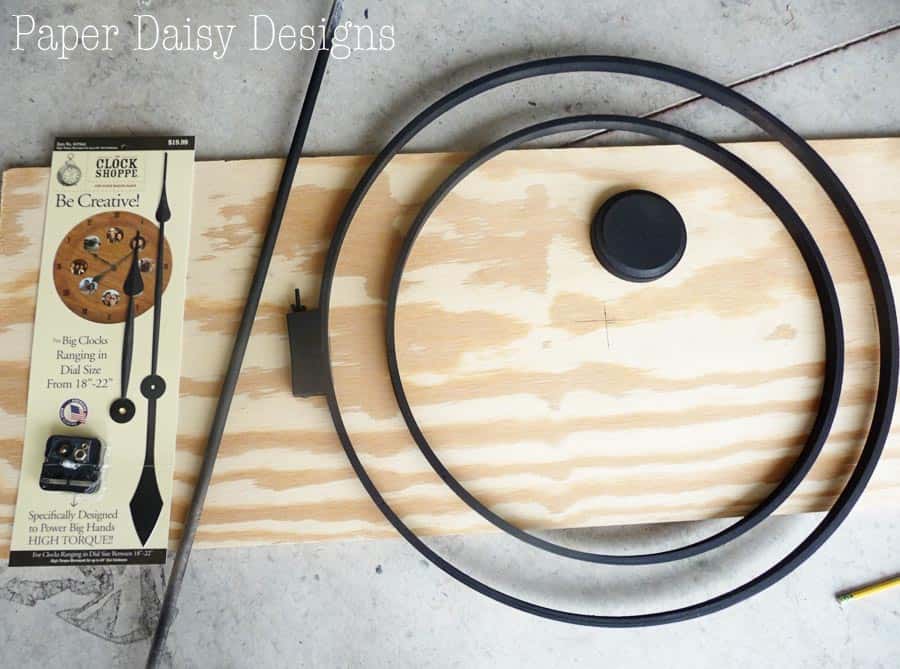
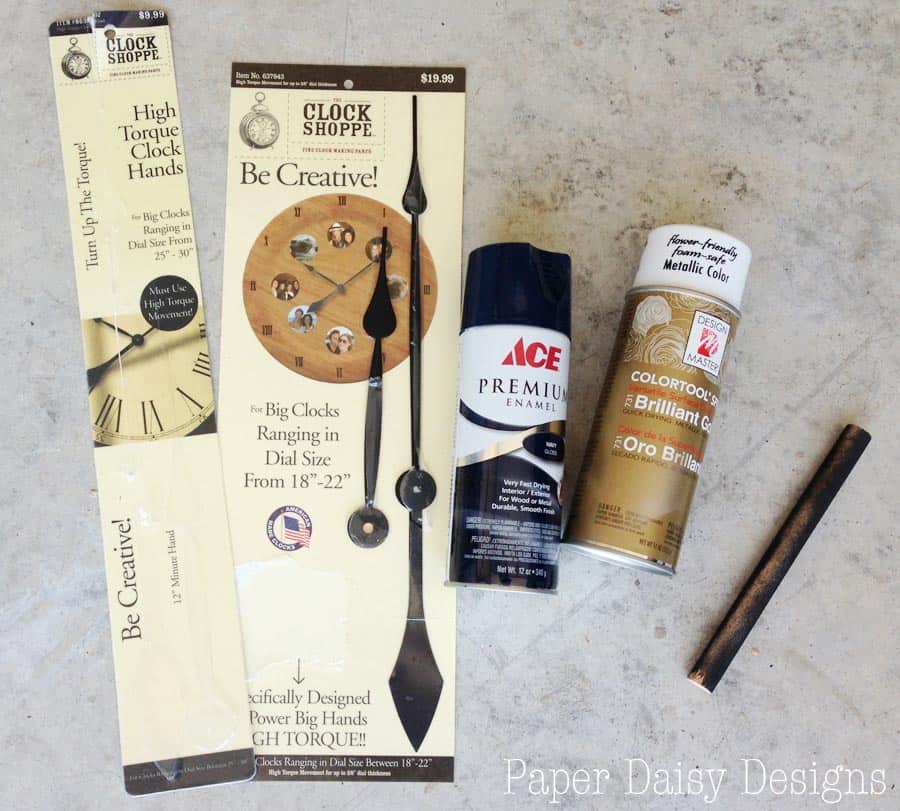
Here’s a supply list and where I got everything.
1. 23″ and 18″ Embroidery Hoops- JoAnn’s
2. 5/8″ dowels, need two- JoAnn’s
3. Wooden disk, 4 1/2 diameter and 3/8 thick- Hobby Lobby, comes in a set of two, shrink wrapped
4. Clock for large hands- Hobby Lobby
5. Larger hands- Hobby Lobby
6. Navy colored Cricut vinyl- Michael’s
7. Navy Spray paint- Ace Hardware, turns out true Navy spray paint is kind of hard to find.
8. Gold Spray paint- Michael’s
9. Wood glue
Start with gluing the two pieces of each hoop with wood glue. You will need to unscrew the wing nut at the top to get them to separate.
Then put the hoops back together and tighten the wing nut back so it’s good an tight.
I honestly don’t think this step is vital, but I thought the wood glue would add some stabilty since this was the base of the clock.
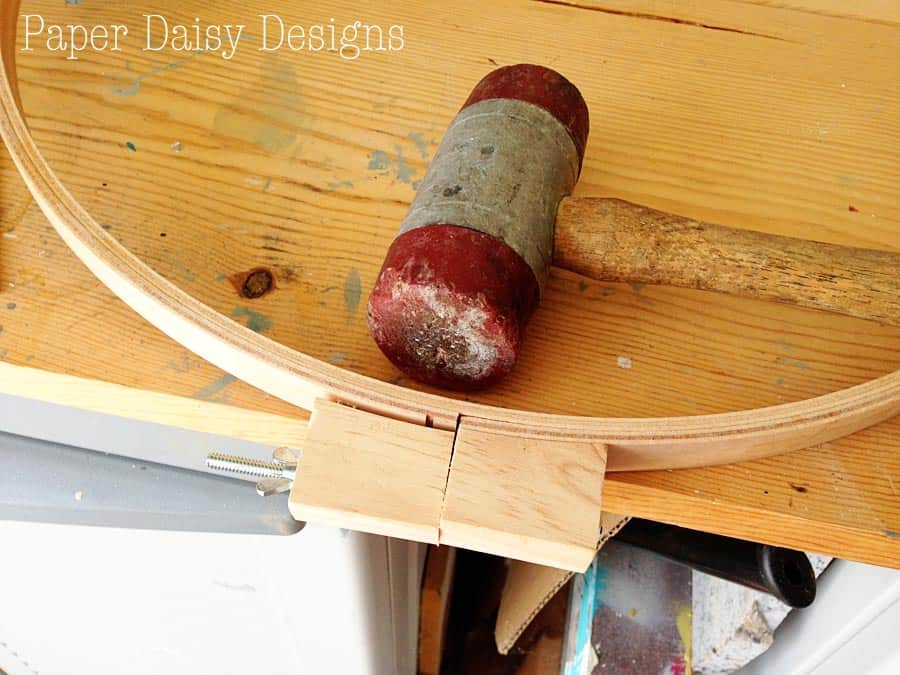
Once the glue was dry, I removed the tightening mechanism on the smaller hoop. I had some reservations on whether or not this would work, but it did fine.
I just placed the hoop on the side of my work bench and carefully whacked it with a rubber mallet. The staples holding it in place came out easily with some pliers.
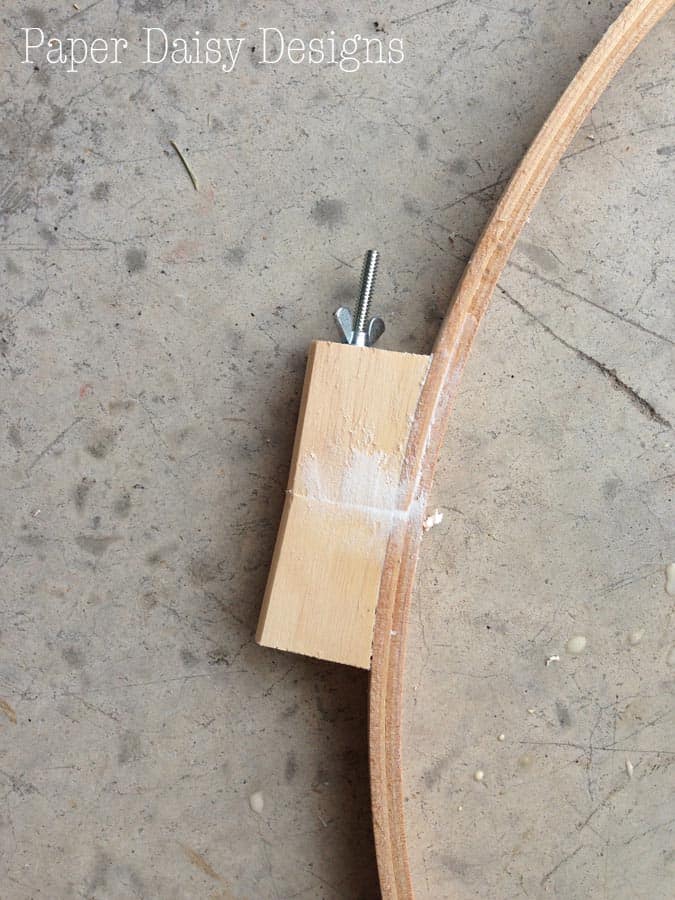
I choose to leave the larger hoop tightener because I liked the way it looked. It was a nod to what the clock is made of and it also kind of reminded me of the winding mechanism on a pocket watch.
I decided to fill the seam of the tightener with some wall spackle and then sanded it when it was dry for a more finished look.
I primed all the pieces with black primer. It’s what I had on hand and my final color was going to be navy. I thought it was a better choice than white.
Next, I moved on to assembly. This is where things got a little more tricky. Trial and error was definitely used. 😉
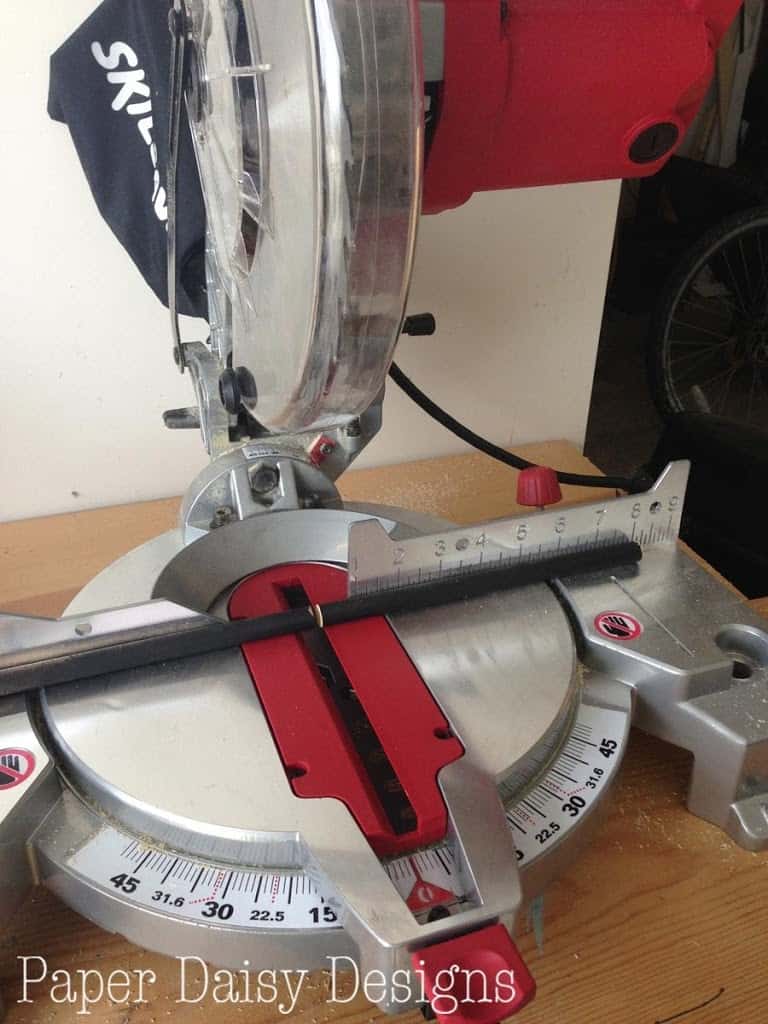
I started with the a small dowel and cut all the pieces to fit in between the embroidery hoops. After fitting it all together in a dry run, I realized that a thicker dowel would make this whole process a lot easier.
Trust me on this, I had the little pieces of dowel resting on nuts. It was a little ridiculous.
After another trip to the craft store, I primed and cut the thicker dowel, now 5/8 of an inch, to the sizes I needed to fit between the hoops and hold them together.
I was happy to have my new table saw to help with this, but I’m sure it can be done with a hand saw or circular saw just as well.
Remember those trips to the hardware store I mentioned on the “Behind the scenes of a backyard makeover.” post. Yeah, my husband got bored waiting in the paint department and went to look at tools. And we came home with a table saw!! Oh yeah, I was a happy DIY’er.
I chose to use wood glue to assemble the pieces.
After seeing the mess I made wood gluing the hoops together, I decided it would be best to put some glue on a scrap piece of wood and dip the ends of the dowels into the glue.
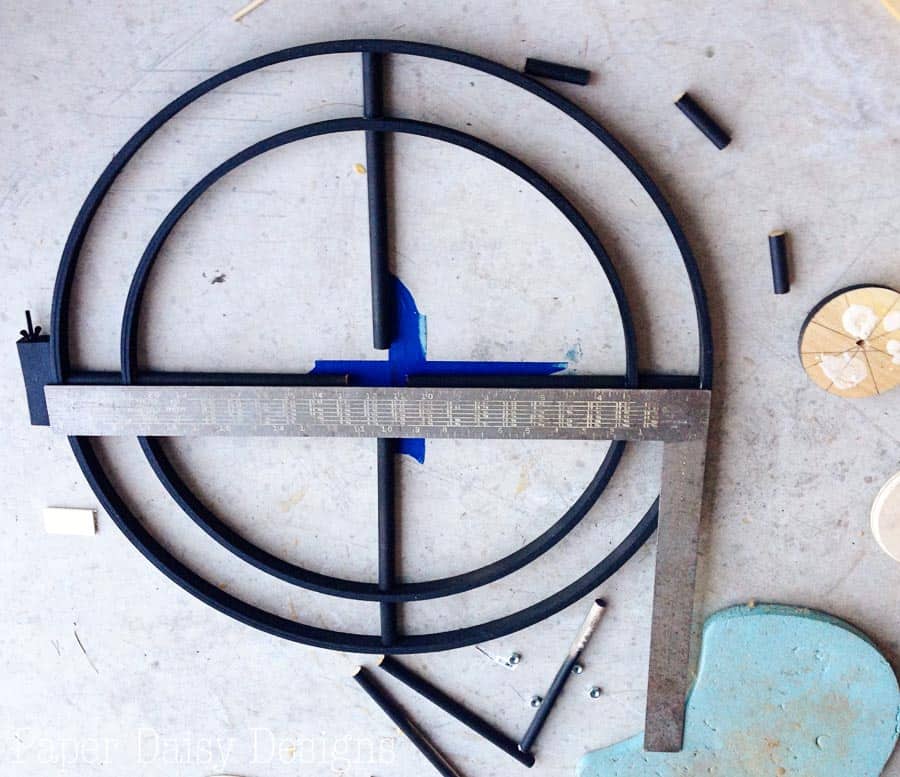
Here’s how I pieced it all together. You can see the abandoned smaller dowel pieces and nuts too. 😉
This was going so much better.

And using wood glue gave me plenty of time to make adjustments. I wanted to be sure all the perpendicular pieces lined up perfectly.
I left it to dry overnight.
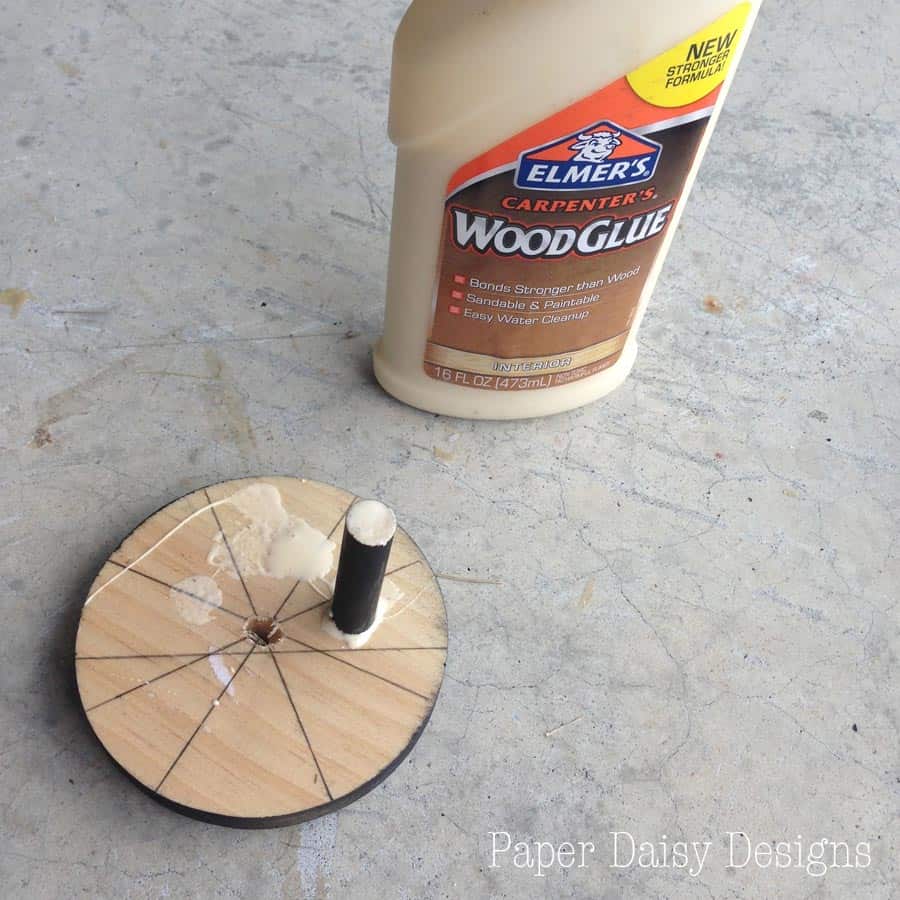
If you look close at the above photo, you can see I left an open spaces between the center pieces for the clock works that fit behind a round disk.
Finding the right disk was a little bit of trial and error too. Initially, I chose one that was too thick for the shaft of the clock. The right size wooden disk turned out to be 4.5 inches in diameter and 3/8 inches deep.
Here’s a look at all the measurements.
This photo is after I painted the glued pieces navy blue. This is also where I decided that I needed the longer hands, sold separately from the High Torque clock set I bought initially.
Another trip to the craft store.
After a quick spray with Brilliant Gold spray paint on the hands, the clock was done!
Or so I thought.
I forgot to add a hanger to the back of the clock. I knew all along I was going to hot glue a sawtooth hanger to the back of the embroidery mechanism.
But I forgot to do this until I was done.
Bad idea!
Because when I tried to balance the finished clock between two stools to hot glue the hanger and not smash the clock hands, the clock fell and several pieces of the center broke.
And then I hot glued it back together. I was too upset to take a photo. Just take my advice. Make sure to glue the hanger before you are done with the clock installation.
I do think the wood glue is strong enough, minus the fall. Even after hot gluing some of the dowels I would not recommend using hot glue. The glue dried faster than I could get it to line up and it’s not as perfect as it was.
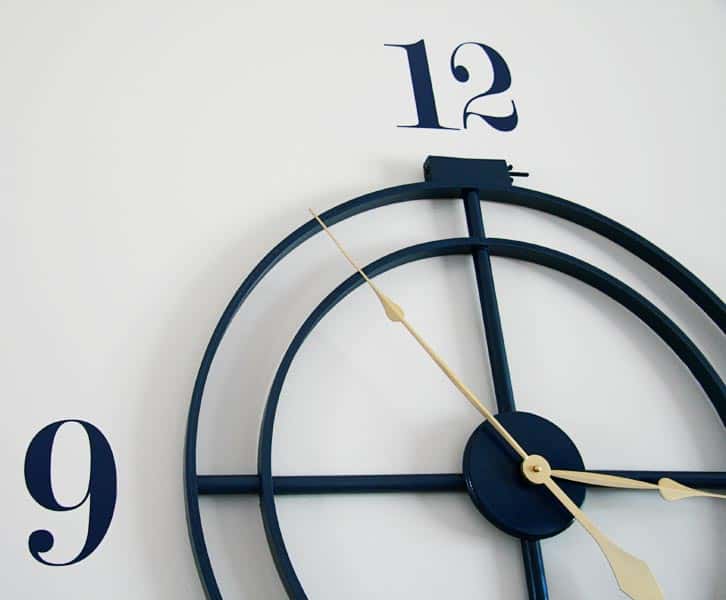
The very last step was to hang it on the wall and add the numbers.
I used my Silouhette Cameo to cut the numbers in vinyl and transferred them to the wall. You could also stencil them or use house numbers if you don’t have a Silouhette.
In the end, it was totally worth all the twists and turns and DIY drama.
Just look for yourself.
I think it perfectly fills the space and is a bridge between the two sides of this long room.
I love that it’s simple, but I could totally see it in a more ornate fashion with more dowels and numbers.
But there’s kind of a globe, map thing going on in the room and the classic design kind of reminds me of a compass rose. Can you see it?
Now that I’ve worked out the kinks, I think this could be a very simple project that can definitely be done with less than $50, especially if you are smart about using your 40% off coupons.
Let me know if you make your own version! I’d love to see it.
Sharing here:
Thank you for subscribing to Paper Daisy Designs. Please continue reading on the blog. I appreciate having you as a reader.


 And using wood glue gave me plenty of time to make adjustments. I wanted to be sure all the perpendicular pieces lined up perfectly.
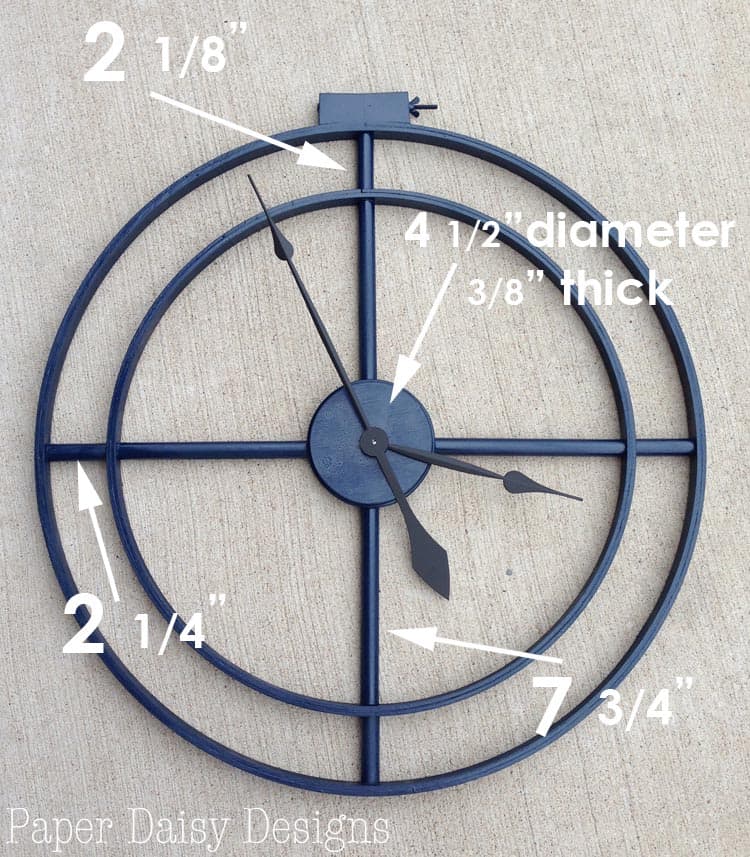


Very clever, I have been meaning to make something like this for ages, maybe I should now!
Love how this turned out! I'll have to make one of my own.
Wow! Looks great! I tried to make a large clock but yours looks fabulous. Stop by my Friday's Five Features and link up this post (and others)! http://diy-vintage-chic.blogspot.com/2013/08/fridays-five-features-no-4.html
Very cool clock!
Very, very, very nice…<br />Anna
Really great DIY project. It is a nice addition to your room!
Leslie, this is absolutely adorable! It looks SO great in that room! You did a fabulous job!<br /><br />I’d love it if you linked this up over at Living Well Spending Less for Thrifty Thursday this week! http://www.livingwellspendingless.com/category/thrifty-thursday/
I love this clock! I will definitely make one following your expertly done instructions. Well done!
That is very cool! I love it! Julia
Congratulations! This post is featured over at Diana Rambles today and has been pinned in the Featured at Diana Rambles board at Pinterest, Tweeted, and Recommended on G+. Please grab a featured button off my sidebar or via the link under the features. Thanks for sharing this awesome idea!
It's gorgeous, Leslie! I love the extra large size! Great DIY. I'm including a link back in today's DIY features. Thanks so much for sharing!
Very cool! I love big clocks!
What a great project! It's so graphic and bold and really looks great in your space!
Wow, that's super beautiful! I've seen old bicycle wheel clocks I want to imitate, but it always seemed so intimidating to me. I love how your giant wall clock turned out…it's got my gears turning again (hehe)…
This comment has been removed by a blog administrator.
What a beautiful clock!! You've done a wonderful job with that and it's perfect for that spot too!
That's actually a pretty nice looking clock. My sister has been bugging me about getting some things on the walls in my apartment, and I've been trying to figure out what I should do. A wall clock like that might actually be pretty nice to have, though I might make it a different color.<br />Andre | <a href="http://heathershousewares.com/store/products/kassel-15-day-wood-wall-clock-2/"
Wow! Looks great. I love this clock. What a great project. Many thanks for nice sharing. Its helped me a lot thank you.