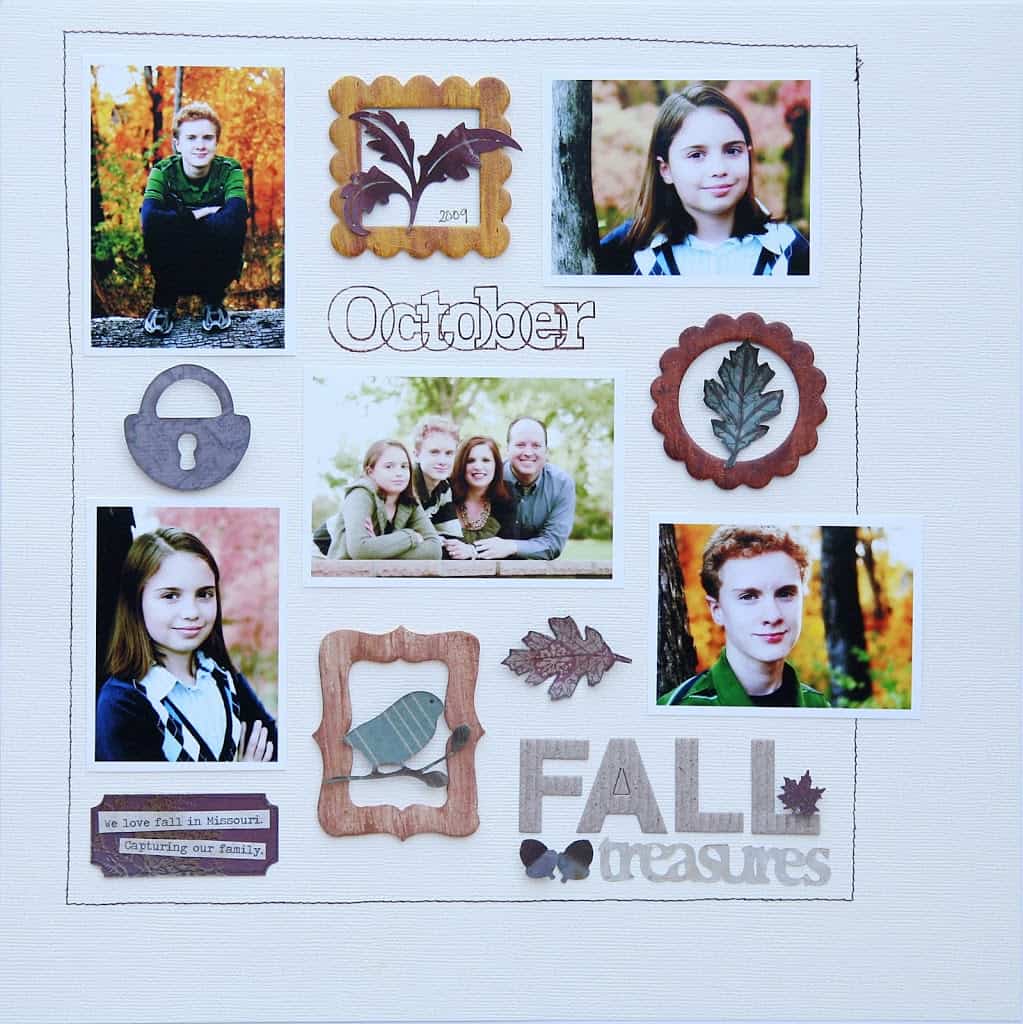
Faux Wooden Frames from simple chipboard
Today I’m going to show you how to make faux wooden accents from chipboard. The look of wood is perfect for adding warmth to all your fall pages. I love how it feels like I was able to bring the woods right onto my page.
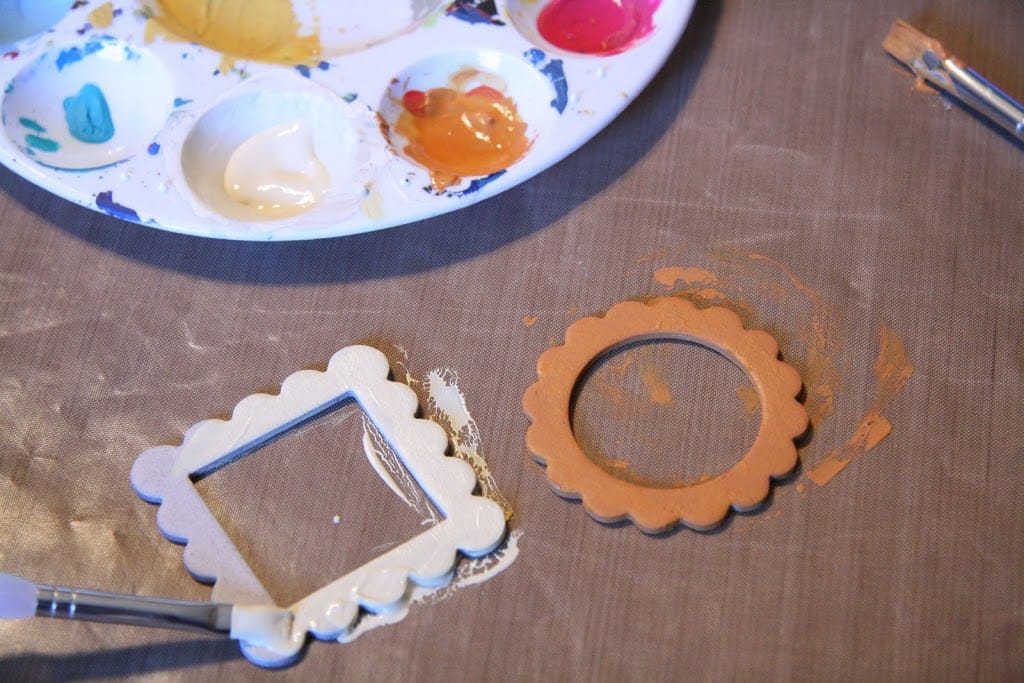
The basic supplies needed for this project: Small Frames Chip Art from GCD Studios, acrylic paint in a rich orange and cream, a few paint brushes, a non-stick surface like the Craft Matte from Ranger and Maya Mist (Brown and Sunflower Yellow).
Start by painting one of your chipboard pieces the burnt orange color (I used Monarch by Making Memories) and the other two cream (Sand Sable by Americana). Be sure to get all the edges of the chipboard as well.
Once dry, spray mist on the non-stick matte and paint on the mist. The best tool for this is a really worn out brush, one that you may not have washed properly after using. 😉
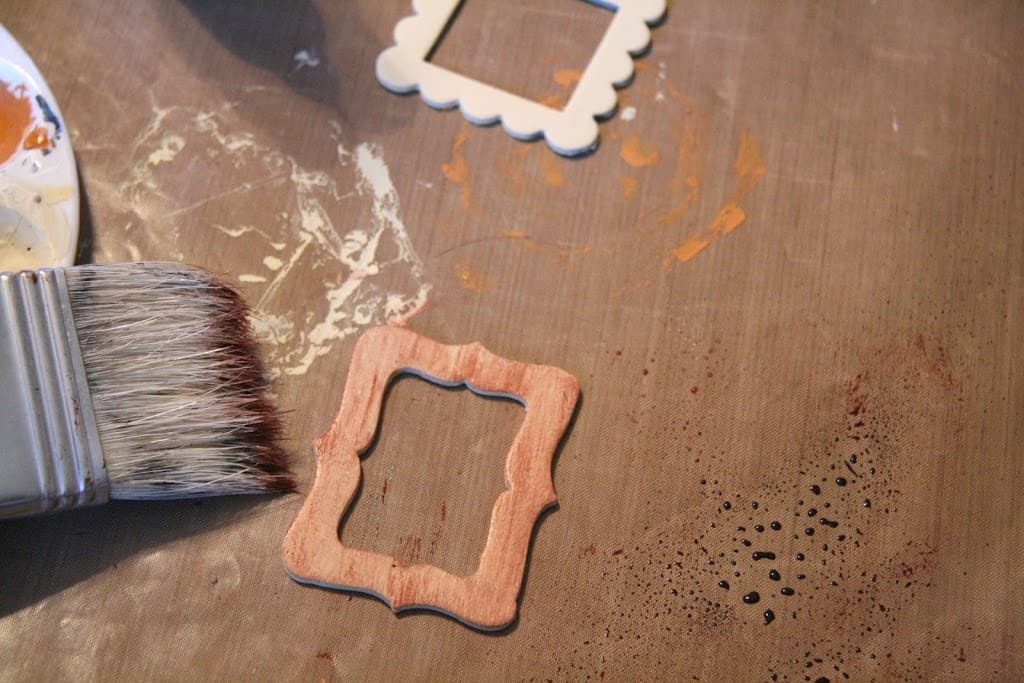
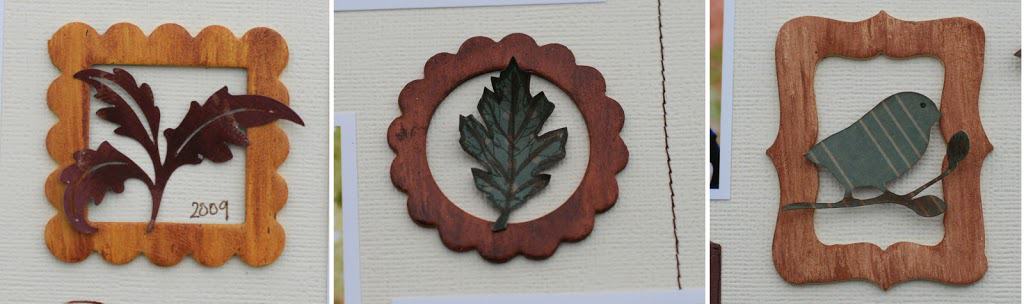
It’s best to work in one direction, like the grain found on wood. This first “wooden frame” mimics cedar. Simply, dry brush brown ink that has been sprayed on the matte over cream frame.
The second frame looks like oak. Brush yellow mist over cream and let dry. Follow up with dry brushing brown mist over the yellow.

The last frame looks like maple. Repeat dry brushing the brown ink over the burnt orange painted frame. Here they are together in order from right to left; maple, cedar, oak)
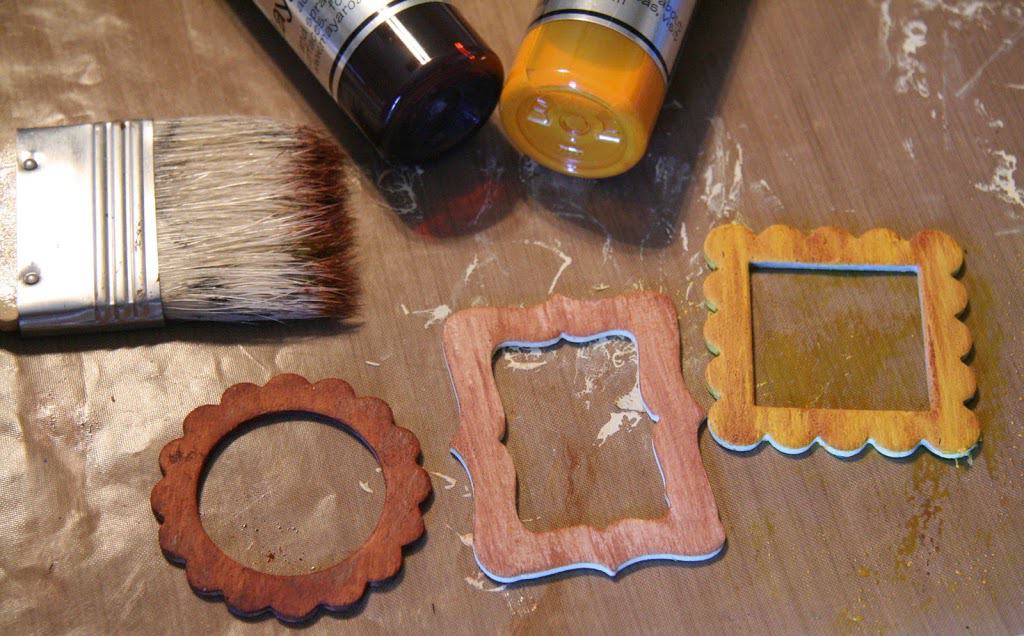
I finished off the oak and maple with a quick spray of Krylon Satin finish spray. I left the cedar unfinished because cedar wood often has a “raw” look to it.
Here are a few close up photos of the faux wood finishes.
All patterned papers by GCD Studios, Joyful Peace and Ella Blue Collections.
Other supplies used: Alpha Stickers by Making Memories, Punches by EK Success (acorn, leaf and label punch), Making Memories Slice using the Vintage Findings design card, and Stamps by Studio Calico (October) and Stamp Craft (leaf).
Be sure to subscribe to the GCD Studios Monthly newsletter for some helpful tips on assembling this style of scrapbook page.
Hope you can add some “wooden” embellishments to your next project!
I’ll be back tomorrow with a recap of our Halloween fun!


OK, this is just too creative! Love how you did this. TFS!
Love those frames, such a cool idea!
Great idea! TFS!
Very cool – thanks for sharing!
Ooh, I looooove that SC stamp and the mix of pics and accents here.
oh, what a fun technique!