Quick tips for painting bead board ceiling
I’m pretty certain it’s because I had the right tools. After watching my dear husband deal with aches and pains after painting the bead board on the porch, I knew I’d have to come up with some better options.
Here are my Quick tips for Painting Bead board ceiling.
1. Use a small roller and prep.
Ceilings are always a chore to paint. It’s over your head and it’s just plain hard on your body. After watching my husband struggle to paint our screened porch ceiling, which is also bead board, I knew my weak arms couldn’t tolerate a heavy roller. So before I started in the kitchen, I went searching and asking questions at my local Sherwin Williams. I told the sweet guy helping me I wanted to use a small roller and he suggested this one. (Although my stripes are blue.)
 |
| Contractor Series® Woven Gold Stripe Mini Rollers 2 Pack – 6″ |
The nap was durable and perfectly thick enough for getting into the grooves of the boards, but not enough to splatter paint everywhere. (I was so concerned about that I donned a handkerchief “do rag.” I’m sure you’d love a photo of that one, but unfortunately no one was home to photograph me. Ha!)
And when I say this roller was durable, I should probably elaborate. Because the bead board is probably original to the house, it had several patches where the paint had kind of flaked and the ceiling was very rough. I probably should have sanded the whole thing down, but instead I just focused on the most offensive parts and just covered the rest with paint. This left spots that were pretty prickly and this roller did not shred or lose fibers at all. A sponge roller would have lost chunks and died rather quickly.
While you may be scratching your head wondering why I would choose a smaller, 6″ roller instead of a regular sized or even an oversized roller, I can tell you that there’s only so much space you can cover while standing on a ladder. The lighter your roller is, the easier it is to move around. This small roller held a surprising amount of paint, definitely enough to cover the area within reach. I didn’t want to push around a roller that could hold more paint than I could cover in one section. If I had to climb down to reposition the ladder, I might as well refill the roller then too.
2. Have a stable, wide base step ladder.
My dear husband recently came home with this new handy step ladder. The small ladder we had was anything but stable after years of heavy use. This one is easy to move and has a nice wide base at the top to move on. You can even carefully turn around on it. Even as someone as short as me, it provides enough height to reach the ceiling with just the paint handle.
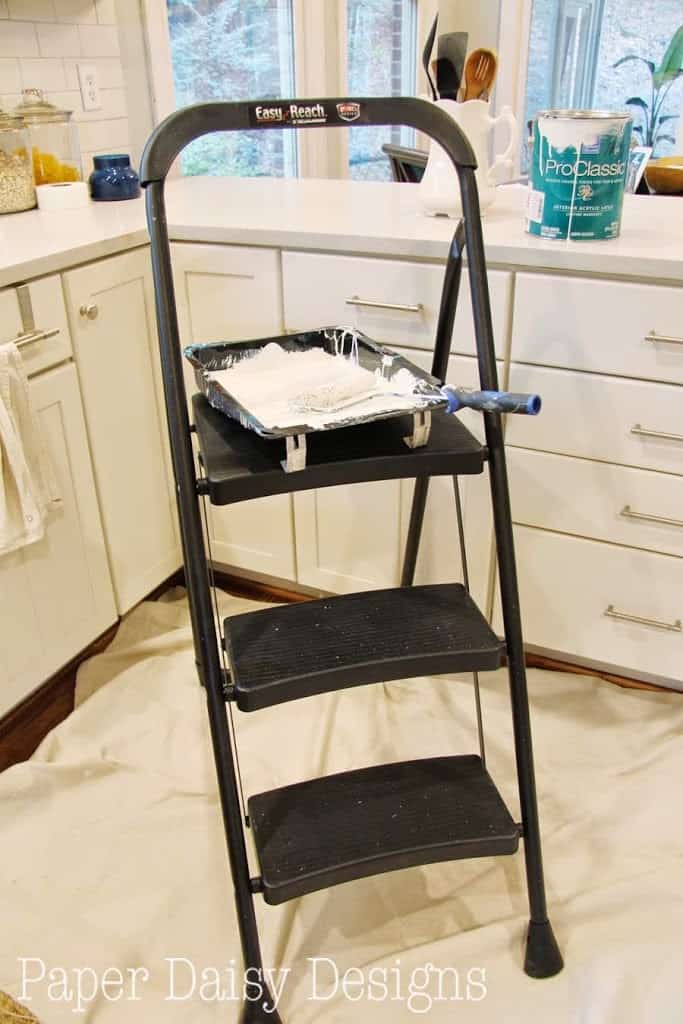
He did, actually, have the nerve to ask me to keep it clean. I told him I couldn’t make any promises. I was going to be using it to paint after all, but somehow I managed. (Actually, out of a kind heart, I put a piece of contact paper on the top step, but as luck would have it I don’t think I got one drop of paint on it.) He bought the step ladder from Home Depot.
3. Work in small sections.

Because the kitchen is naturally divided into three sections with the newly added beams, I told myself I was only going to do one section a day.
Well, I went against my own “rules” and did two the first day. Granted I took an hour or so break between the sections, but I as I neared the end of the section, I was really thinking I should have followed my own “rules.”
The next day I easily whipped out the last part. If I had pushed myself to do it all in one day I would have been really sore and extremely tired, if I could have done it at all. This way I had energy to work on a few little projects like painting planters and cook dinner. 😉
4. Match your original paint color and use quality paint.
I’m so thankful our home already had bead board ceilings in the kitchen. That was just one of the charming details in the home that made me fall in love with it. Assuming they are original to the house, they would about 14 years old and they were in desperate need of a fresh coat of paint. I used Sherwin Williams Pro Classic Interior Acrylic Latex in Semi Gloss.

I had a custom match made of the trim in the home and painted the ceiling that color. While I’m confident that I filled in the “cracks” in the bead board, I’m certain keeping the same color is much more forgiving than changing colors, like we did on the porch.
Here in lies the reason I was on my own for this bead board painting project. Dear hubby painted the porch by himself! Not only was the ceiling higher out there, but I changed colors on him! To paint that ceiling he started with a sprayer. Not a good idea because the one we have doesn’t like to be tilted. Then he moved to a heavy nap roller, which was super heavy. Even for a strong guy like him, he was very sore for several days. It’s a shame he had to suffer, but now I’ve figured out a better way to paint bead board and we all win!
I think that about covers it! I’ve got crown molding to paint now!
Have you ever painted bead board? Got any tips? Leave a comment and I’ll be happy to update the list!


Good tips . I’m the process of painting it now. We didn’t sand. My husband doesn’t want to sand at this point ..wil it look bad. Rougher I know but bad. ??
If you are using oil based paint I feel like it hides imperfections better. But ideally, you would just do a quick sand. Nothing too strenuous that I would suggest skipping.
Sorry, that is probably not what you wanted me to say.
Thanks for reading and good luck.
Leslie
I recently purchased a home with bead board ceiling in two rooms. Both are original to the home (built in the 1930s) and are chipping. Would you scrape it first and then sand some before painting? Do you think the scraping knife to get the loose paint off would be enough?
Boring, also you wasted your time. A pole and a 14” roller and drop cloth and you’re done in 20 minutes. Either way your neck is going to be affected looking up so why not get it done in in 20 minutes instead of an hour. Just saying
You are entitled to your opinon and you could have kept it to yourself actually. BUT I have limited shoulder strength and this worked great for me! I thought it was worth sharing for others like me.
I welcome all advice even when I don’t use all of it. I am working on bb ceilings from 1890s, full of buckles and gaps and other problems of age, moisture etc. Main problem is selecting right white, as we have fir coffers (beams) and new golden bb walls AND a section with bb wainscote below sheetrock.