The beauty of vellum
I’m so happy vellum is making a come back! I think it was sparked by the arrival of goodies in cute little glycine envelopes that helped vellum resurgence. (That’s just my theory and who knows if that’s true.) 😉 What I know for sure is that my scrapbooks are full of “older” pages that include vellum. I know I loved teaching my vellum class back in the day, because vellum done right is a very pretty thing. Obviously, as with anything it can always be overdone, but there are instances when vellum is the perfect embellishment for your page.
Here’s the page I created to share with you today.
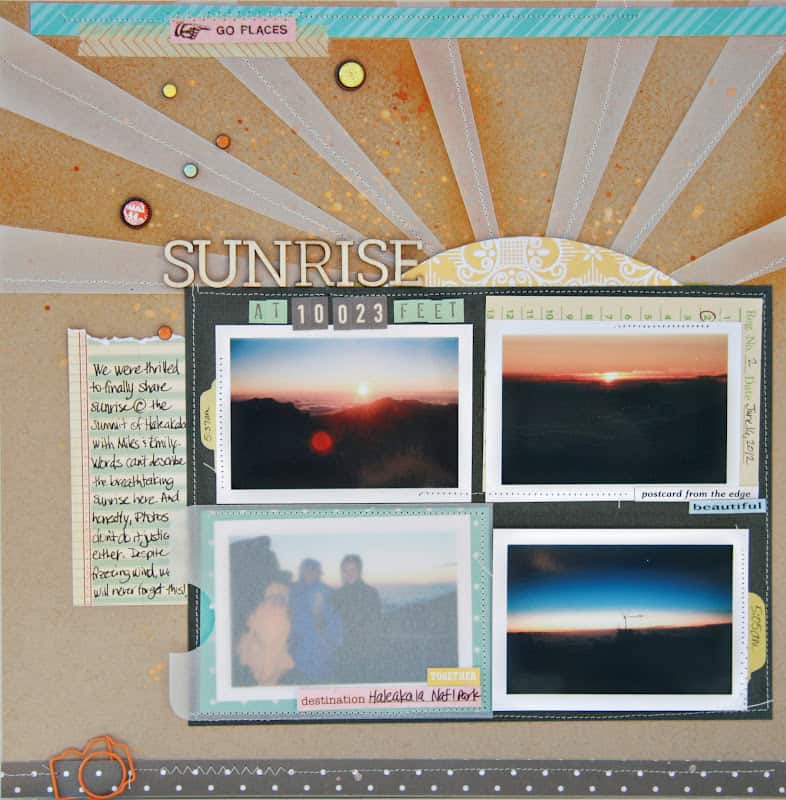
As you can see, I used vellum in two places. Once to create the rays of the sun and the other to create a pocket for one of my photos.
I began my layout, as I almost always do by layering my photos and cardstock on the page. Once I had a feel for where everything was going to go I moved the cardstock to my spray box and dappled a bit of “sunshine” with some mist.
(Here’s a tip: before I move the elements off my page for misting or ink spotting, I snap a photo of the layout with my iPhone. That way I know where I had everything!)
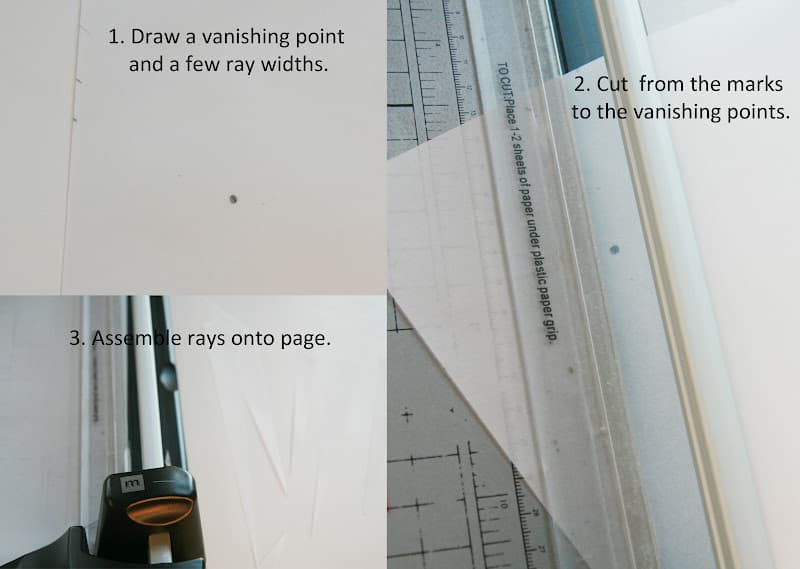
To make my rays, I had to think back to art class and realized that using a vanishing point would give the rays a bit of perspective.
Here’s how I did it.
Now, here’s the thing you’ve got to consider about vellum. Using glue or dots with vellum is just ugly. The most attractive way to adhere vellum is to sew, or use brads, eyelets, buttons, or generally anything that inherently attaches one thing to another is great. Or you can hide adhesive under other elements. I chose to use my favorite, stitching.
Here’s a close up of the rays sewn in place.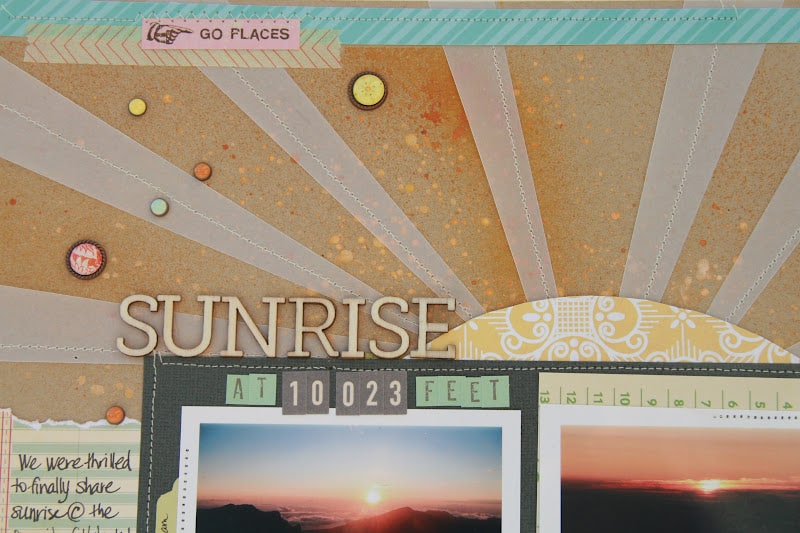
Vellum is also perfect for pockets. Being able to see through the pocket invites the reader to take a peak inside. I often tuck multiple things in pockets, like brochures or ticket stubs. You can also create a little window to highlight a certain part of the photo, if you’d like.
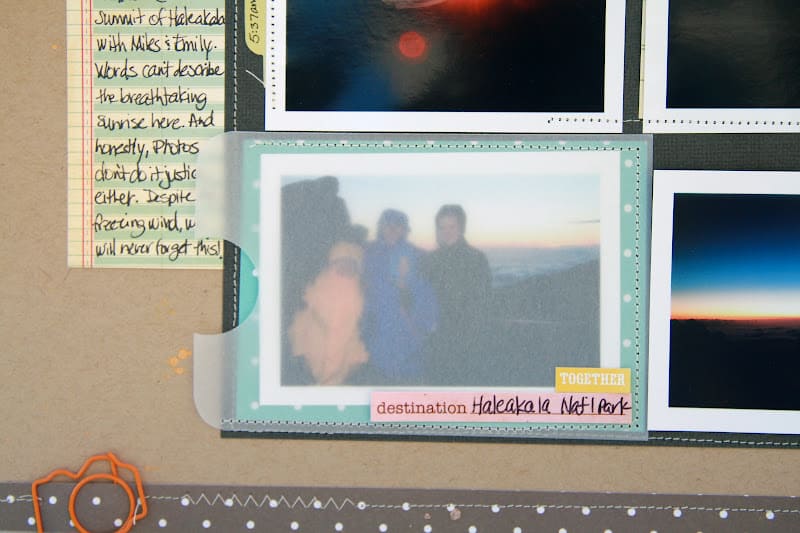
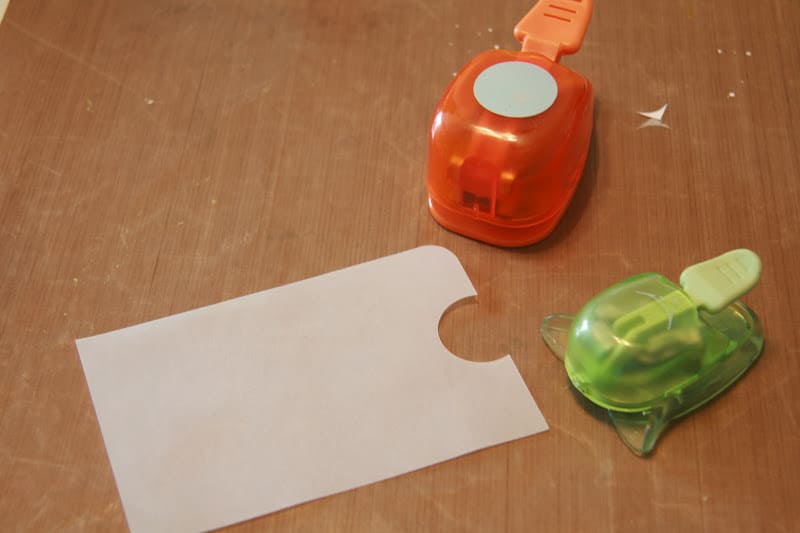
To create my own “library pocket” I cut a rectangle a little larger than my photo. I took a circle punch and cut more than half of a circle in the “top” edge and used a corner rounder to punched like so…
Now that I have a fresh stash of vellum in my studio, I know I’ll be creating lots of these semi-transparent embellishments for my pages. 🙂
Here’s another look at the layout. Now go and create your own vellum beauty! I know this one is going to be one of my favorites for a long time. 🙂
Supplies: Patterned Paper: GCD Studios Country Charm, Splendor Collections & Cosmo Cricket, Stickers: Making Memories, Cosmo Cricket, Letters: Studio Calico, October Afternoon & Dear Lizzy, Brads: Basic Grey, Paper Clip: Amy Tangerine, Mists: Maya Roads Cream Metallic and Studio Calico Sunshine.


