Upcycled Side Table
Our back patio has been experiencing a wonderful transformation. From drab slab and grass to a inviting backyard retreat you actually can relax and enjoy.
Last time I mentioned our patio, I had converted a chair into table.
Remember this? You can see how to create your own chair-table here.
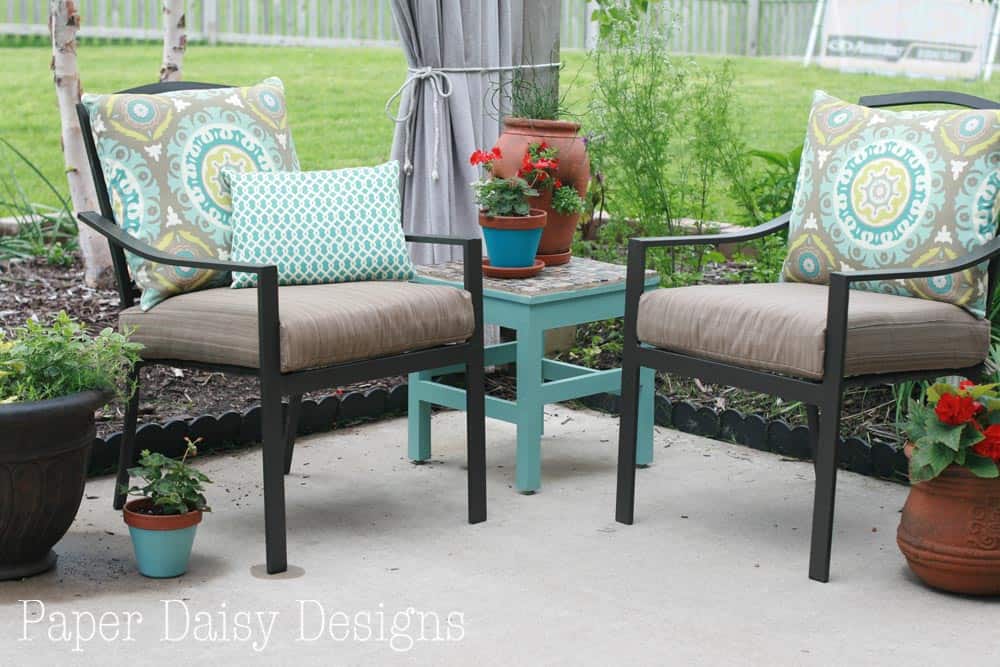
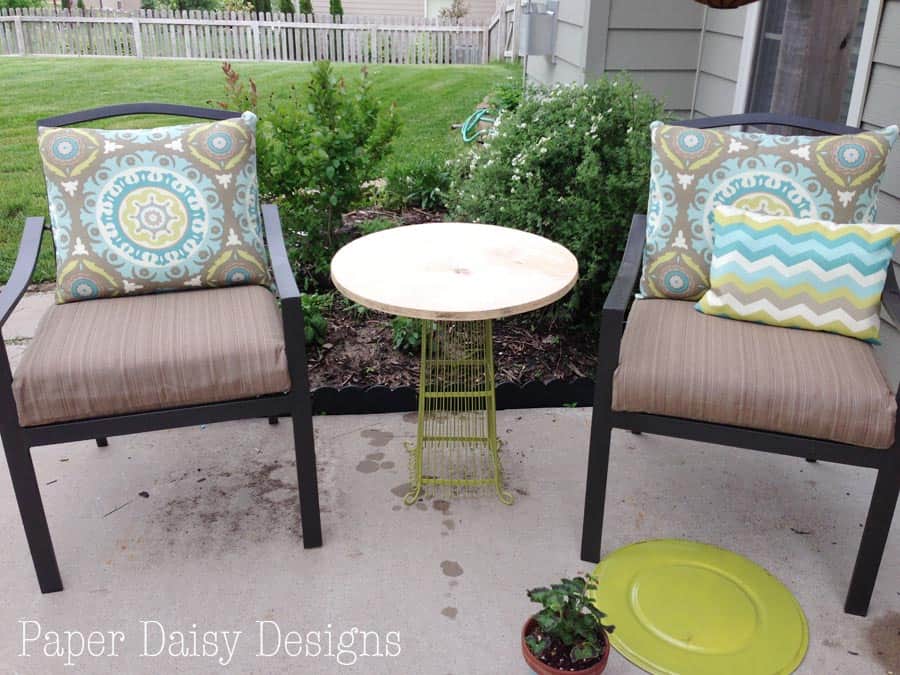
Today, we are focusing on the other side of patio and another comfy seat grouping. Having two seating areas is really nice, because sometimes one set is in the shade and sometimes the other. 😉
My thoughts are if we are entertaining, we can always bring the grouping together. But for every day, it’s better for the flow to the backyard to have them as two separate areas.
So, onto the table the other table.
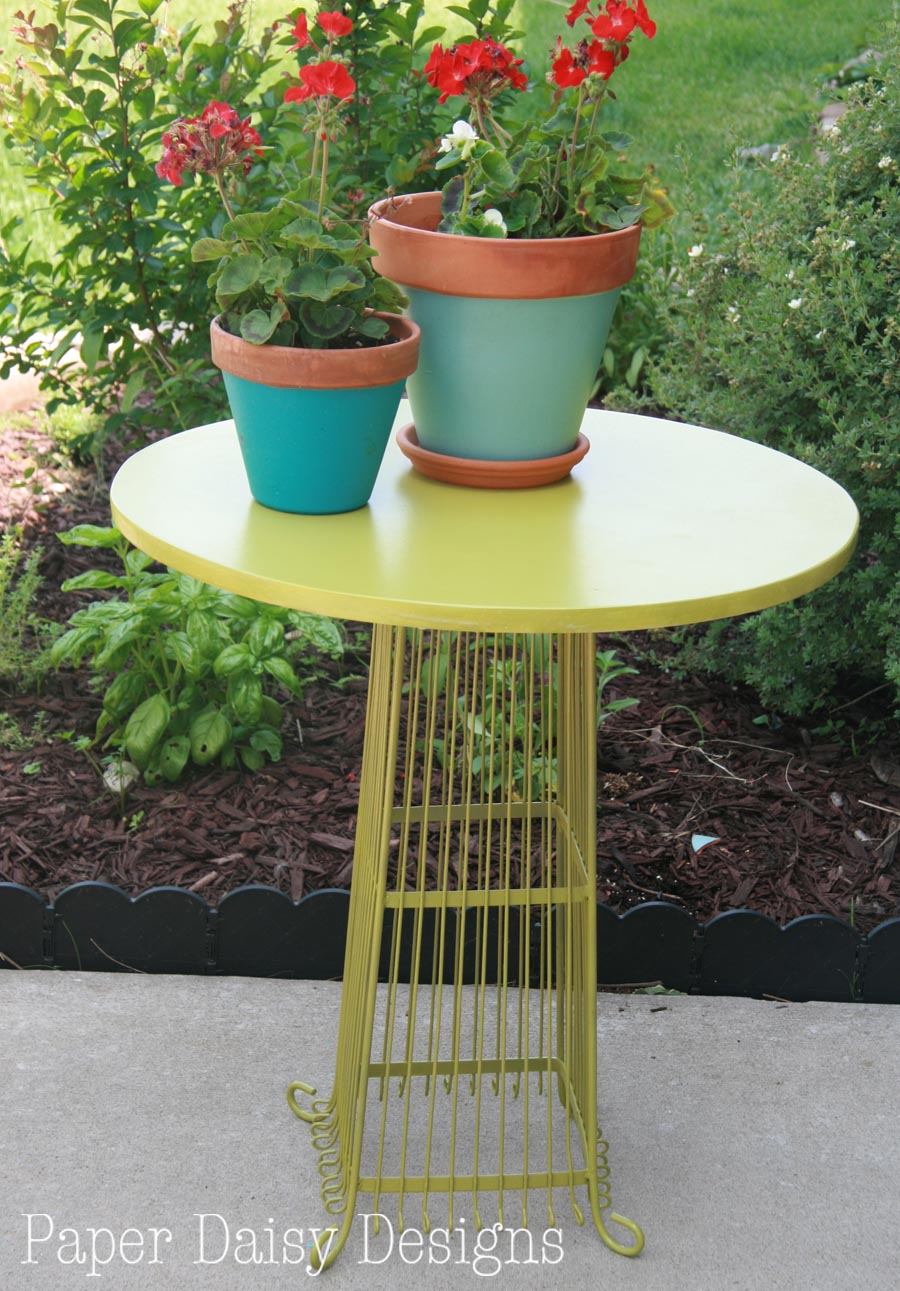
I was browsing my local Salvation Army and found this interesting specimen. It’s actually an umbrellas stand.
But when I snapped this photo I had already converted it, in my mind a least, to a plant stand. 😉
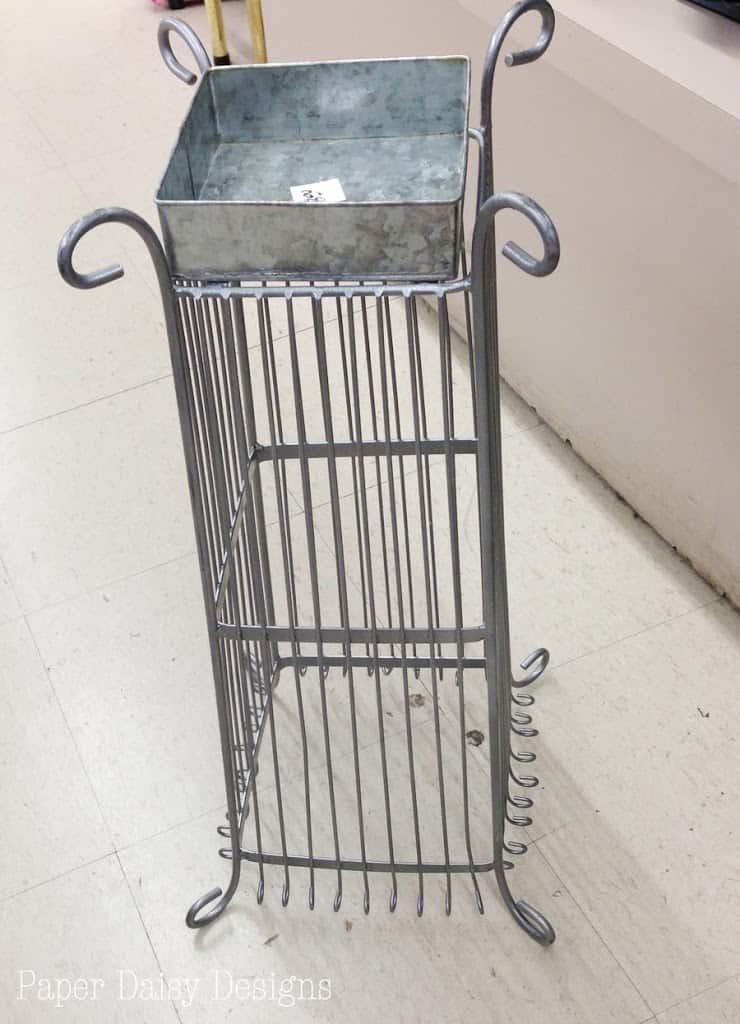
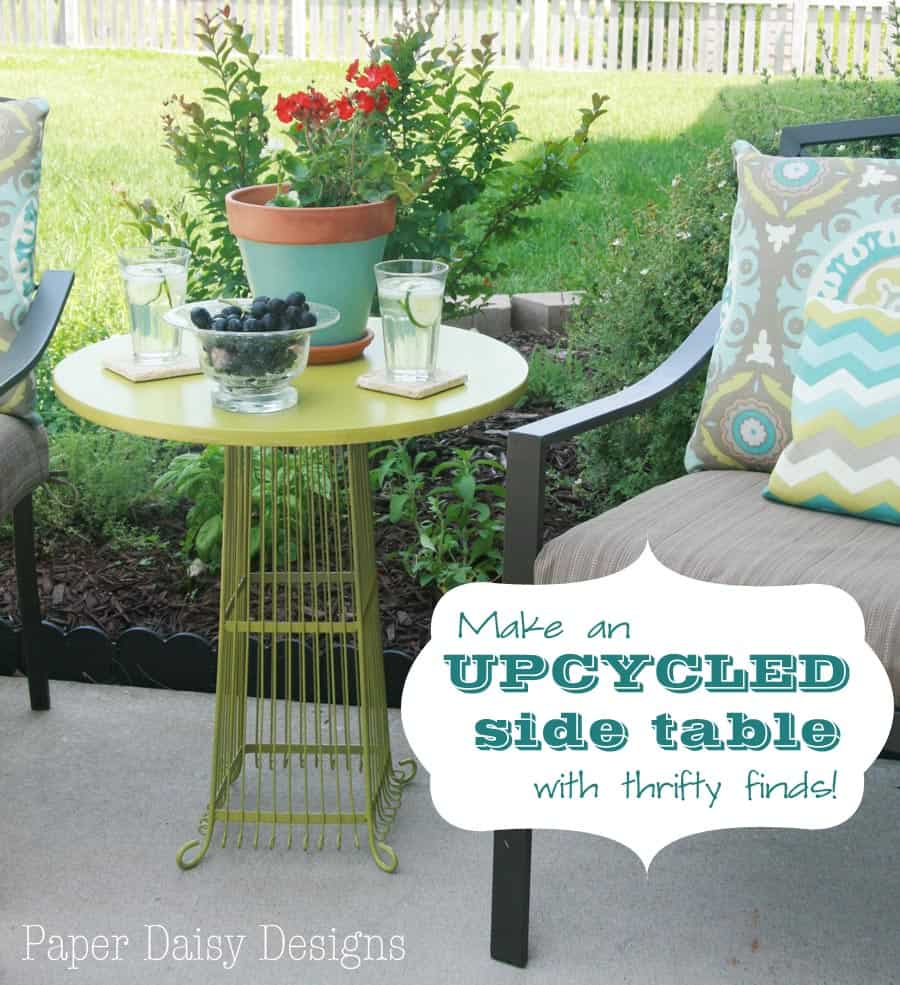
Cool, right? A interesting plant stand for $8. Gotta like it.
But as I turned the corner to check out, I found an aluminum tray for $1 and thought, it’s a table!
I spray painted both out and this is the result.
Cute, but a little lack luster. I didn’t like how the ridges of the upside down tray held water and where are the beverages and maybe a snack going to go?
It sat unattached for about a week. Can’t explain why really. I couldn’t have known or even thought up what was going to happen next.
But then, it was garbage day and Tucker and I went on a run around the neighborhood.
In a new construction dumpster, I spied this perfectly cut piece of wood! Ah, hello! That could be anything. A clock? A tabletop??
I finished my run, I may have picked up my pace at that point, grabbed my tall teenage boy and had him reach it out of the dumpster. Score!
After much brainstorming, I realized it needed to be the tabletop. Thank goodness for procrastination!
Much better don’t you think? More real estate for your beverages and even a snack!

I spray painted the tabletop to match the base and finished it with two coats of Minwax Polycrylic.
To attach the wooden round to the umbrella stand base, I cut 4 pieces of metal flashing with some heavy duty snips.
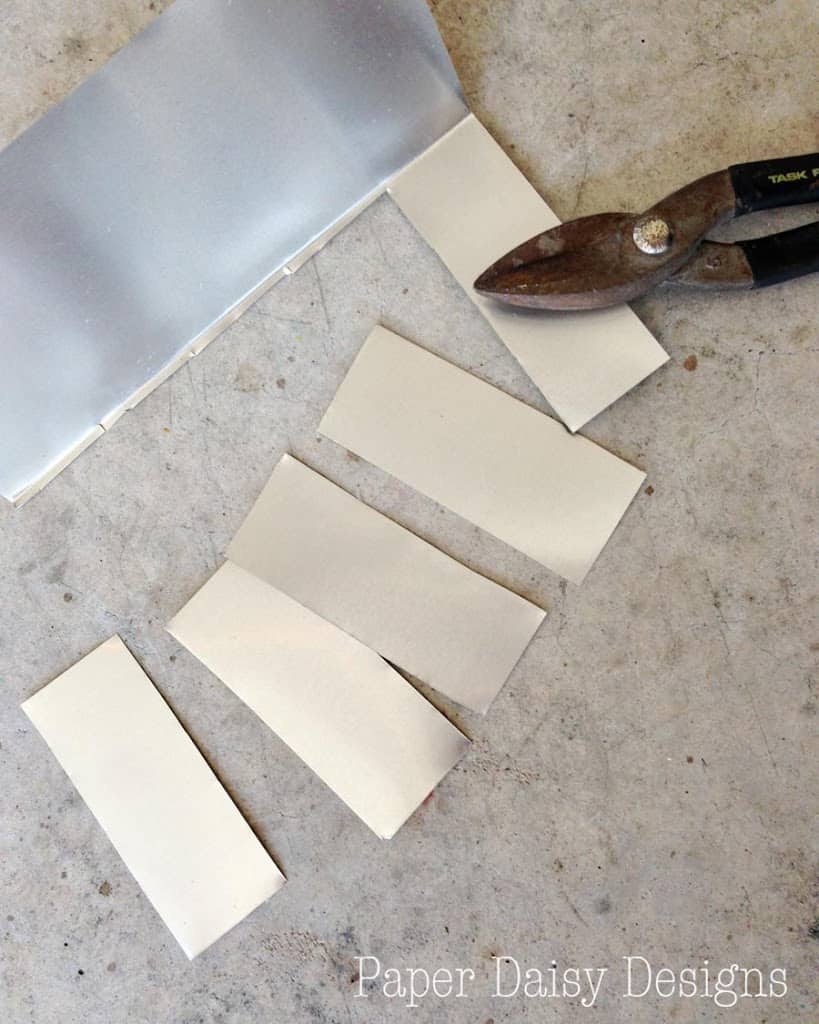
I folded the flashing in half, because they were to wide to fit, making them extra sturdy.
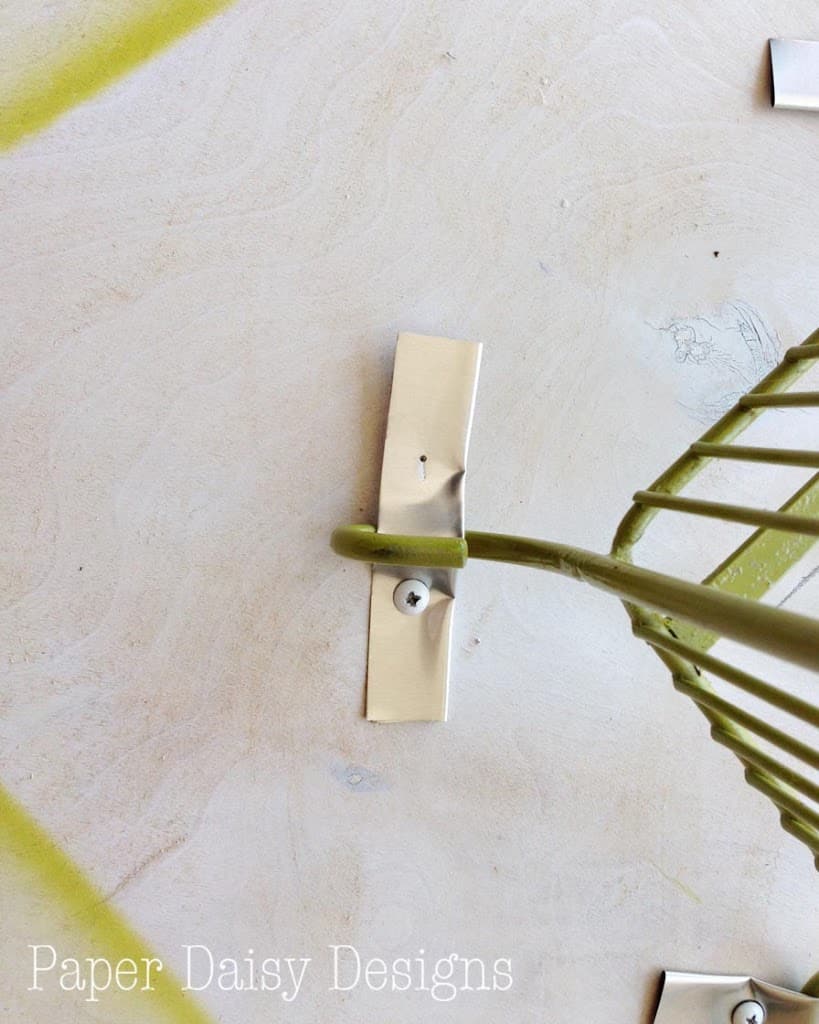
Then I drilled a small pilot hole through the metal and added the screws.
In case you were wondering, when I was going to use the metal tray, I had planned to attach the top in a similar fashion, using epoxy to glue the metal straps over the stand’s wire loops.
A quick flip over and it was in place!
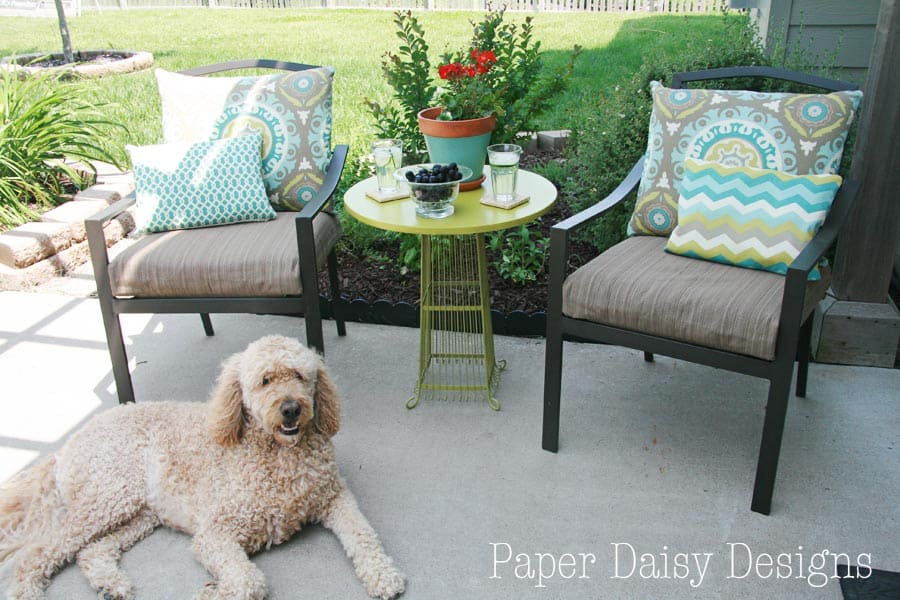
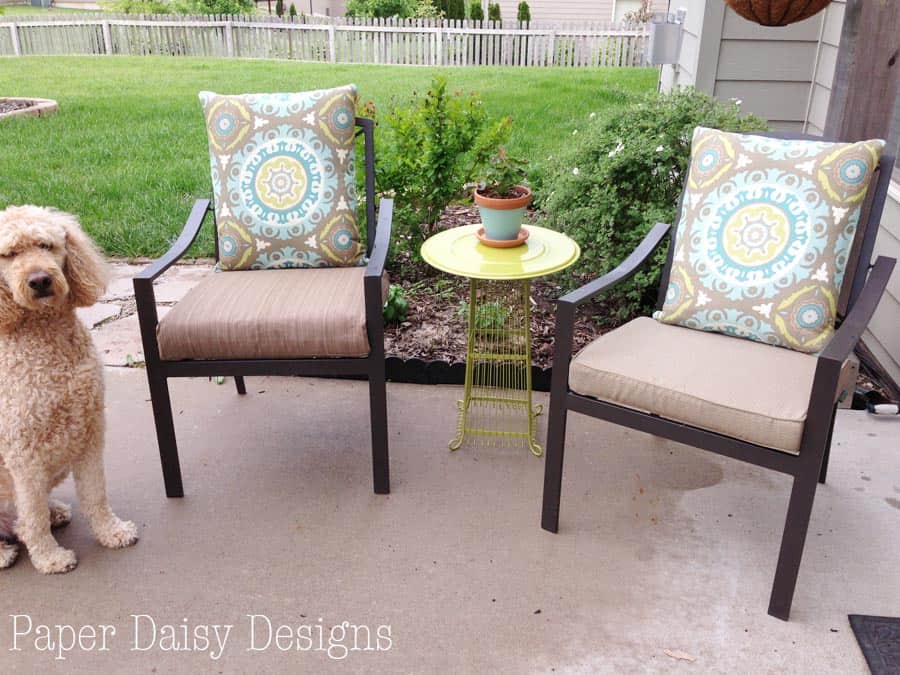
Now we are ready for summer!! And it’s super cute, right? All for $8 and a little paint. You can’t beat that.
Be sure to come again, the best transformation is yet to come in this backyard oasis. 😉
Sharing here: Mop it Up Monday’s @ I should be mopping the Floor / Nifty Thrifty Sunday @ Nifty Thrifty Things / Martha Monday’s @ Watch Out Martha / That DIY Party @ DIY Show Off / More the Merrier @ DIY Home Sweet Home / Nifty Thrifty Tuesday @ Coastal Charm / Get your Craft On @ Today’s Creative Blog / Tutorials Tips Party @Homestories A to Z / Wow Us Wednesday @ Savvy Southern Style /Power of Paint @ Domestically Speaking / The Summer Bucket List@ the Foley Family / Humble Brag Party @ One Project Closer / Chic and Crafty Party @the Frugal Girls / Show and Share @ Southern Lovely/ Transformation Thursday @ Shabby Creek Cottage / Hooking up @House of Hepworths / Feathered Nest Friday @ French Country Cottage / Be Inspired Friday @ Common Ground / Friday Link-up @ Redoux / Shabbilicious Friday @ Shabby Art Boutique / Frugal Friday @ The Shabby Nest / Pity Party @ Thirty Hnndmade Days / Party Junk @ Funky Junk Interiors / Shine on Friday@ One Artsy Mama /


Leslie, you're so good at transforming the ordinary to something extraordinary. I would NEVER in a million years have looked at that umbrella stand and thought "ahhh…a table!" Not even a plant stand, although that was a little less of a stretch. Anyway, great job, it looks awesome.<br /><br />Debbie
You are amazing. Who would have thought of that. I love that table. This is such an awesome post. I would love it if you would share this post at our WIW linky party. Hope you can join us!<br /><br />Paula<br />ivyandelephants.blogspot.com<br /><br />
I love little side tables and round top tables. The idea of using the tray was cute. I love getting ideas of things to use for parts that I might overlook otherwise. In the end, the wood turned out great. <br />Liz
I love it! It's so cute – and you were so clever to think of it. Love that shade of green, too – it's both festive & relaxing (if that's possible, LOL). Thanks so much for sharing!<br /><br />Kim @ <a href="http://www.enjoytheviewblog.com" rel="nofollow">{enjoy the view}</a>
What a clever little table! I love how you saw another use for those items. And now you have a piece of furniture unlike anyone else. Bravo!
You are so clever! Thank you so much for sharing at my party. Featuring today at 2:00 PST. Happy 4th!
Congrats on your feature over at Redoux, Leslie! Woo Hoo! Hope you're having a terrific 4th. <br /><br />Debbie
This is so awesome and creative, I love it! <br />~Katie @ Upcycled Treasures
Cute table! What a great way to upcycle finds from the thrift store. That's my color, too!<br /><br /><a href="http://ngnrdgrl.blogspot.com" rel="nofollow">Bethany the ngnrdgrl</a>
It's an adorable idea! You trully inspired me, thanks!