I’m back with another installment of the Lost Post Series. Although, now that I’ve edited the photos I realize why this post was set aside. Well, there might have of been one more reason as well. I’ll get to that at the end.
The driving factor for posting this, despite the photos, is that it was very popular on my Furniture tab. Most of the comments on that page were regarding this piece of furniture. I felt that now that the comments are gone from that tab on the new site, it was only right to create a to step-by-step instruction in an actual post.
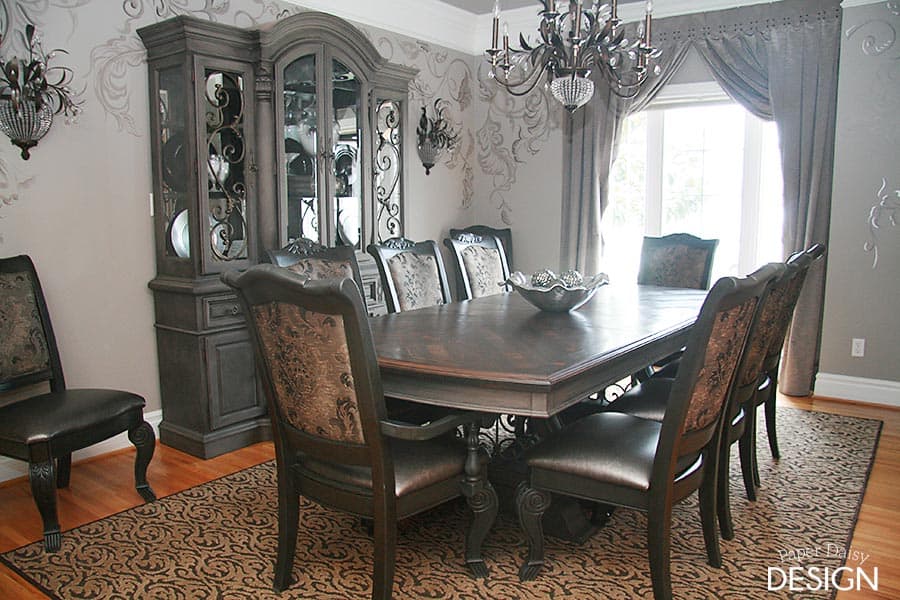
Here’s the image that garnered so much attention. 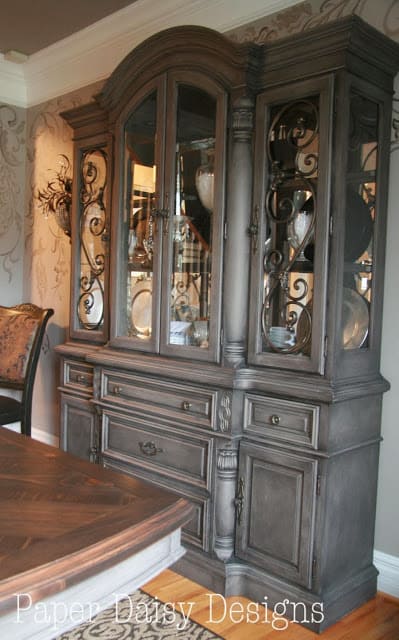
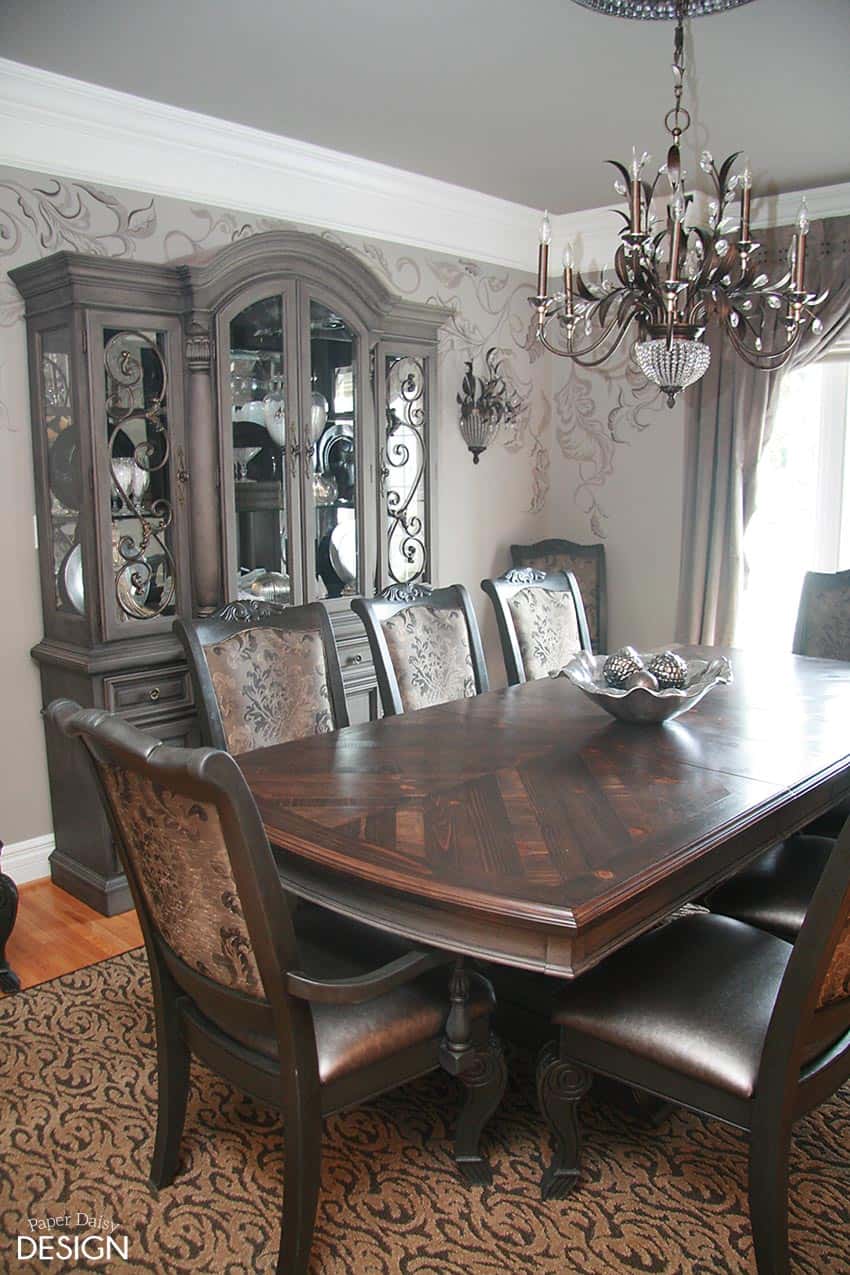
My friend hired me to paint this whole room of furniture the summer before we moved. It was already a gorgeous room, but with the new paint finishes it became a true knock-out.
I don’t think either one of us could have predicted how perfectly this hutch was going to match her hand painted mural.
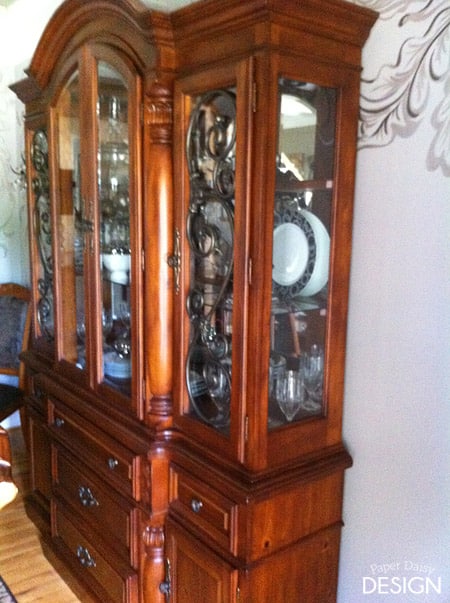
Here’s a look at the before of the hutch and you can see a peak of the chairs too.
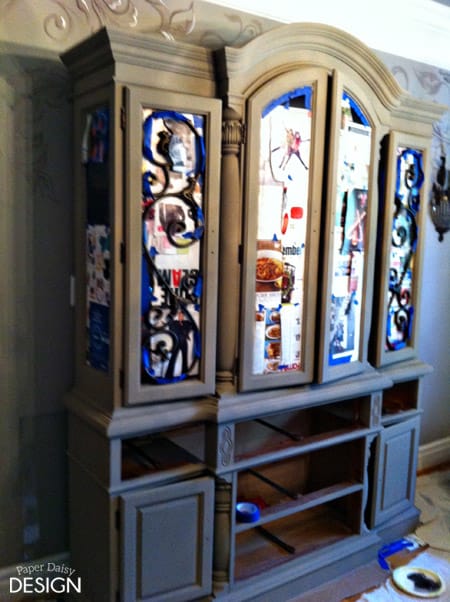
After 2 coats of Coco Annie Sloan Chalk Paint it looked like this. You can see I inserted magazine paper to cover the glass in addition to tape. In some places this worked out great, in others it was a nightmare to get the paper out from under the wood. Not sure I’d recommend this idea.
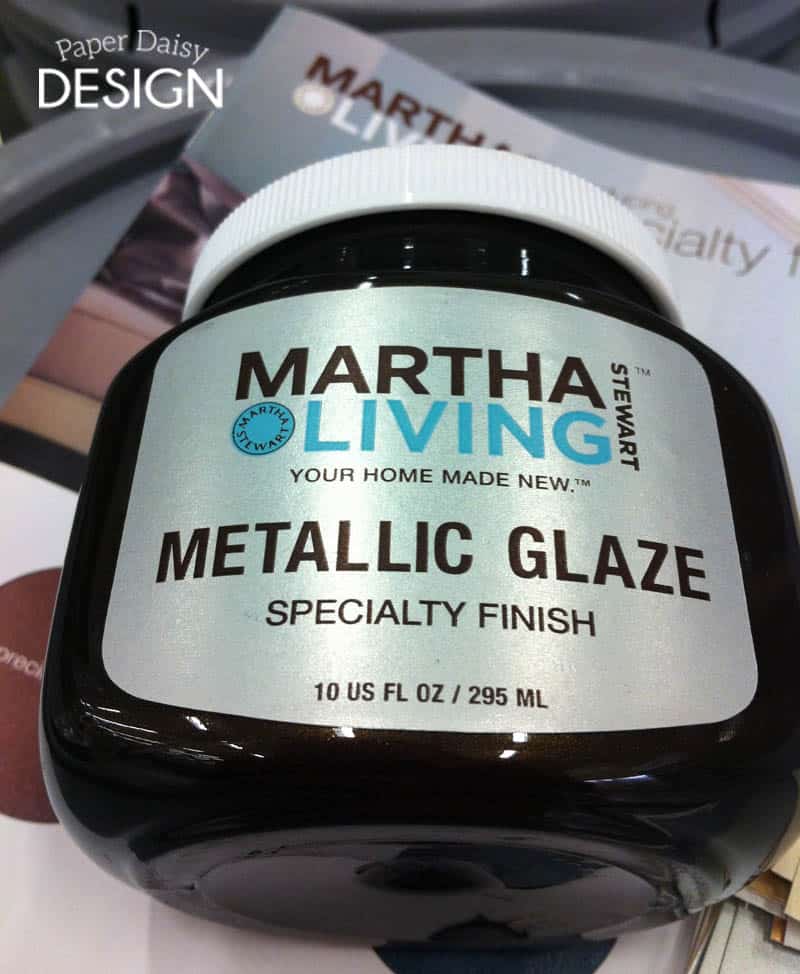
To give the piece more depth and just a bit of sparkly essence, I added Martha Stewart Metallic Glaze in Black Coffee.
NOTE: THIS PRODUCT SEEMS TO BE DISCONTINUED.
I think I have found a possible replacement. HOWEVER, I have NOT tried this product.
I just wanted to share because it seems to the same product, repackaged under a different brand.
Here’s a link for your convenience.
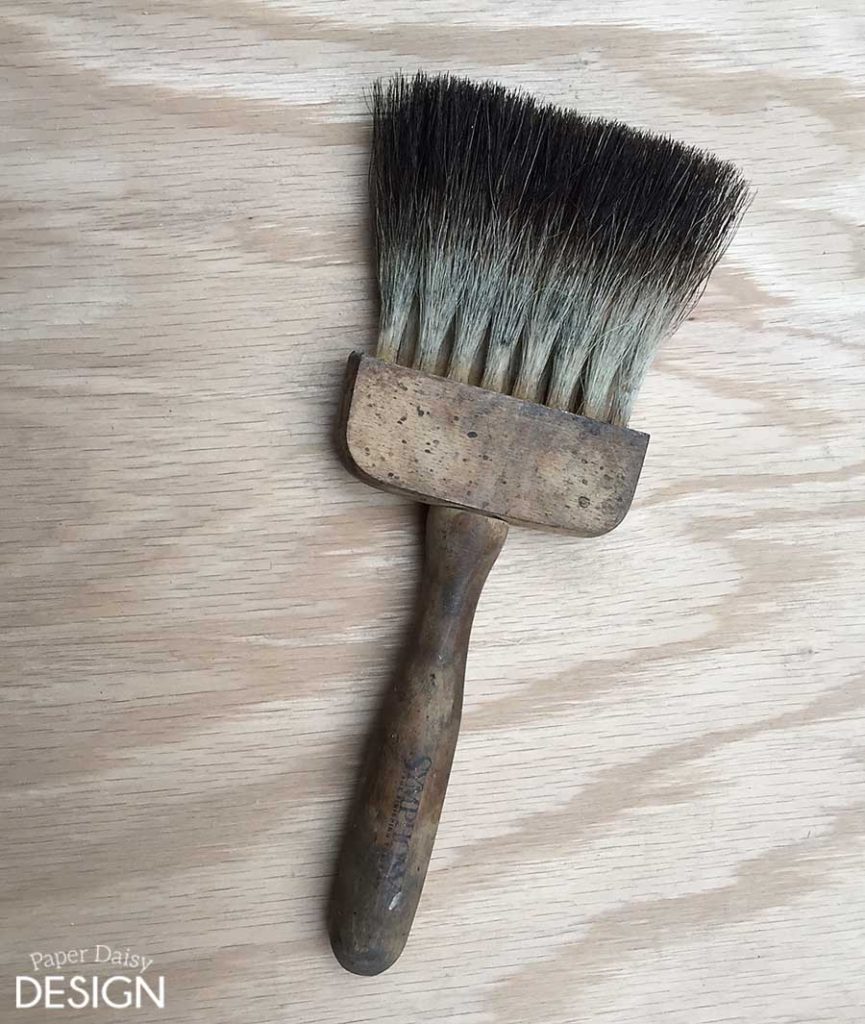
I used a inexpensive 3″ natural haired brush to “paint” on the glaze in an even coat. Then with a faux finish brush like this one, I feathered the glaze out. Kind of like working the glaze into the paint, using a sweeping motion in both directions, working in about 1 foot sections. I kept paper towels handy to wipe off the faux finish brush often.
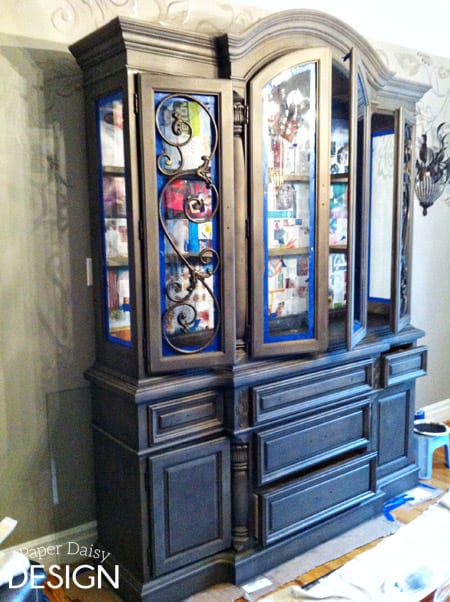
After one coat of glaze it looked like this. You can see the dramatic difference it made. I think this photo makes the finish look a little blotchy. I remembered that in real life it didn’t look so much so. Although, I will admit I got a more even finish as I perfected my technique. (Which is why I started with the side of the hutch no one would see.)
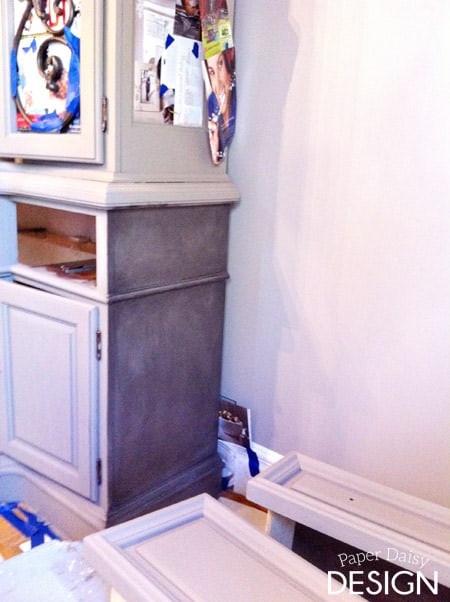 After one coat of glaze it looked like this.
I let it cure for over the weekend. Once I went back to the piece I realized, thankfully, that the glaze provided plenty of protection for the paint and did not require any further top coat.
I also used this technique on the base of the table.
For the top, I stripped the old red/orange finish off, sanded and refinished with Varathane Wood Stain, in Kona, topped with Minwax Wipe on Poly in Satin
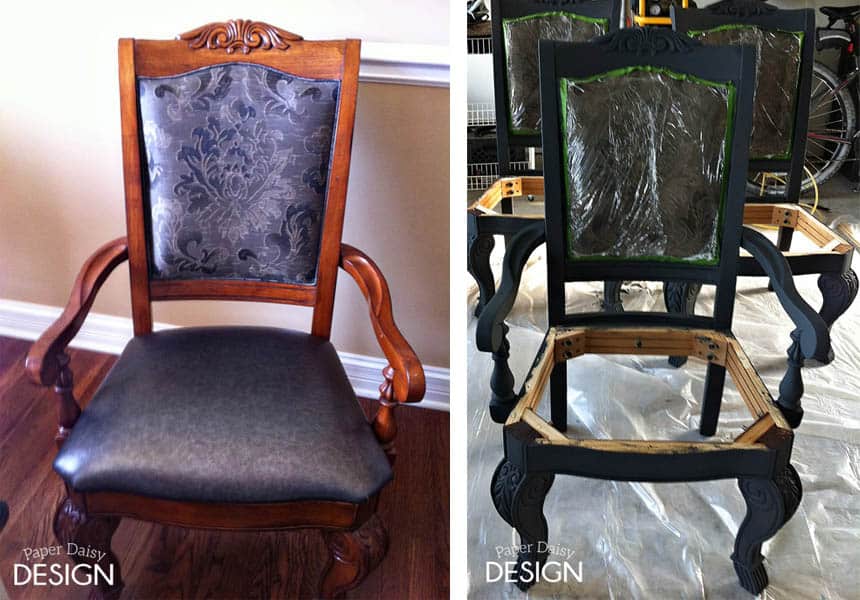
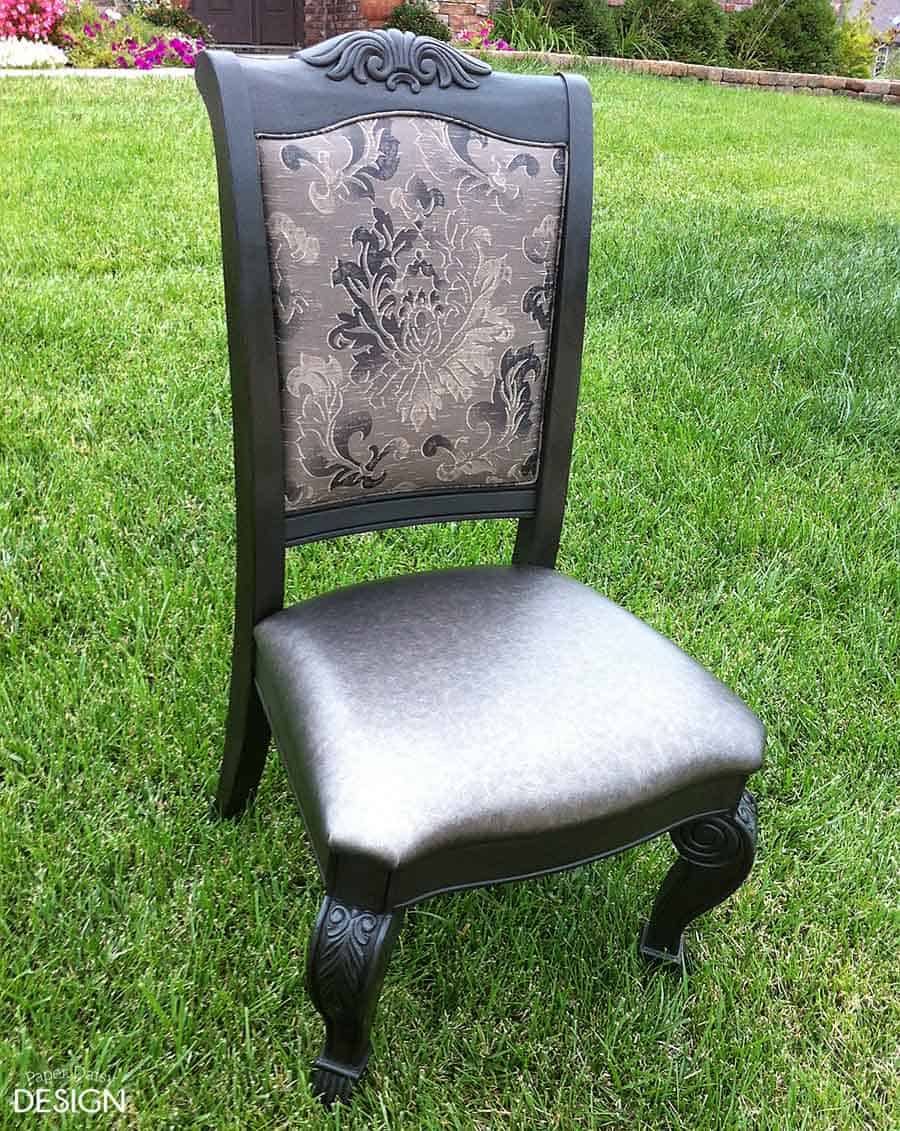
I’ll go ahead and mention the technique I used on the dinning chairs because they received an entirely different finish. First, they were painted with Annie Sloan Chalk Paint in Graphite.
Then, to warm up the color and match the tone of the fabric more closely, I applied straight Annie Sloan Dark Wax.
I will tell you that it took at least a week for the tackiness to go away even after much buffing. This is because it was a rather heavy coat of wax. Once it cured it had a very nice smooth finish.
Now I’m going to insert a bit of the Q&A that went with that post.
Q . Do you apply the glaze over the 2nd coat of chalk paint or did you apply the wax made for chalk paint first? I tried applying the Martha Stewart black metallic glaze over chalk paint and it doesn’t seem to do anything. I am wiping it with a damp rag after applying, am I doing something wrong?
A. I did have to use two coats of chalk paint. If you wipe the glaze off it will be too light and only fall into the grooves of the piece. Sometimes that is the look you want, but in this case we wanted a more overall finish. As I said, I painted on the finish and then used the faux finish brush almost as if I was sweeping the piece leaving a soft haze of glaze behind.
Q. I’m looking at the big hutch with the Coco ASCP and Martha Stewart Black Metallic Glaze. It looks gray not coco. Was the coco gray or brown tone? I’m trying to achieve a gray and wondering if this will work for me.
A. In the photo, the walls were so close to the Coco color it appears a little washed out. I can best describe Coco as a dark greige. It is definitely more brown than the color French Linen from Annie Sloan.
Hope you enjoy this lost treasure of post! To say this was an enormous job is quite the understatement. So the other reason I probably let the project go without a mention had to do with the fact I was so done with this project!
Want to see more of my Furniture Flips? Click here.






50 Comments
Jennifer
January 26, 2015 at 9:31 pmWow! That furniture looks so beautiful. You do awesome refinishing work! I’ve always wanted to learn how to refinish furniture, but just have never had the time. You’ve definitely stirred up some inspiration 🙂 Thanks for sharing!
Nelda
January 27, 2015 at 10:08 pmThis is so beautiful! Really some good work here!
Amy Jo
February 7, 2015 at 7:53 amGreat job! I know this was a huge project! Turned out perfect!
Laurel Sutton
April 22, 2015 at 12:37 pmI love this piece! I can’t wait to try out your technique!
Aw
May 29, 2015 at 5:47 pmHi i LOVE this dinning room, i was wondering about your walls are those decals or did you paint the pattern on them 🙂 if they are decals where did you get them, So beautiful!
Mitch
September 30, 2016 at 5:36 pmJo Ann fabric sells stencils
Dale Ann Laravee
August 30, 2015 at 1:57 pmThat hutch is stunning! I just finished painting an old buffet with two coats of Cocoa and went online for ideas as to how to finish it and now I’ve found it! I do have a question for you though. When painting pieces as large as that hutch do you paint by hand or do you spray paint? I bought a sprayer recently but haven’t tried it yet.
Leslie
August 30, 2015 at 7:40 pmI have a sprayer that I like now and I actually just shared information on it here just recently.
https://deeplysouthernhome.com/2015/08/tarva-ikea-hack-greek-key-dresser.html
But when I did this piece I didn’t have a sprayer and with chalk paint, generally you want a hand painted look.
Unfortunately, this particular glaze has been discontinued and I don’t have a product to recommend. Sorry!
Kathy Frye
November 13, 2015 at 1:51 pmI’m not sure if you answered this or not. On the hutch, did you glaze right over the chalk paint? I was told to apply a light poly coat first ( because the paint is so chalky), then the glaze. then one more poly. I don’t really want to use the wax. I’ve seen it on a sample and it isn’t very smooth. Help
Thanks, Kathy
jennifer
January 15, 2016 at 11:08 amHi i have a question! First this is beautiful!!!!!! Second i want to recreate this with my bedroom furniture, but the martha stewart glaze has been discontinued i see 🙁 any other options of glaze that would give the same look? thanks for your helpful post!
Leslie
January 15, 2016 at 8:31 pmYes, I’m sorry you missed it in the post. Here’s a link to a product I think is exactly the same. This is an affiliate link. http://amzn.to/1n1PQ1q
Chalk Painted Furniture by Color - Grey Chalk Paint
June 27, 2016 at 9:56 am[…] I have thought about repainting my kitchen hutch and this one might convince me it’s worth it to paint it with grey chalk paint. Click on over to see all of the new painted furniture! {source} […]
Kelly
July 7, 2016 at 8:18 amHi Leslie,
This all looks great! Question, did you sand the hutch or strip it before applying the 2 coats of chalk paint? I’d like to avoid a lot of sanding/stripping and want to re-do our bedroom furniture, just like this.
Thanks!
Kelly
Cabinet Blog
August 14, 2016 at 10:55 pmPortofino Comfort Motion Rocker Set In Chalk
[…] was very popular on my Furniture tab. Most of the comments on that page were re […]
Amber j turk
August 20, 2016 at 7:40 amdid you apply wax before the metallic glaze?
Mary
October 11, 2016 at 9:18 amWondering the same thing. Did u get a reply?
Leslie
October 11, 2016 at 9:41 amI did not wax at all. Neither before or after. The glaze created a nice, finish once it cured about a week.
Josie
October 28, 2016 at 2:26 pmThe link is not to a glaze. It is a metallic paint. I didn’t even pay attention and when I made the first swipe, I knew there was a problem.
Leslie
October 29, 2016 at 9:00 amIt should work as a glaze as well. I used just a small amount working it in over an area with the brush above. It’s always a good idea to work on a sample board first. Hope this helps.
Lauren
November 1, 2016 at 11:58 pmI was wondering if you added the glaze while the paint was completely dry or still a little wet. I was able to find the Martha glaze you used and mine is coming out very dark and not like the light grayish look you had. Any suggestions?
Leslie
November 2, 2016 at 5:42 pmLauren,
The paint was definitely dry. Like several days dry. It is very much an application and a removal process with the glaze. Glaze really never is painted on. Try offloading your brush on a plastic plate and then use a rag or the faux finishing brush I mention to remove excess paint and leave just a hint of the glaze.
I’d love to know where you found this glaze so I can direct others.
Thanks and hope this helps.
Terrie Levingston
February 22, 2017 at 2:31 pmwhat did you do about the hardware?
Amy
January 1, 2017 at 8:13 pmIt looks like it was highlighted with white over the dark glaze, or is it just the light shinning on the piece. Very beautiful piece, I am going good to try to apply something similar to my old kitchen cabinets. Thanks for sharing.
Leslie
January 2, 2017 at 10:54 amI think what you are seeing is the metallic reflection of the glaze I used. It was fairly subtle, not shiny metallic but enough to give it a bit of glamor.
Charyce Nicholson
February 9, 2017 at 11:26 amYou seriously should win some kind of award for this! Not just because of the finished product, but because of all the hard work! I live in Houston where there are high end furniture stores every few miles. This is better than anything you’d find on their sales floor. Cudos for perfection!
Leslie
February 23, 2017 at 10:00 amOh, Thank you! What a compliment!
Dani
March 8, 2017 at 10:27 amDo you know the brand of the hutch and table? I would like to try and find them or something similar.
Leslie
March 8, 2017 at 3:36 pmDani,
I’m sorry I have no idea. It was my friend’s piece and I have moved away. Wish I could be more help.
Patty aguilera
March 8, 2017 at 12:43 pmI can’t find the glaze any where. Can you help me?
Leslie
March 8, 2017 at 3:37 pmIn my post I shared this affiliate link to Amazon. I have not used this product but it appears to be exactly the same. The Martha Stewart one is not available at Home Depot anymore.
http://amzn.to/2lZWIvO
Good luck and I hope this helps!!
Jennifer Burton
March 25, 2017 at 2:13 pmI have purchased the Amazon suggested metallic paint and it seems bronze to me. Nothing grey about it and will give a very much brown look. Just FYI.
Leslie
April 4, 2017 at 7:51 amIt is going over the coco color. Be sure to work on a test board first.
They could have changed the formula. Please let me know.
Also, heed the directions that the glaze is applied very lightly. Almost completely wiped off with the faux finish brush.
Jo Ann
June 14, 2017 at 10:17 pmSo, the link in the post was for a metallic paint not glaze. After a lot of research I found a Metallic Burnt Coffee Glaze that is supposed to be a replica of the Martha Stewart one. I ordered it and finished my hutch with it. It came out very nice. Here is the link to the glaze that you can purchase on ETSY – https://www.etsy.com/listing/258400931/metallic-burnt-coffee-glaze-martha
Jo Ann
June 14, 2017 at 10:19 pmThe link in the post was for a metallic paint not glaze. After a lot of research I found a Metallic Burnt Coffee Glaze that is supposed to be a replica of the Martha Stewart one. I ordered it and finished my hutch with it. It came out very nice. Here is the link to the glaze that you can purchase on ETSY – https://www.etsy.com/listing/258400931/metallic-burnt-coffee-glaze-martha
Cabinet Blog
April 23, 2017 at 1:04 amPortofino Comfort Furniture Cover Set
[…] my Furniture tab. Most of the comments on that page were regarding this piece of […]
Jo Ann
May 13, 2017 at 12:00 amMy daughter helped me repaint a hutch that I inherited from my husband’s family. I saw your post and wanted to try the same color combination. We finished the two coats of the Annie Sloan coco and I ordered the metallic paint from Amazon that is supposed to arrive tomorrow. I am so excited to see how it comes out. The hutch is not as large as the one you did but, it has some metal pieces on the glass in the side doors. Is there a way I can send you a picture of it when we are finished? Thank you for the idea. I have never loved the style of the hutch and it was so dated. Hopefully, this will make it a beautiful piece.
Jo Ann
May 14, 2017 at 6:50 pmSo, after the two coats of coco and letting it dry for two days, we tried the metallic rich espresso paint. It is just coming out a gold color. Nothing like the the grey dark tones on the pictures that you have. I guess we need to try another color of metallic paint. I really don’t like the gold with the coco.
Jo Ann
May 14, 2017 at 7:41 pmI think the problem is the link that is in your post is to a paint not a glaze. I think that is the problem when trying to apply it as a finish. The paint is covering to much. I think the link was supposed to be for a glaze not paint.
Jennifer
May 20, 2017 at 7:20 amBeautiful! Looking on here for ideas on painting our dining room set and I find your post with our exact same set! So cool!! I’ve been going back and forth on whether to go white or coco with it.. Decisions decisions…
Amanda
June 2, 2017 at 8:56 amI am loving the look of this room. A beautiful job on that hutch! I’m trying to recreate the look of the room and was wondering if you happened to know the color of the wall and ceiling? It’s the exact look of what I’d like in my dining room. Any help would be appreciated.
Leslie
June 9, 2017 at 8:36 pmI am sorry I do not know the wall color. I’ve since moved away and this was my friend’s house.
Pleasure Blog
June 11, 2017 at 10:32 pmBest Buy Fifty Shades Darker By Coco De Mer Red Room Slip
[…] hat it was very popular on my Furniture tab. Most of the comments on that page w […]
Fifty Blog
June 25, 2017 at 9:59 pmCoco De Mer Always
[…] e gone from that tab on the new site, it was only right to create a to step-by-s […]
Suspender Blog
June 26, 2017 at 6:16 amOne Of Coco De Mer
[…] is, despite the photos, is that it was very popular on my Furniture tab. Most of […]
Suspender Blog
June 27, 2017 at 6:33 pmFifty Shades Darker By Coco De Mer Escala
[…] e new site, it was only right to create a to step-by-step instruction in an actu […]
Linda
July 6, 2017 at 4:44 pmHey I’m just wondering what the height and width is of this hutch? Beautiful piece!
Glaze Furniture Rehab Ideas | Instant Facelift For Old Furnitures
August 9, 2017 at 9:47 pm[…] image via Paper Daisy Design […]
Deb Labs
September 4, 2017 at 10:19 amI want so bad to do this to my hutch but am scared to death ! This is beautiful !!
Seat Ing Blog
December 13, 2017 at 3:29 pmPortofino Comfort Furniture Cover Set
[…] f the comments on that page were regarding this piece of furniture. I felt that […]
Seat Ing Blog
December 14, 2017 at 6:58 pmPortofino Comfort Motion Rocker
[…] ere regarding this piece of furniture. I felt that now that the comments are gon […]