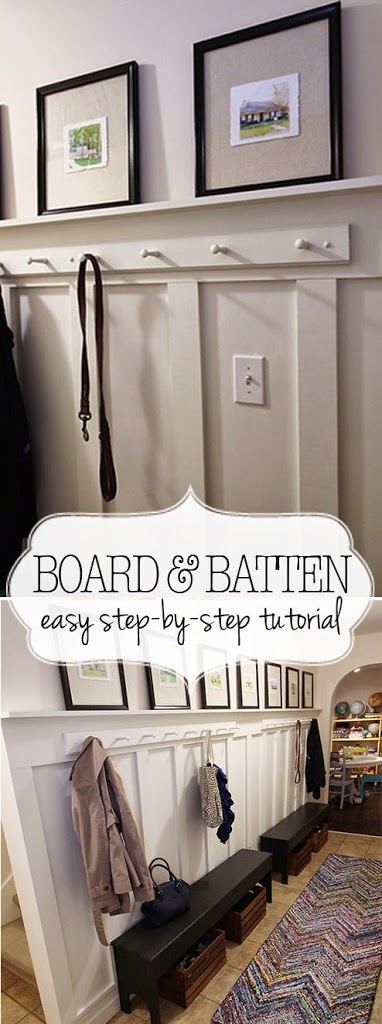
Want to transform a boring hall into a practical, useful and beautiful space?Board and batten is the simplest answer to add charm and interest to a basic wall. In the same way crown molding adorns the ceiling of a room and chunky trim adds depth, board and batten is the classic and straightforward solution to a plain wall. Add functional hanging pegs, a place to rest, ample storage and you’ve created yourself a mudroom hallway.
I know you have read board and batten tutorials before, but speaking from experience, it is honestly a beginner, super easy project.
Today, I’d like to share how we completed the project.
I dare say this project was even fun! My husband and I were like little kids fighting over who would use the Ryobi AirStrike Brad Nailer.
Let’s get to the how to shall we?
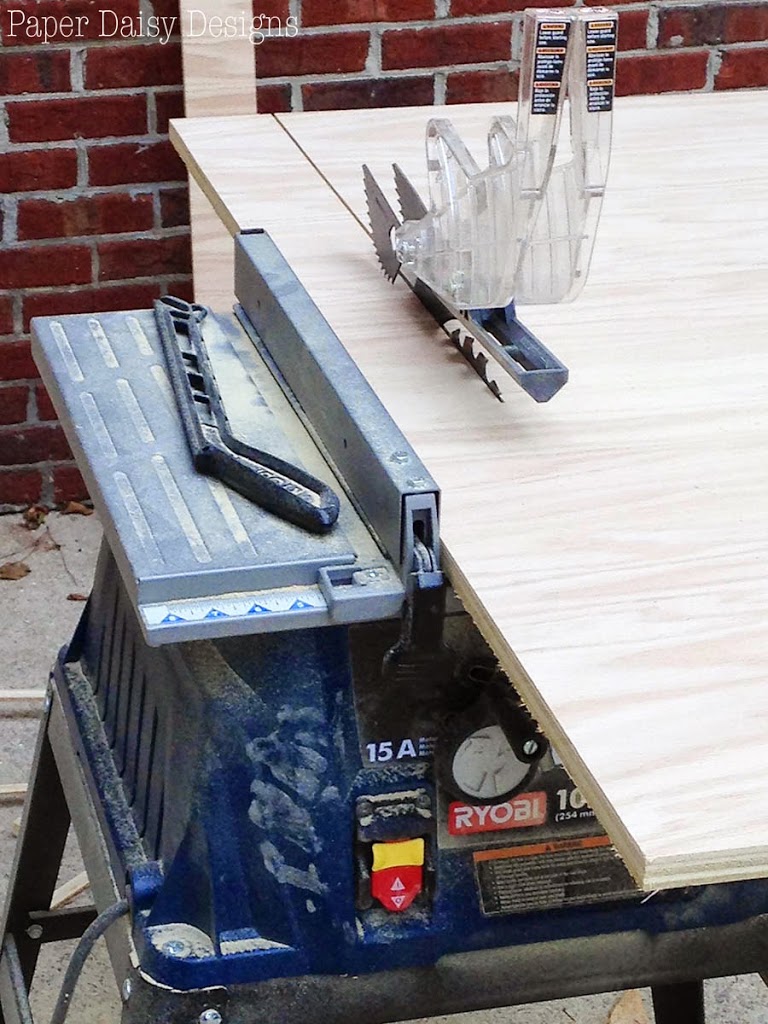
We decided to begin with a sheet of PureBond Plywood from Home Depot. I love that PureBond is formaldehyde-free and is a hardwood plywood.
We also used a higher grade of wood for our horizontal pieces because they tend to be straighter and have less warping.
We had the plywood cut to (2) 35″ x 4 ft sections, plus the leftover, so that it would fit easily into our car. You could also have Home Depot rip all your cuts, but we chose to bring them home and cut them ourselves on our table saw.
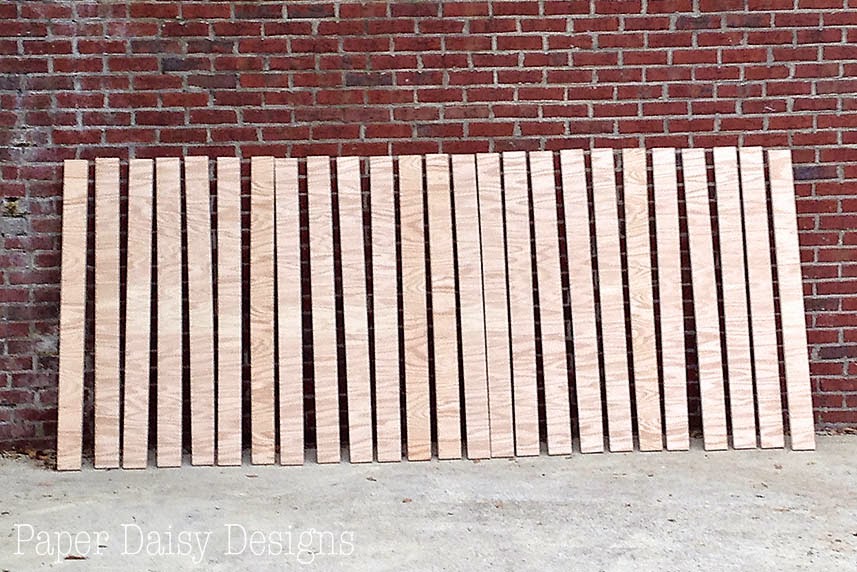
I wanted the boards to be a little chunkier than most versions of board and batten I had seen, finally settling on 3.5″ wide.
Here’s what the boards looked like all cut and ready for primer. My husband, Richard, cut the boards while I was away for the weekend, but he said it went super fast. We hadn’t decided on our exact plan for spacing at this point, so we ended up using only 12 of these boards.
When I returned, I primed all the boards and we got ready to assemble.
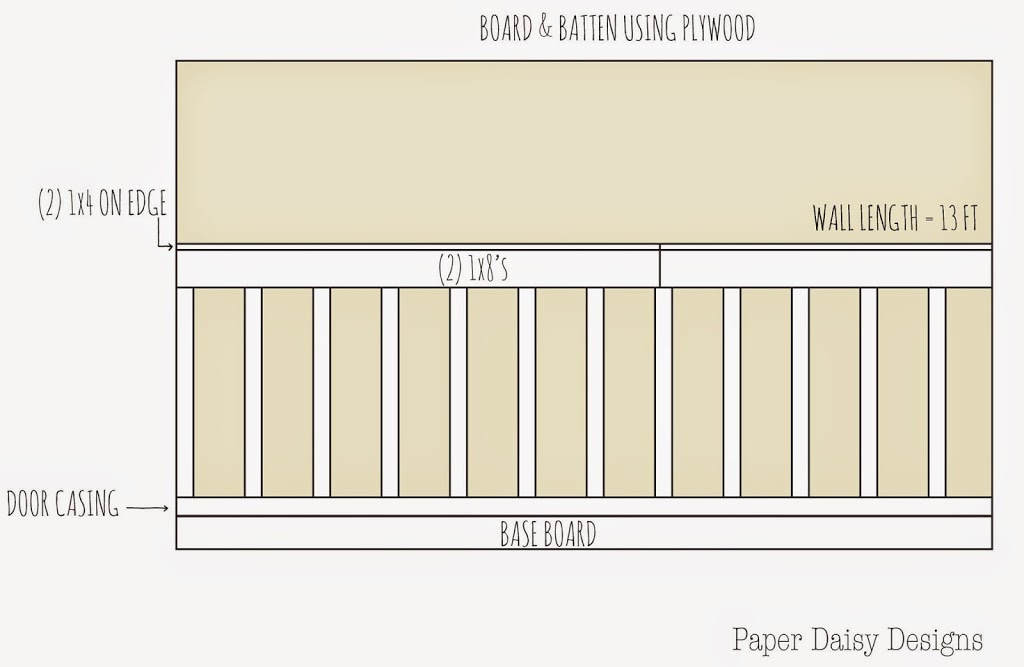
Here’s a diagram of our construction of the board and batten and a description of the wood pieces we used.
The most unique element of our board and batten is I chose to use door casing as a transition board from the baseboard for two reasons.
The first was simply an issue of recycling; we had some door casing in our wood pile left over from the installation of a new back door.
The second was, when the trim was flipped so that the inside of the casing met the baseboard it was a similar depth. Conversely, the outside of the casing matched up perfectly with the depth of the plywood for the batten strips.
Before nailing anything, we found the studs using the Phone Works Stud Finder by Ryobi. This handy device tethers to your smart phone.
By using the display on your phone, it clearly indicates where the stud is located. Once you find the stud, you simply push the little green button at the bottom and it will make a pin point mark on the wall. We loved this thing!!
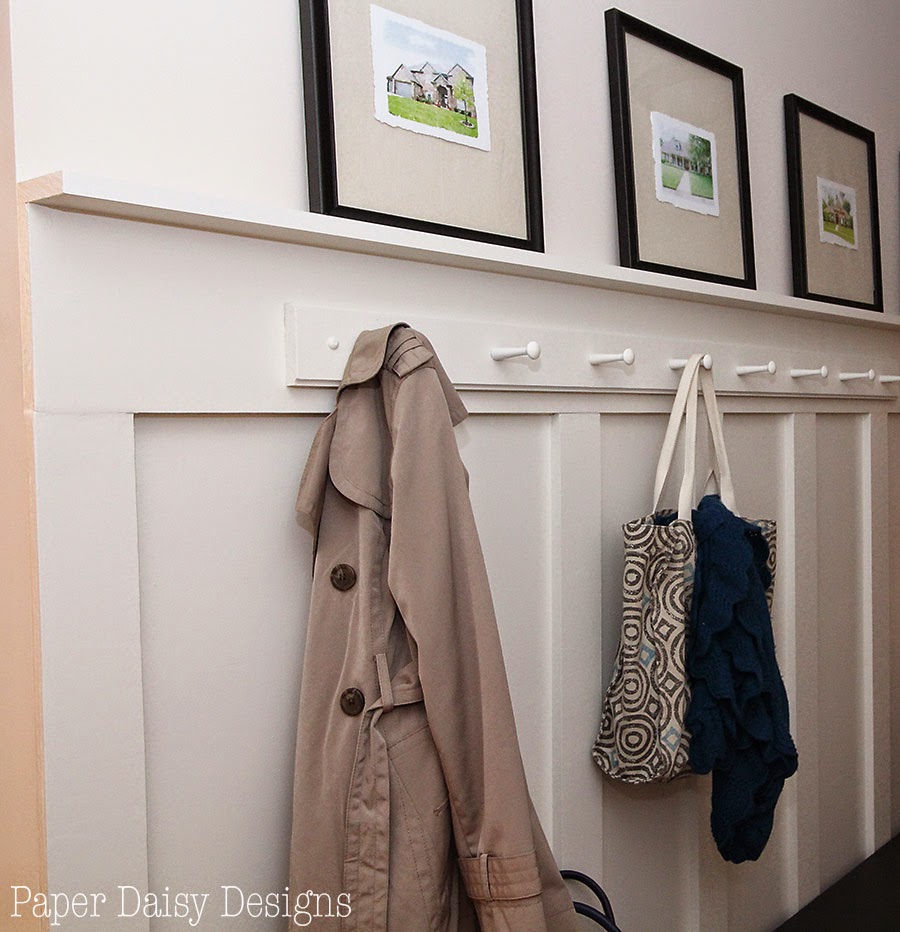
Then we began nailing our trim. You can see how the door casing creates the perfect transitions between the baseboards and the battens.
Next we started attaching the batten boards. They went up quick! We absolutely loved the nailer. It was so much easier to use then our old nail gun attached to a compressor.
Sometimes the boards met the studs sometimes not. They don’t support any true weight and each board is fairly light, so no big worries. We were sure to use our marks for the studs on all horizontal pieces.
To make the spacing between the boards almost effortless, we used a scrap piece of wood that matched the desired space between the boards, 9 3/4″. You will want to make sure your scrap is perfectly level and straight. This was a simple check with an L square, repeating this process for every board.
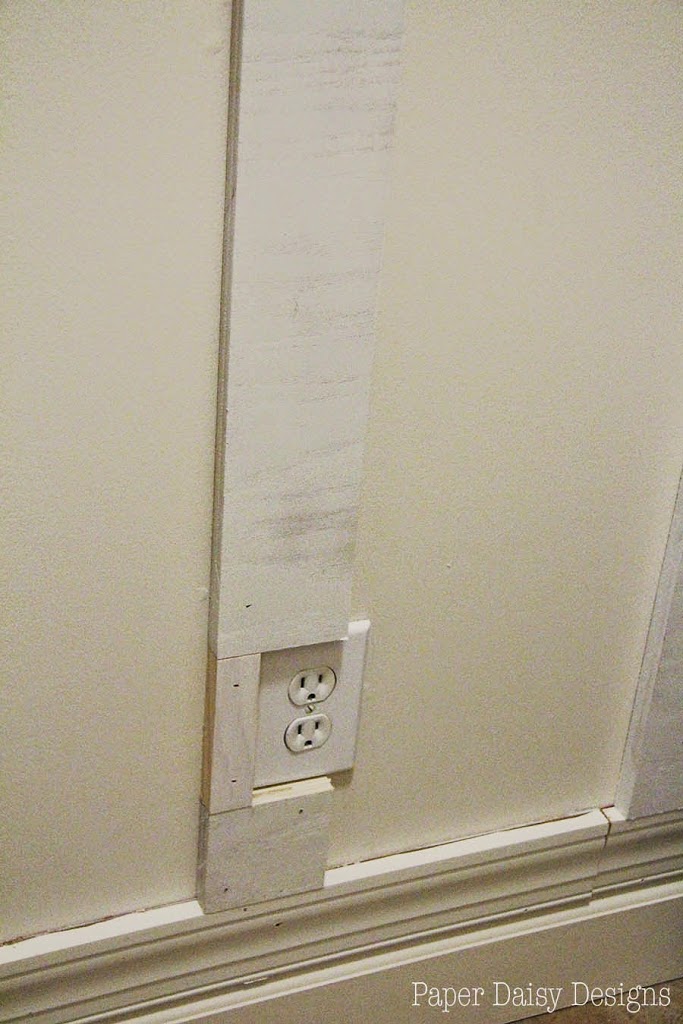
When we reached the wall outlet, we chose to simply build around it.
Next we added the 1×8 boards along the top. And this is where I must confess that my dear husband was right.
He had suggested we should hang the 1 x 8’s along the top before we hung the vertical boards. If we would have done as he suggested, there would have been less putty work for me at the end. We could have lined the top of the boards up perfectly and left the less than perfect joints for the bottom.
Hindsight is always 20/20 as they say and that’s also where having someone go before to learn from their experience is beneficial.
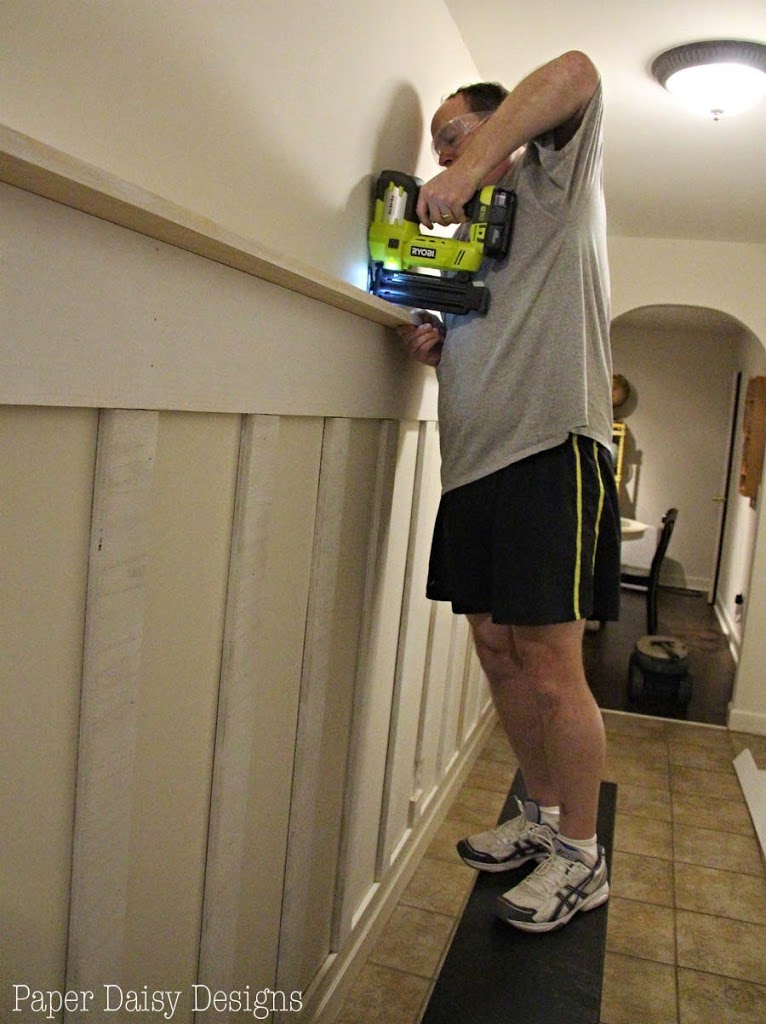
After the 1 x 8’s were up, we nailed the 1 x 4’s to the top edge to create a ledge.
To nail the board in as a ledge, you need to go in at a bit of an angle to insure that you don’t misfire and have a nail come out through the 1×8. I finally pried the nail gun out of his hands and handed him the camera!
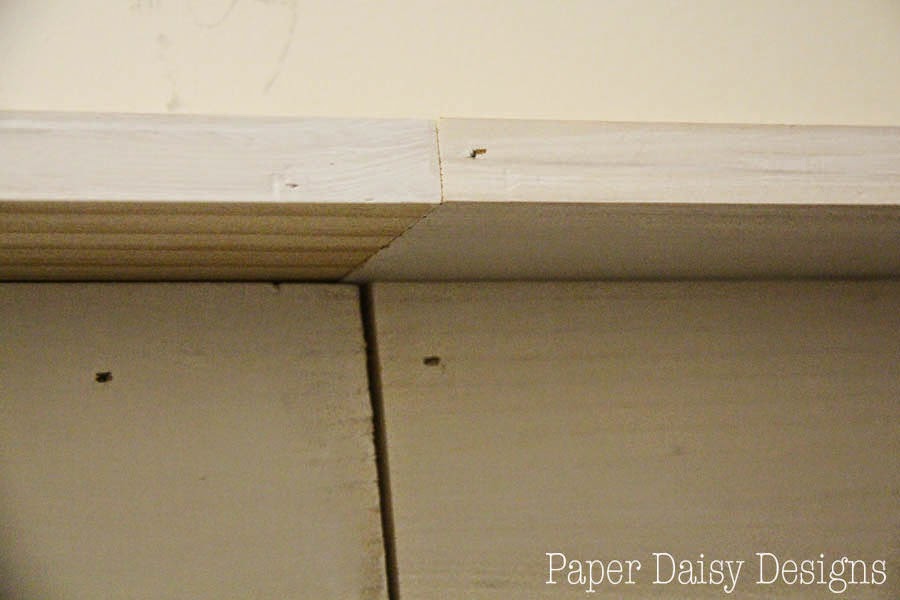
Because our wall was longer than the boards we were using, 13 feet or so, we sent a nail into the 1×4 wood diagonally where they met for extra stability.
Also in hindsight, we should have trimmed off the ends of our 1×8’s to make them square. A little wood putty did the trick to fix the top where the seams of the two boards didn’t meet perfectly.
Speaking of putty, after the boards are all hung, putty and caulk are your best friends.
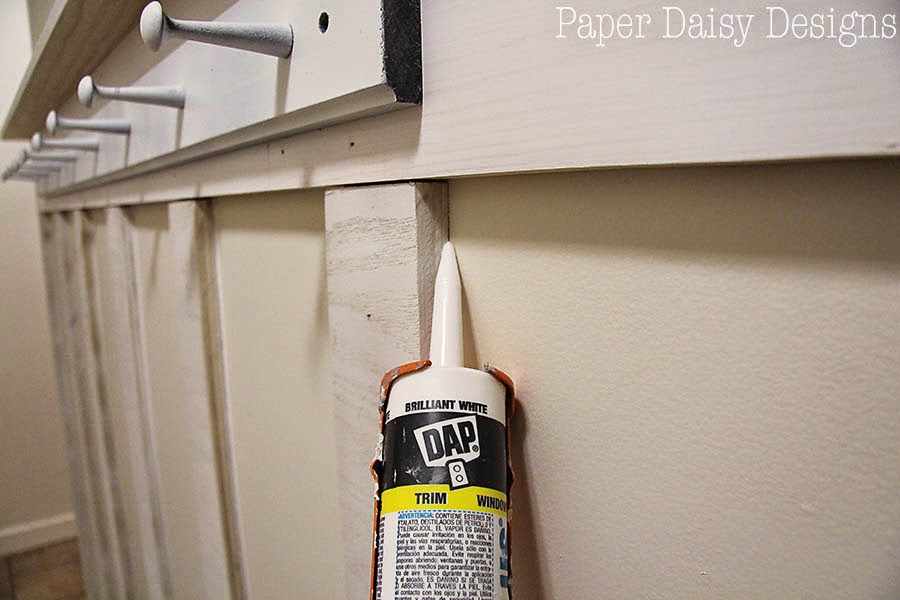
I used caulk along the edge of each board along the wall. The key to caulking is to use a knife to cut a small hole at an angle. Then using even pressure on the gun with the angled edge against the wall pull the caulk along the edge. Run you finger along the caulk to smooth out an excess. Keep some paper towels handy to wipe off your finger.
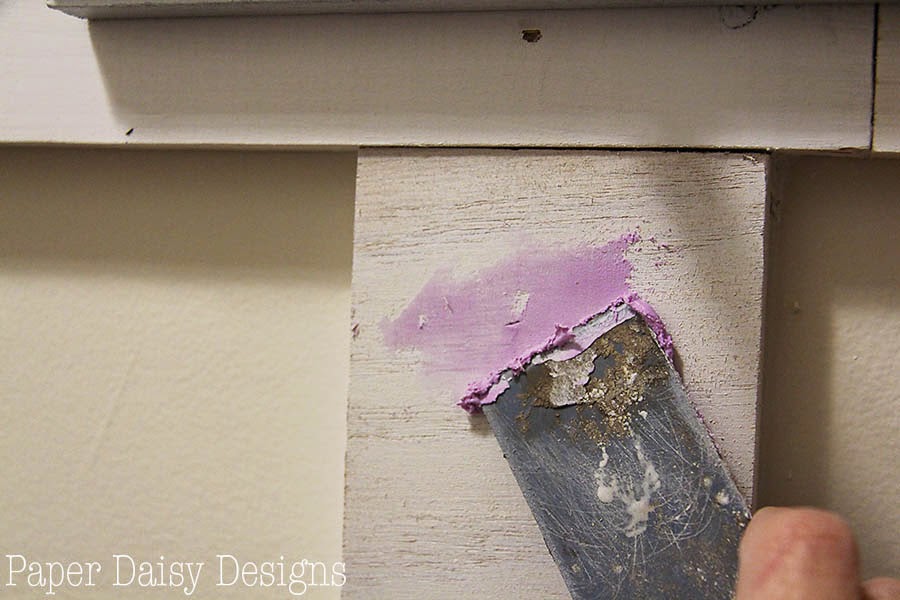
I used wood putty to fill the nail holes and the gaps left where the wood did not meet perfectly.
But before I filled the gaps between the boards I sanded the edges down, this made the transition smoother and I could use less putty. In addition, you will want to sand the edges of your plywood before you paint. The process of cutting them creates a rather rough edge.
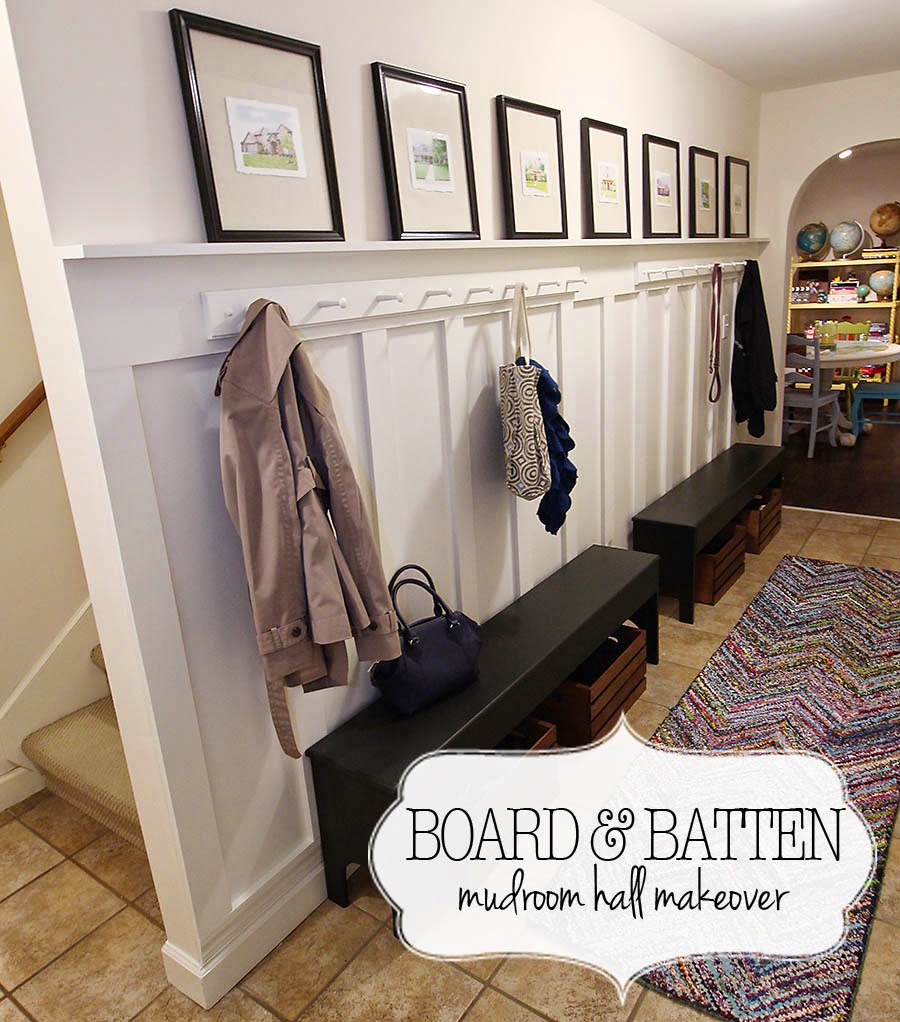
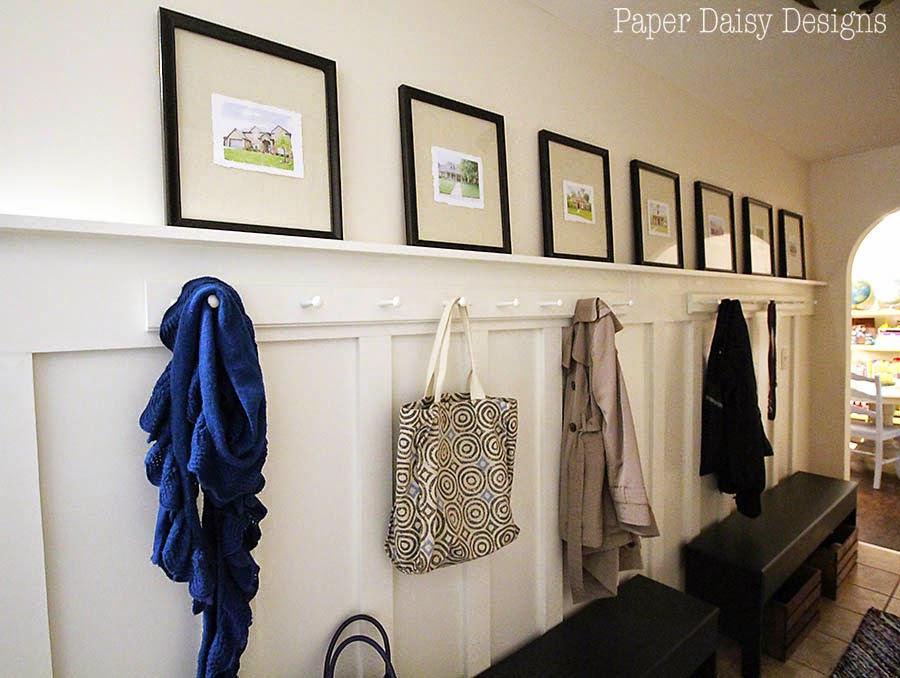
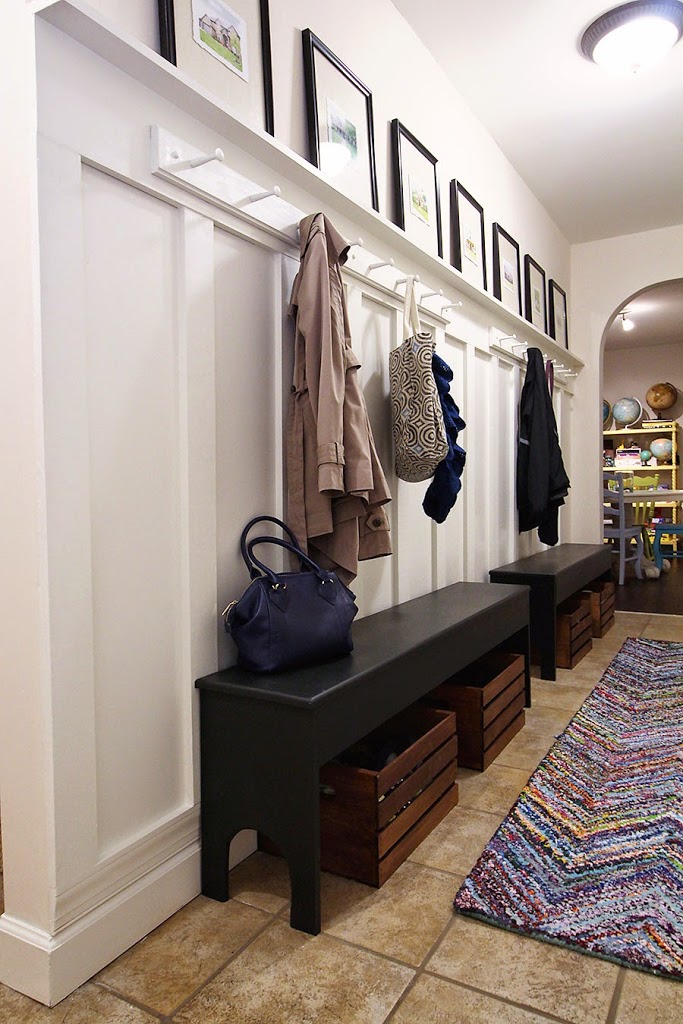
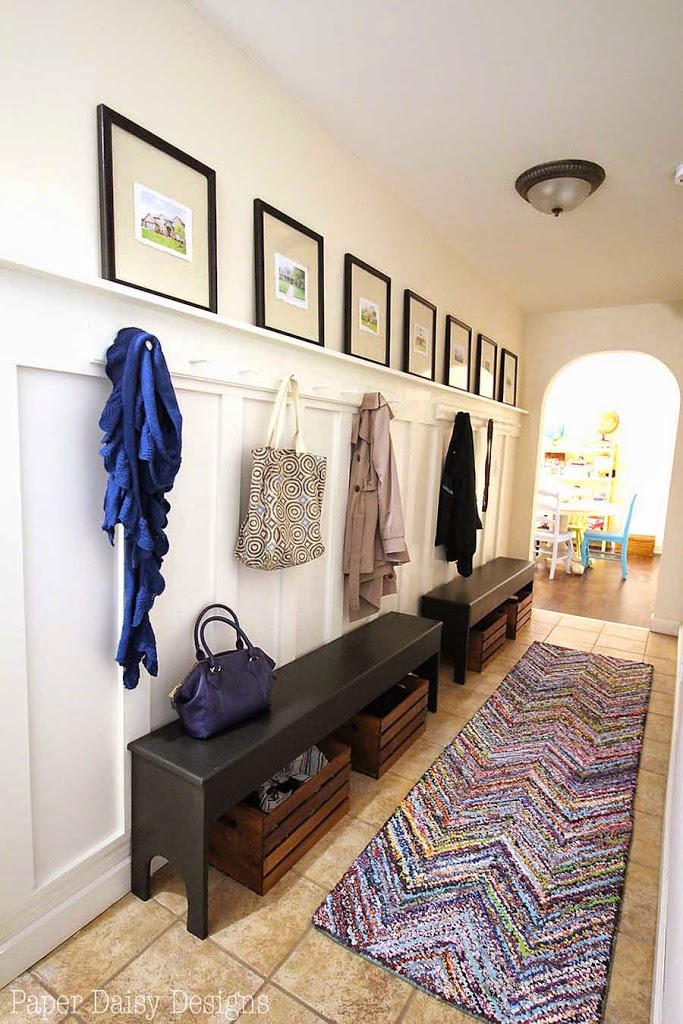
After a couple coats of gloss trim paint we ended up with a completely transformed hallway.
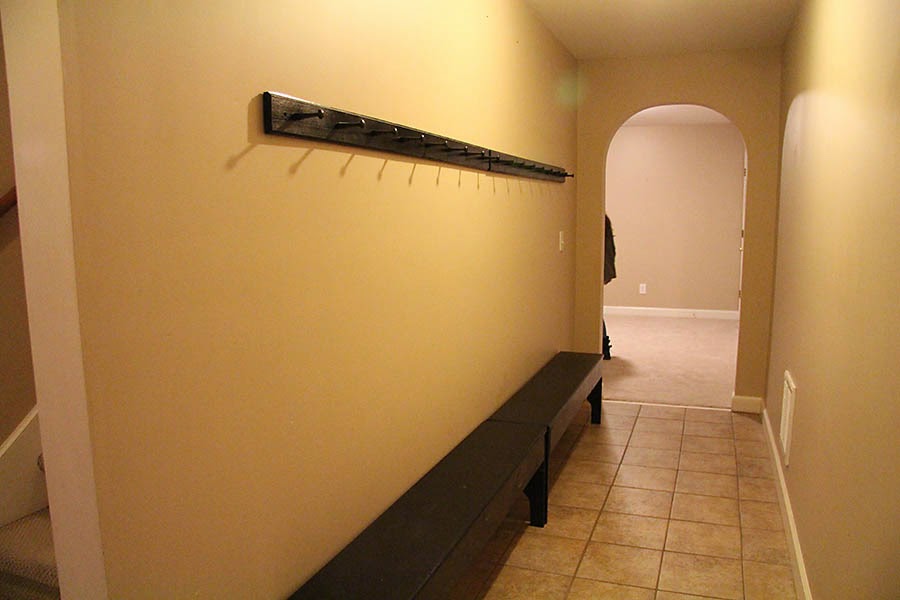
To give you a point of reference, here is a look at the before. I thought the previous home owner made a valiant attempt to make this windowless hallway more functional.
So much so that I reused both the benches and the peg racks. The benches just needed to be sanded and repainted to eliminate a bad spray paint job.
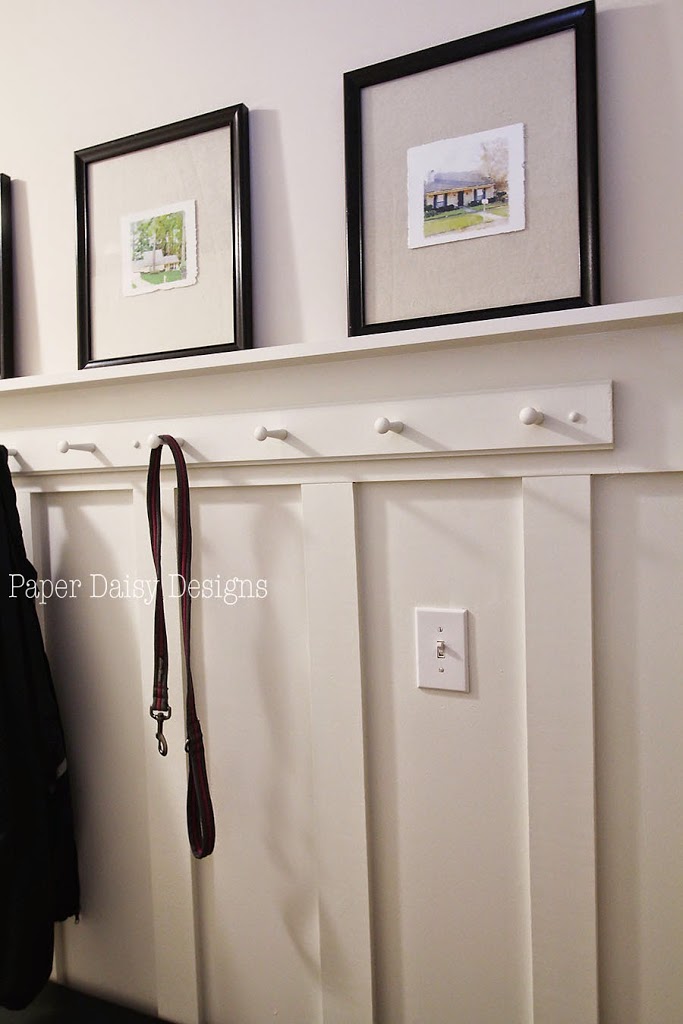
The pegs were not only still functional and once they were painted the trim color they would offer a more seamless approach to practical hanging storage than hooks.
Adding crates under the benches for extra storage, a color-packed rug and artwork perched along the top rail, finish the space.
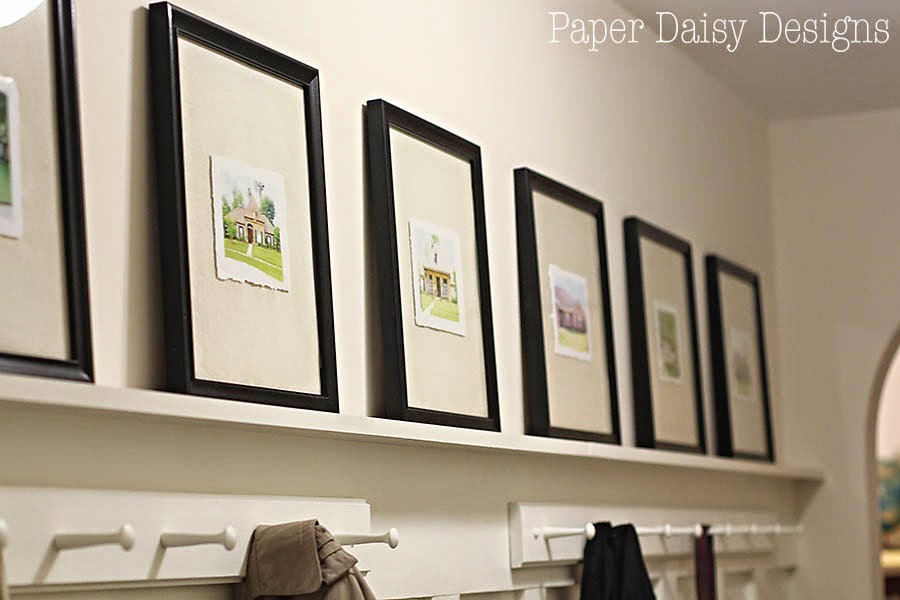
Honestly, it took me longer to create the art above the board and batten than it did to build and paint it! It required me to comb through boxes of photos and my digital files to collect a photo of every one of our 7 previous homes. I also had to call in a favor of a previous neighbor and my mother to photograph two of our houses in Louisiana. Thanks Mom & Kelly!
Then, for more of an artistic look, I transformed them into watercolor prints. Here’s a link to the watercolor houses post.
The project definitely created a more welcoming entry into our basement from the garage. It is the entrance we use everyday and despite being a windowless space, it is now bright and inviting.









22 Comments
Nadine Renee Naturals
December 21, 2014 at 5:37 amNice idea for a mudroom! Great step by step instructions!
Ally's Sweet and Savory Eats
December 21, 2014 at 2:00 pmWhat a beautiful space! I am DYING for a mudroom/walkway/space we can put all our "stuff". Gorgeous!
Claire C.
December 21, 2014 at 3:22 pmThese look great! I would love to make them thank you for sharing!
Erica Sooter
January 9, 2015 at 4:18 amOoh I love this! So light and classy and elegant 🙂 Luckily the previous owners of my home put in a lot of board and batten so I didn’t have to do any of the work lol. Thanks for sharing at Think and Make Thursday! 🙂
Karisa | Petite Modern Life
January 11, 2015 at 4:19 amThis turned out beautiful! We did a board and batton in our entry too, but I didn’t think about adding another lip to the baseboards. It’s clever and beautiful!
Jennelise
January 12, 2015 at 4:20 amIt looks absolutely stunning! What a beautiful transformation! Thankyou for the how-to!
feathersanddimes
January 13, 2015 at 4:20 amSaw this from the dedicated house and I love it! It brightened up your hallway so much.
Carissa Rasmussen
January 13, 2015 at 4:20 amWow– the board and batten turned out so good!! Looks like such a nice space now! You should join my link party, http://www.carissamiss.com/2015/01/outside-box-no-18.html Love your stuff!
Sandra and Hennie Cronje
January 14, 2015 at 4:21 amYour mudroom turnout beautiful. Thanks for sharing
Havalah Turner
January 15, 2015 at 4:21 amlooks great!
Kathryn Ferguson Griffin
January 19, 2015 at 4:21 amLeslie, you guys did an amazing job! Thank you for sharing. You are one of the features today at the Make it Pretty Monday party at The Dedicated House. Here is the link to this week’s party. http://www.thededicatedhouse.com/2015/01/make-it-pretty-monday-week-125.html Hope to see you again at the bash! Toodles, Kathryn @TheDedicatedHouse
Mary
January 9, 2016 at 2:01 pmHi Leslie! I am new to your blog and love your style. Would you mind sharing where you found this rug? I LOVE it! Thanks for the great tutorials and blog. 🙂
Leslie
January 10, 2016 at 12:16 pmThank you Mary! So happy you find the tutorials helpful and enjoy the blog. Here is a link to the rug. The photo on my blog is a better representation of the color than the photos on their web site.
http://www.wayfair.com/Safavieh-Nantucket-Blue-Chevron-Area-Rug-NAN141C-FV52697.html
Hope to hear from you again soon!
21 Amazing Before After Entryway Makeovers - A Piece Of Rainbow
May 12, 2016 at 3:35 am[…] 2 . Add ledge shelf above board and batten wall When the entry is a hallway, utilize the opportunity to display art along the linear space. (Paper Daisy Design) […]
21 AMAZING BEFORE AFTER ENTRYWAY MAKEOVERS – Kosip
August 29, 2016 at 12:09 pm[…] When the entry is a hallway, utilize the opportunity to display art along the linear space. (Paper Daisy Design) […]
21 AMAZING BEFORE AFTER ENTRYWAY MAKEOVERS
October 21, 2016 at 3:04 am[…] When the entry is a hallway, utilize the opportunity to display art along the linear space. (Paper Daisy Design) […]
10 Chic & Stylish Entryway Makeovers • The Budget Decorator
August 10, 2017 at 5:50 pm[…] another board and batten entryway makeover that makes organizing your family a breeze, from ‘Paper Daisy Design‘. Great step by step […]
10 Chic & Stylish Entryway Makeovers • The Budget Decorator - HDWALLO
August 17, 2017 at 8:50 am[…] is another board and batten entryway makeover that makes organizing your family a breeze, from ‘Paper Daisy Design‘. Great step by step […]
10 Do it Yourself Ideas for Mudrooms – Link Directory
August 24, 2018 at 10:04 am[…] Board and Batten Makeover In this following example, you will find how easy it is to create a different effect in your […]
mode femme populaire – 19 Idées d’entrée pour le vestiaire qui garderont votre maison propre
October 8, 2018 at 5:27 am[…] Source: Profondément Southern Home […]
Hope
December 5, 2018 at 9:24 amI know it’s been a few years since this post, but where did you get the benches?
G.Fast Chipset Market
March 25, 2021 at 1:23 amThank you so much for sharing this post, I appreciate your work.
https://www.globalmarketestimates.com/market-report/global-g-fast-chipset-market-2856