I’ll just start this post with a confession. I have a problem with doing laundry. I wouldn’t say I hate it, anymore. I’m just really, really good at finding other, more important things to do than laundry. The game changer in my attitude came from a speaker who suggested that you should turn the process of doing laundry into a time to be grateful. So now, I consciously focus on how grateful I am for the family I wash for, grateful for the clothes we have, grateful that I actually have a washer and a dryer. And now I can finally be grateful for this space, no matter how tiny and awkward it is.
Sure, I’ve seen laundry rooms with more bling. Elaborately decorated rooms with beautifully tile backsplashes and chandeliers, but for now, I just needed a space that didn’t make me cringe each time I walked by or into the room.
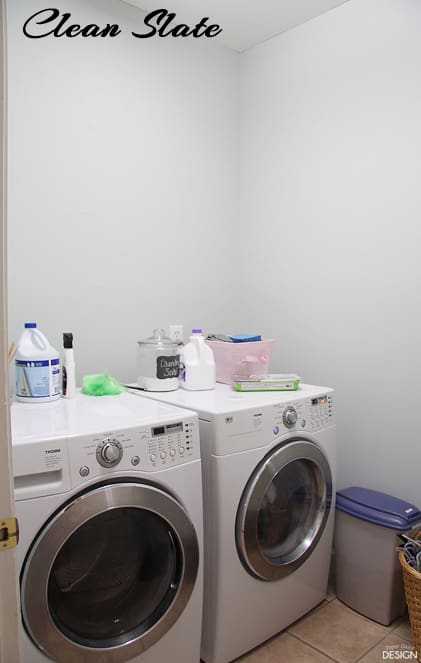
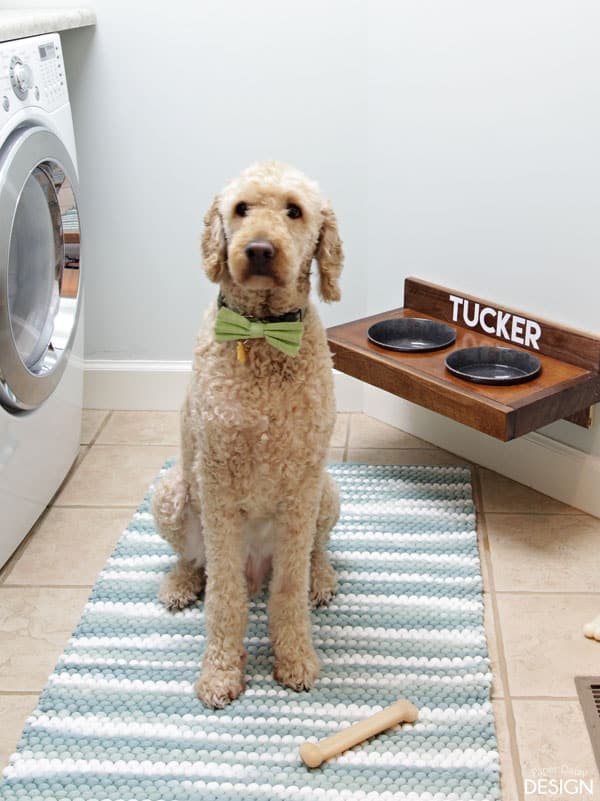
This is what the laundry room looked like when we bought the house. Not the worst ever by any means. Functional, maybe, but the shelves wrapping the room were overbearing in the small space. To make it feel even smaller, the wall just out of the photograph is angled into the room. And since this room is where we keep Tucker’s water and food, the door has to stay open.

Thankfully, the laundry room is not in a very public area of the house. It’s across the hall from the master bedroom. So I see it a lot!
This budget makeover started by removing the shelving and giving the space a fresh coat of paint, Sea Salt by Sherwin Williams.
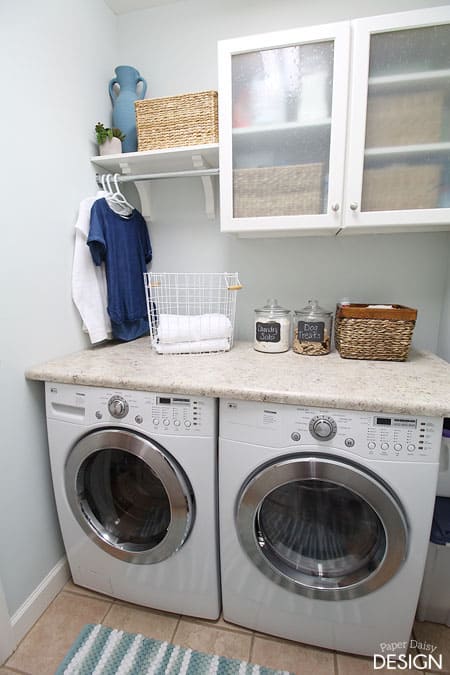
After we demolished part of the kitchen, we recycled this set of cabinets for the needed storage in the laundry room.
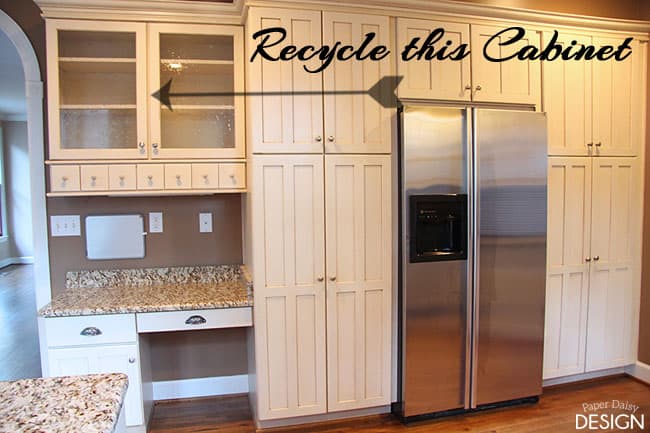
Obviously, it’s a beautiful piece of cabinetry with very heavy bubble glass that I was not going to let go to waste. Just like I recycled the small cabinet at the bottom to make our kitchen island cart.
Want to know the easiest way to hang a heavy piece of upper cabinetry?
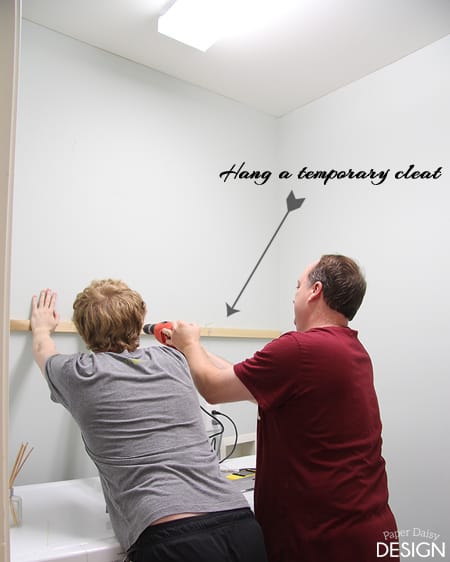
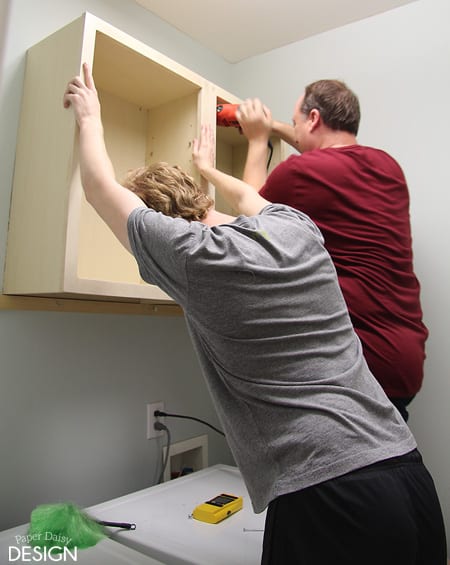
Secure a piece of wood to the studs, at the bottom of where the cabinet will hang. Make sure your cleat is level. This temporary support will help hold the cabinet up as you attach it to the wall.
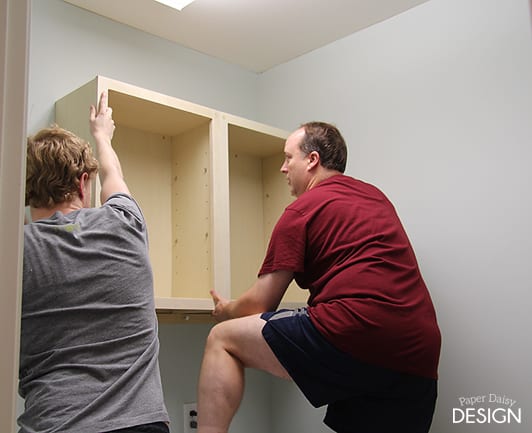
Once it was hoisted up, all our son had to do was hold it against the wall as my husband drilled the cabinet into place.
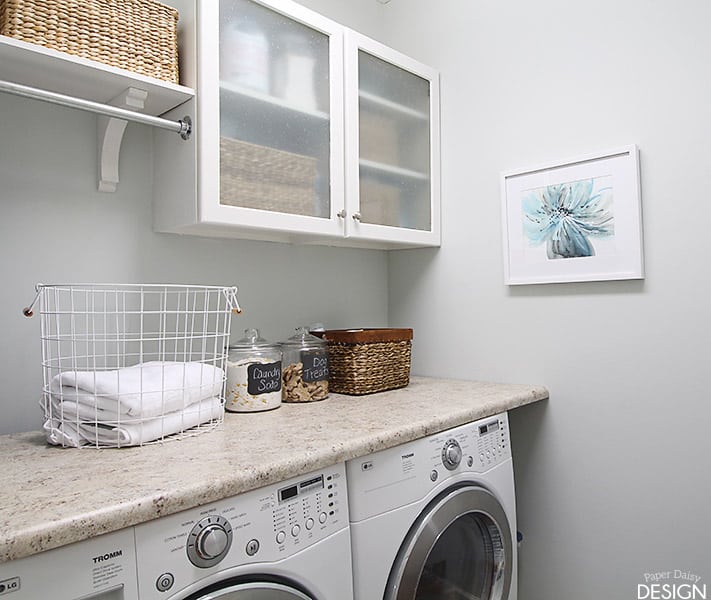
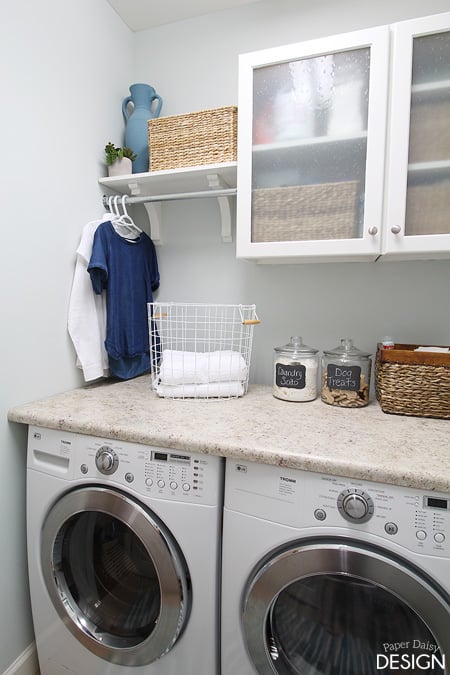
Then we added a shelf from scrap wood, two functional, yet decorative shelf brackets and a small rod to hang clothes. The counter just sits on top of the washer and dryer. (The counter was recycled from the our previous house where it was installed with a cleat on the back and a newel post as a side support. We thought we would just temporarily “set” the old counter on top of the washer and dryer and then install it “properly” at a later date, but in the end, we realized this works perfectly fine. Keeping it simple!)
And now for a bit more honesty, the functional pieces like the cabinet, shelf, rod and counter have been in place for almost a year. But after building the new raised dog feeder for Tucker, I felt like it was time to actually finish up and make everything look pretty.
The dingy, glazed cabinets got a fresh coat of paint. Art was added to the walls; a soft rug covers the fleshy beige tile and the bubble glass cabinet fronts were “frosted” with Artscape Window Film to obscure the items inside.
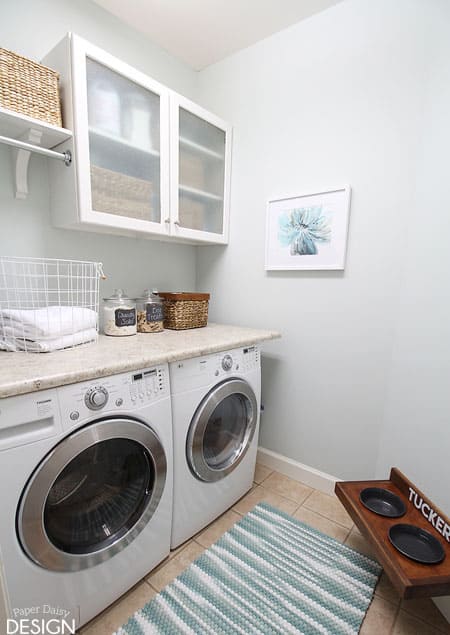 And now, with these budget additions, I have a beautiful laundry room to add to my Grateful List!
So, what do you say? Are you an efficient laundress or are you like me and find yourself doing laundry whenever family members start asking for clean clothes?
source list: rug, art & basket: Home Goods || wire basket, faux planter, glass canisters: Target || shelf brackets, rod, frosted glass film: Home Depot







27 Comments
andi
July 8, 2015 at 3:26 amworking on being better at laundry (me) 😀
Ally King
July 8, 2015 at 6:35 amOh my gosh–I love it! Simple and clean! Also–that dog–too cute! My laundry room is a nice size, but it has this old wallpaper border that says, “A woman’s work is never done” and then has ducks and birdhouses and other 90s-inspired “country” items on it. Why haven’t I taken that off yet?! So yea–I’m blaming the border for my lack of laundry love. Haha!
Roxanne
July 8, 2015 at 7:23 amI SO LOOK FORWARD to a laundry room in our next house. Our current house has the washer and dryer just sitting in the garage. No laundry rooms in the 50s 🙁 This is a LOVELY makeover!
Though, I doubt it made doing laundry any more fun 😉
Renee Kinlaw
July 8, 2015 at 7:44 amI dislike doing the laundry too. I think some of it has to do with it being my chore while growing up. I was more excited about my mom getting a dryer than she was! Like you said some of it has to do with the area. Mine is a small stuck in the back of the house, small room off the kitchen. I need to take your ideas and dress it up, because your’s looks like a place I’d like to hide away in from time to time, even if it meant doing laundry!
Marissa
July 8, 2015 at 8:00 amI am totally waiting for the inspiration to do something to my laundry room… it’s got seriously outdated wallpaper and brown cheap laminate floors… not helpful for cultivating any desire to get laundry done.
Thanks for sharing your process… maybe it’ll help motivate me…
Marissa
Jelli
July 8, 2015 at 4:23 pmLeslie, this space, albeit small, looks just like the ones in magazines. Putting in the cabinets really made a world of difference and choosing white for everything makes it look a lot bigger. Hope you enjoy it, even if it’s not your favorite chore. (My husband does the laundry at our house 🙂 )
Brandi @ penguinsinpink.com
July 8, 2015 at 4:33 pmThat is a gorgeous laundry room. I wish my laundry room looked half as good as that. Instead, I have the standard laundry room in the garage going on.
Pat Fenner
July 9, 2015 at 6:12 amUgh, laundry…does it NEVE end? I love the idea of being grateful while I do it. I use the same technique when I’m doing grocery shopping and having to put everything away when I get home!
I’d much rather be in the pool with the kids or writing a blogpost!
Caroline @ In Due Time
July 9, 2015 at 10:07 amWow! This looks AWESOME!! Can you come help me? 🙂 We are so bad with DIY stuff, but goodness, this is motivating! We too have a smaller laundry room and it drives me nuts 😉
Kathryn Griffin @TheDedicatedHouse
July 18, 2015 at 11:40 pmSuch a great makeover! Thank you for sharing. You are one of the features at the Anything Blue Friday party at The Dedicated House. Here is the link to this week’s party. http://www.thededicatedhouse.com/2015/07/anything-blue-friday-week-91.html Hope to see you again at the little blue soiree. Toodles, Kathryn @TheDedicatedHouse
Samina
August 17, 2015 at 1:26 pmThis is full of great inspiration & ideas for me as I try to redo my laundry room. Also, is Tucker a Labradoodle? He’s a handsome boy & looks just like my Snickers (Snickerdoodle).
Cindy
August 17, 2015 at 2:06 pmYour laundry room looks great! I was curious about your counter on top of the washer/dryer. Maybe I overload my washer, but it moves and shakes some during the spin cycle and I don’t think jars would stay safe being placed there. How do you make it work?
Kelly
September 25, 2015 at 8:28 amthis is soooooo cool!! I LUV it <3
Leslie
September 26, 2015 at 1:02 pmThank you!! It still makes me smile to walk in there. Only problem, is it still doesn’t do the laundry for me. 🙂
Lynn
January 2, 2016 at 7:43 pmLove your laundry room! I’m looking for a rug like yours. Where did you get it?
Leslie
January 22, 2016 at 7:59 pmLynn, It was purchased from Home Goods. Although, I would not necessarily recommend it. It seems to be very hard to keep clean and it can’t be washed. ;(
Ashley
March 4, 2016 at 5:23 pmGreat makeover! What paint colour is that? Thanks!
Ashley
Blessedmess.ca
30 Laundry Room Makeover Ideas | Refresh Restyle
May 5, 2016 at 4:13 am[…] Tiny Laundry Tiny Budget – Paper Daisy Design […]
Laundry Room Makeover 3103 - Home Inspiration Ideas
May 28, 2016 at 4:48 pm[…] laundry room makeover id: 3103-2 | Credit […]
Awesome Before and After Laundry Room Makeovers - Hative
June 20, 2016 at 1:58 am[…] This laundry room was basically done from scratch. The clothesline was removed, the walls painted a solid white and the floors replaced. A washer and dryer were added with a marble counter on top, and matching wall cabinets provide the necessary storage. See the full makeover tutorials on paperdaisydesign. […]
Sarah
September 8, 2016 at 3:51 pmLove the room but loved what you said about being grateful even more! Thank you!
John
October 5, 2016 at 1:44 pmAfter seeing this post. Great job on the room by the way. Is it possible to create a company to come to your home and do laundry? Would that fall under a personal assistant?
Awesome Before and After Laundry Room Makeovers
November 14, 2016 at 3:05 am[…] This laundry room was basically done from scratch. The clothesline was removed, the walls painted a solid white and the floors replaced. A washer and dryer were added with a marble counter on top, and matching wall cabinets provide the necessary storage. See the full makeover tutorials on paperdaisydesign. […]
41 Beautifully Inspiring Laundry Room Cabinets Ideas to Consider - The Veranda of ideas
June 1, 2017 at 4:20 pm[…] via paperdaisydesign.com […]
15 Inspiring Laundry Room Ideas for Small Spaces – PearNews
February 13, 2018 at 4:48 pm[…] See more at Paper Daisy Design » […]
Heather Patterson
February 17, 2018 at 6:56 pmI’m perplexed! The top pic shows the countertop going all the way to the wall on the right, but all the rest show a gap between the wall and the end of the countertop. Am I seeing things or did you cut some off the end? If so, why?
I love the update by the way!! I looks awesome!
Leslie
February 19, 2018 at 9:25 amWe reused that countertop from our old house. Ideally it would have gone from wall to wall. We always talked about eventually replacing it, but you know, budgets always win! And it still worked out fine.
Thank you! I hope this inspired you!!