One Room Challenge Spring 2020 Week 4: All About the Fireplace
Welcome back to Week 4 of the One Room Challenge™! It’s been another week filled with hard core DIY. I am so looking forward to completing the fireplace so I can scale back the physical labor. Whew!
In today’s post I share my inspiration, a little about why we left the fireplace out of the initial construction of our home and why we chose to make the fireplace faux instead of installing a gas or electric fireplace.

If you are new to Deeply Southern Home, welcome! I am Leslie! My goal, whether in my home or my client’s, is to create rooms with a relaxed southern style. Although my designs are traditional, I love to experiment with color and a fresh interpretation of classic interiors. We recently downsized to a new-construction home and I can’t wait to inject old-world charm and character through my DIY projects and timeless finishes. I am honored to be a Featured Designer this season for the One Room Challenge™ and am waiting anxiously to share the final reveal on June 25!
Is it about to get hot in here??
The answer to that loaded question depends on your perspective. Literally, no, nothing will be heating up the living room. But I am pleased with the way the fireplace is progressing and I think it is looking very “hot” indeed!
In this week’s post I would like to highlight these official sponsors for their contributions to this season’s ORC. Special thanks to Novo Building Products, The Tile Shop and Hudson Valley Lighting.

Why did you leave the fireplace out of your new build?
If you’ve been around here for awhile then you know that we chose to remove the fireplace from the original design and floor plan of our house and replace with windows facing the view of the ridge behind our house and the lake below.

This photo is not from a house exactly like ours, but it is similar. It shows what the fireplace configuration would have looked like. One other very important thing to consider from this photo is that this plan had windows on the side of the house whereas, ours does not.

In addition to losing our view, I also felt like the two sets of doors did not allow enough natural light to spill into the room. And we all know, natural light is everything!
When we discussed with the builder about moving the fireplace to the side, not only was there a considerable up-charge for doing so, but the amount of space they needed to execute the fireplace seemed to encroach on the room greatly. You definitely would have had to walk around the fireplace to get to the door.

Ultimately, we made the decision to leave it off. I knew that I could design and build a fireplace later that would be much better than rushing into having the builder add it and trust that he could execute my vision.
The Faux Fireplace Debate
I am sure there will be some of you reading this that would say that you would never build a faux fireplace. And I totally get that.
I am perfectly fine with a faux fireplace because I have realized over the years that we are just not fireplace people. Even when we lived in the middle of Missouri for 7 very long and cold winters, we lit the fireplace only a handful of times. Crazy, I know, but if there ever was a place this southern family could have learned to embrace the fireplace life, it would have been there. In our defense, the fireplace in that house was gas and while it was vented I could not stand the smell of the dry heat or the gas. Whatever it was, I disliked it enough to just bundle up and turn up the heat.

The second reason I am perfectly fine with building a faux fireplace is because I know it can look beautiful. If you saw my instagram post from yesterday, I shared this image.
We built this fireplace as part of the library wall in my husband’s office in the 2018 Spring One Room Challenge.

I couldn’t have been more proud of how it came out. I did my best to add details that made it look as realistic as possible with the size and budget I had to work with. (I only had the 11 3/4″ of depth of the shelves to build out the fireplace.)

Right about now you might be wondering, “What about a low profile electric fireplace?”
That was actually the original plan, especially since this is the only fireplace in the house. With the library fireplace, it wasn’t the only “fireplace” in the house, we had one in the living room.
Here are a few Electric Fireplace options I considered. While these were ultimately not the right solution for me, they could work for your situation. Affiliate links.


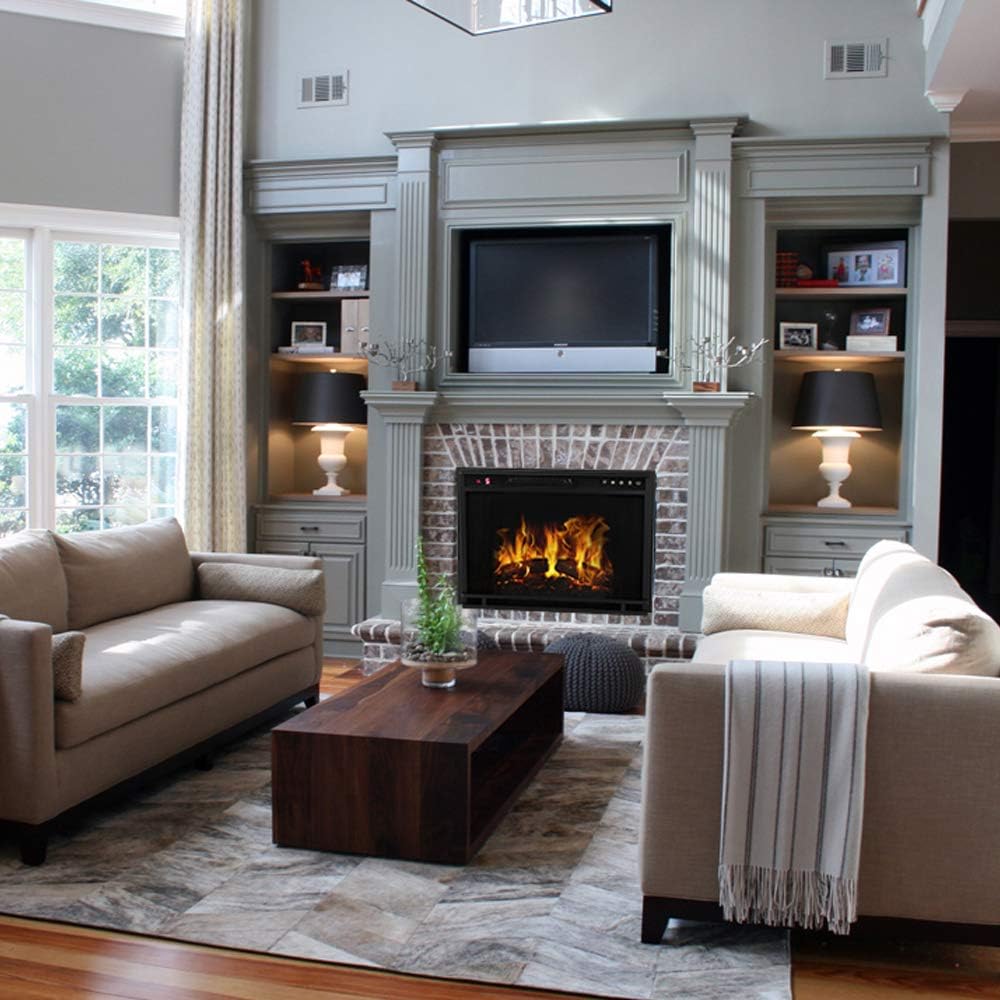
Like I said, these were definitely very appealing.But several months ago, I realized the inspiration images I kept being drawn to looked more like these below and I knew that I could never achieve this look with an electric fireplace.
Fireplace Inspiration
Given the direction I was going in with the Tudor paneling, I was immediately drawn to this shape of the cast stone. The Tudor arch is one of my favorite expressions of Tudor architecture.

With so many other important design elements I desired in the room, this was not in my budget. I realized that a simpler stone surround and firebox was equally appealing and could possibly be created through a sneaky DIY.


The Fireplace Design
To design the fireplace for this house I outlined the features that meant the most to me and then I devised a plan to make it happen.
- A beautiful, light colored firebox.
- Low mantle rather than tall, so that a TV can sit comfortably on top.
- A stone surround for a clean, polished look.
- Incorporate the tudor paneling into the fireplace structure.
- Shallow footprint, just big enough to make a statement.
Most important goal: Build and execute a fireplace that does not look like a faux fireplace.
If you recall this rendering from Week 3 of the Tudor paneling sketch, this became my starting point.

I chose tiles from The Tile Shop to help create a very realistic structure inside the firebox and the hearth, just like the ones in my inspiration photos.

With the help of an online sales rep, we narrowed down the tiles that would work best for the look I was trying to achieve. He totally understood what I needed, something that would best mimic a fire brick.
He ended up sending me several different color variations of the Color Market Ceramic Subway Tiles. The color I chose is called Patagonia, it’s an almost white with grey undertones. But the beauty really of this line its hat it comes in so many amazing colors!!

The texture and size is visually appealing for any installation, but it was perfect for my fire brick!
For the marble hearth, I selected the Arctic White Brushed Marble Floor and Wall tile. It’s a beautiful soft ivory marble with a bit of grey. It’s a very quiet stone, which was important to me for several reasons.

The ultimate goal is to lime wash this moulding to create a stone like finish from wood.
Similar to how I layered the moulding for our library faux fireplace. My plan is to do that again, but this time instead of giving it a paint treatment to blend into the background, I have partnered with Romabio Classico Limewash to give the moulding a lime wash in several colors to create a marble finish.

I had hoped to have this to share this week, but I will do so on Instagram Stories.
I created a slide show of the process of building and finishing the fireplace so far.

There was one small miscalculation in the execution of the moulding that you might have missed too.

If you look closely, the top set of boxes are a little taller than the ones below and on the wall. When I calculated the height of the vertical pieces of wood or stiles, I added in the top rail or last horizontal piece.
Luckily, the solution I came up with incorporated one other little detail I wasn’t particularly happy with. Given the height of the top of the fireplace, the once chunky finishing detail of the architrave on the lower wall felt too small.
I added in the missing rail to make the boxes all the same size and then to hide the seam that was created by my initial mistake, I added a half round.

On top of the existing smaller curved piece of the architrave I added a small scale chair rail and then capped the entire thing off with a ripped down piece of architrave turned on its side.
The finished product is much better than if I had not made that mistake! Gotta really love when that happens!

This weekend we hung our Frame TV back in place and the sconces from Troy Lighing a Hudson Valley Lighting company.
I love the way the sconces complete fireplace, even if it’s not really complete. The finish on the sconces are so beautiful. It’s described as a Pompeii Silver, but it’s warm and rustic too.
After grouting the tile, I’ll build the surround and the mantle. I can’t wait to see how this vision for the surround and mantle shapes up! Be sure to follow me on Instagram to find out!!
Oh, and I almost forgot one more detail that needs to be finished.
I added a side panel that will be a secret door to the component and controller for the Frame TV.

I know basically how I am going to create this jib door, but actually doing it is another thing all together! I still haven’t ordered the special hinges that make this happen.
Just to keep me accountable, here is the list of items to be completed for the 8 weeks.
- Paint panel portion of walls – DONE
- Build fireplace structure -DONE
- Install paneling on fireplace, patch and paint – DONE
- Remove existing flooring in fireplace -DONE
- Install tile in firebox- DONE, EXCEPT FOR GROUT
- Install tile for hearth- DONE
- Build mantle and surround for fireplace
- Install paneling around room, patch and paint – ALMOST DONE
- Install new baseboards, shoe moulding and paint
- Hang custom drapery
- Refinish pair of side tables
- Hang chandeliers
- Install sconces
- Install 4 beams across ceiling
- Install new door hardware
- Arrange furniture on new rugs
- Sew or find lumbar pillows for sofas
- Hang art
- Style china cabinet
- Accessorize both the living room and the dining room
- Finish the “surprise” space
- Photograph the room
- Write 8 blog posts total
While it still doesn’t look like I’ve checked off enough items on the list this week, I am nearly done with all of the bigger projects. Hopefully, all of the smaller things will come together rather quickly.
SPONSORS
A special thank you is necessary for my sponsors. They have graciously shared the products that make this makeover possible.
Novo Building Products | Hudson Valley & Troy Lighting | Apt2B
Emtek | Loloi Rugs | Couristan | Calico | Overstock
The Tile Shop | Bemz | AZ Faux Beams | Romabio
Be sure to visit all of the talented Featured Designers for their week 4 updates.


A Glass of Bovino | Beginning in the Middle | Beth Diana Smith | Clark + Aldine | Coco & Jack
Deeply Southern Home| Design Maze | Dwell by Cheryl | Erika Ward | Home Made by Carmona
House of Hipsters | Hunted Interior | Kandrac & Kole | Kate Pearce | Katrina Blair | Liz Kamarul
Veneer Designs | Rambling Renovators | Renovation Husbands | Studio Plumb | Media BH&G
And then look for the Guest Participants on Thursday! It’s so very exciting that there are a record number of guest participants this year. How cool is it that over 350 blogger entries and 260 Instagram entries!! From what I can tell in the little bit of time I have spent seeing all that is happening, they are killing it!!
Thank you to Linda, of the One Room Challenge™ and the official Media Partner, Better Homes and Garden for having me this season!!


Oh Leslie you deserved a big break this week after all that hard work at the fireplace and it looks sensational!! Love that you have looked into the referencing of the side of the firebox and hearth for a realistic look and it paid off! Herringbone is the perfect pattern and I think you have just started off a new trend with moulding … tudor style!!
Thank you so much, Tim! I think once it’s done and styled it will look fairly realistic. I am a huge fan of Tudor architecture and I’d love if I started a trend. Our neighborhood has quite a few houses with Tudor influences, although most people probably have no idea that’s the case.
You’ve done such a great job, this is such a beautiful space!
I have a Frame TV so I know what to look for, but I am SHOCKED at how well you hid the box and wire. I didn’t see an alcove behind the TV from before you finished everything, so I am genuinely curious…how did you hide the thin fiber cord that connects the “guts” to the tv with that molding? It’s incredible.
Thank you so much! I had the contractor add a hole in the back of the TV. The thin fiber wire just runs down to the little jib cabinet we are creating. Similar to what we did when it was hung on the wall. Does that make sense?
This fireplace is incredible!! Can’t wait to see more!
Thank you!! I can’t wait to be finished!!
Beautiful. I love this! My one comment would be the tile in front looks strange to me because it doesn’t cover the floor from end to end of the fireplace, so it looks unfinished to me and takes away from that realistic look you’re wanting. Looking forward to the reveal!
Thank you, I think it will look right to you once it’s complete. Most stone fireplace surrounds have the hearth tile just under the marble or limestone.
How did you accommodate losing your hvac ceiling register that was closed in behind the fireplace wall? Did you reroute the vent?
Yes, we rerouted the air vent to the right hand side of the fireplace. I just don’t have a photo of that in the post. Thankfully, there were no obstacles and it was very easy for my contractor to do.
It looks incredible! what a classic style! I love the secret compartment for the TV components. So smart!
Thank you!! Yes, the compartment is going to be fun to figure out!
Hello, I love your fireplace! It’s so beautiful that it became my inspo to our very first big home project at our new house. Can you explain/describe how was the depth created using crown molding? to make the mantel? Thank you!!