The Final Reveal
It’s finished! Today I am sharing the full reveal of our bathroom and closet. After months of planning and a few years of dreaming about what this bathroom could be, I am absolutely in love with the results. These last eight weeks have been a challenge, full of the usual ups and downs and the unplanned detours of life.
In case you missed the weekly progress and behind-the-scenes chats, check out the links below.
Week 1 Vision and Overall Plan || Week 2 Full Design Plan & Inspiration || Week 3 Decisions & Progress || Week 4 Closet Plans & Demo Begins || Week 5 Checkerboard Marble Floor || Week 7 The Week I Panic
The Bathroom
The Before
We built this house almost 3 years ago and I did my best to make the most of the builder-grade offerings. But after customizing our last two homes with luxury renovations, this bathroom quite honestly fell a little short of what we had become accustomed to.
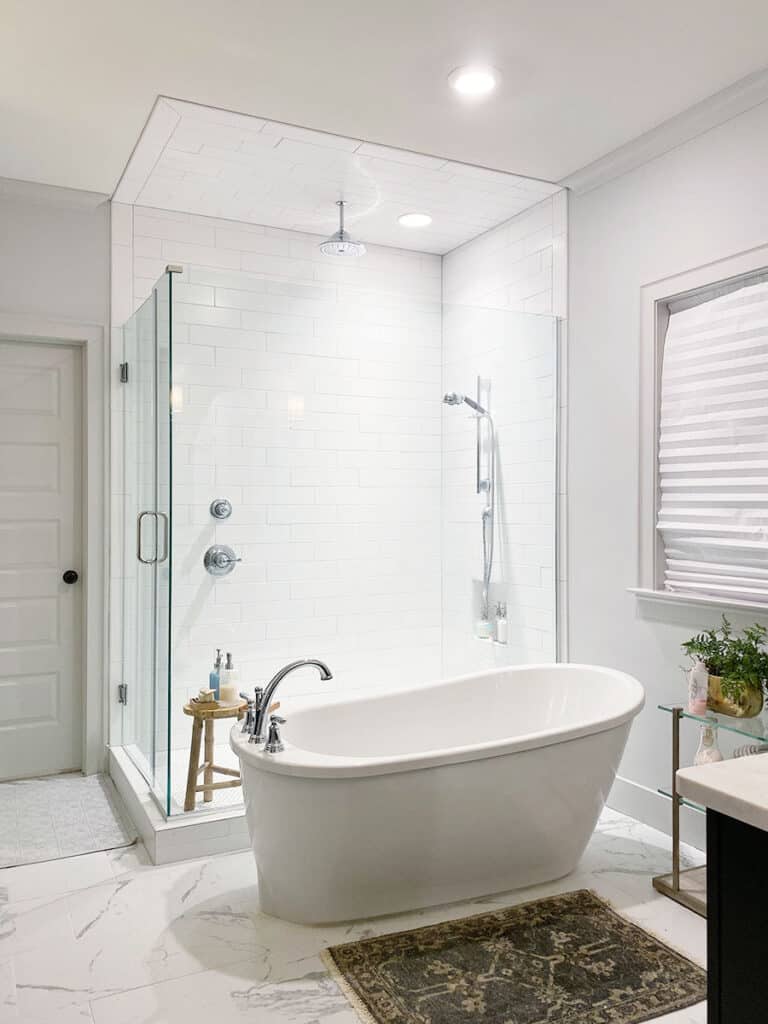
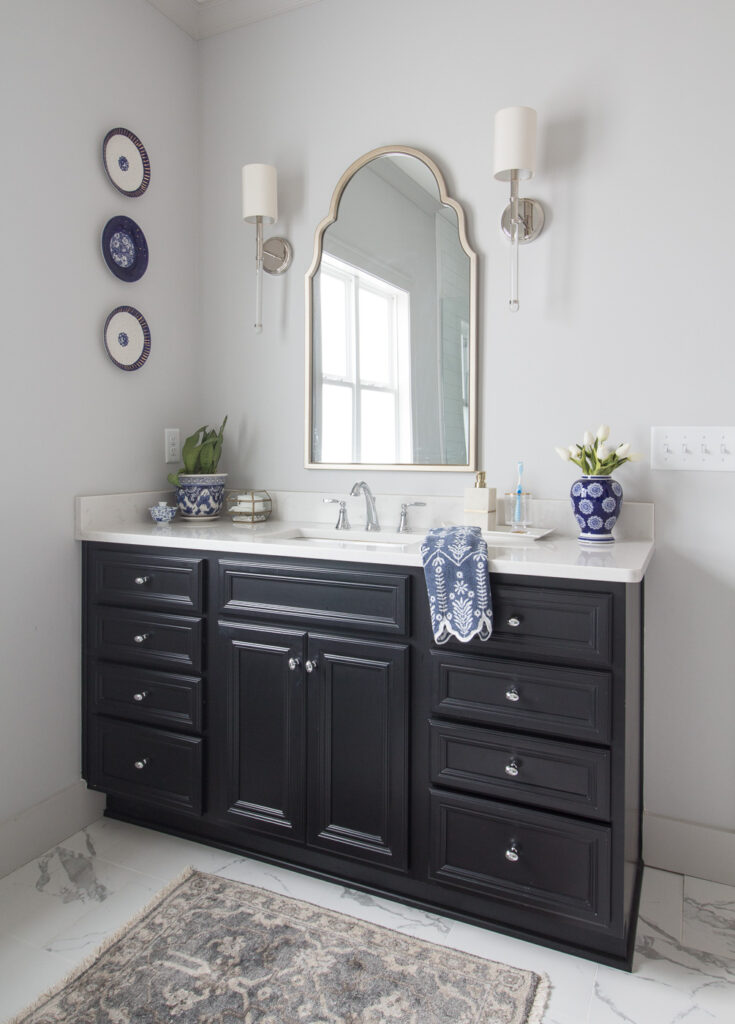
Those two previous bathroom renovations were also part of previous One Room Challenges. The first was very spa like with soft blues and Carrera marble. The second took full advantage of the grandeur of the space adding molding and replacing a jacuzzi tub. Both bathrooms had generous freestanding tubs that I thoroughly enjoyed.
A year into living here, I did my best to add designer touches to this bathroom. Custom drapery, warming up the color palette with a new paint color and adding little details.

While the room was definitely improved by these changes, the small tub continued to be a nagging issue for a dedicated bathtub enthusiast such as myself.
And let me make sure this point is absolutely clear. I am all of 5’1″ flat-footed. I could not stretch my legs out in this tub in any kind of reclining position. It was that small!
The Goals for the Renovation
- Replace tub with appropriately sized soaking tub
- Add heated floors
- Fix poorly grouted shower floor issues
- Add panel molding in keeping with the primary bedroom
- Create a timeless, European traditional design
The footprint, cabinetry, and custom drapery would remain.
The After

The Panel Molding
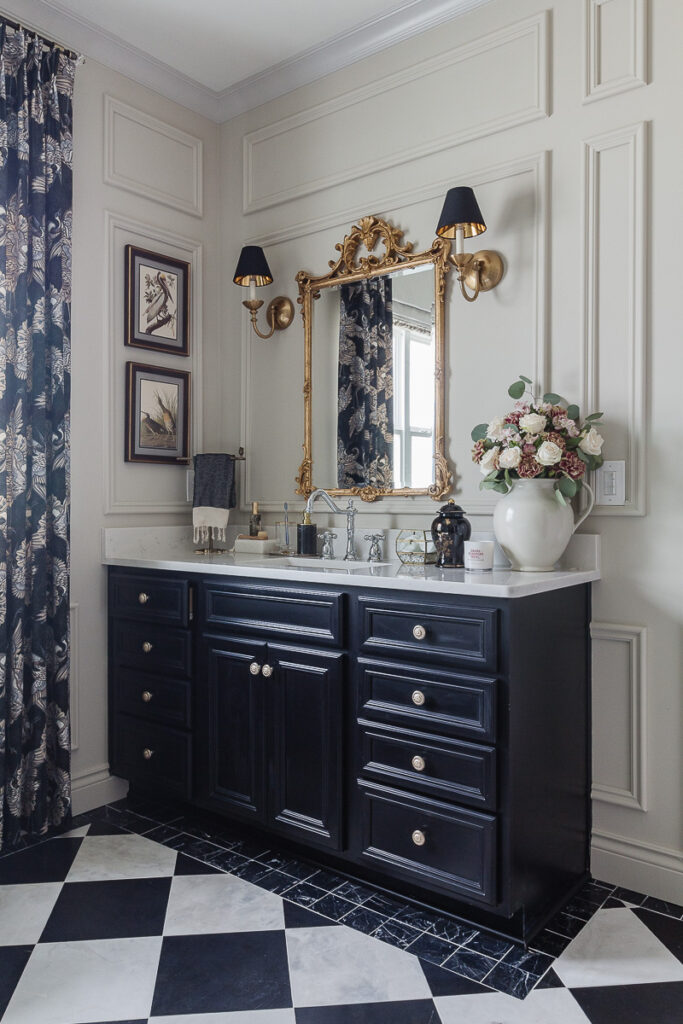
I have been using panel molding from Novo Building products and Ornamental Moulding to add old-world-inspired architectural details for many years. I think this makeover is the 5th room panel molding has been installed as part of one of my previous One Room Challenges. This is my 11th One Room Challenge!
This molding is available at most Lowes retailers and is considered a chair rail. I love the look it gives as a heavier panel molding.

The Tub
Since one of the main motivating factors for this renovation was improving the bathing situation, let’s talk about the beautiful tub.
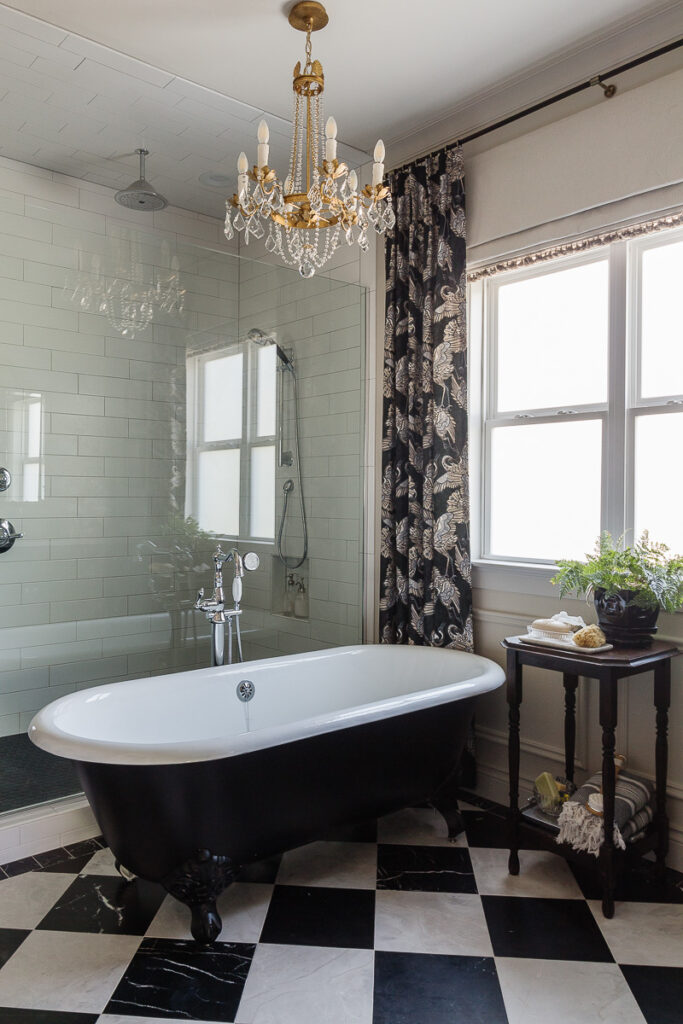
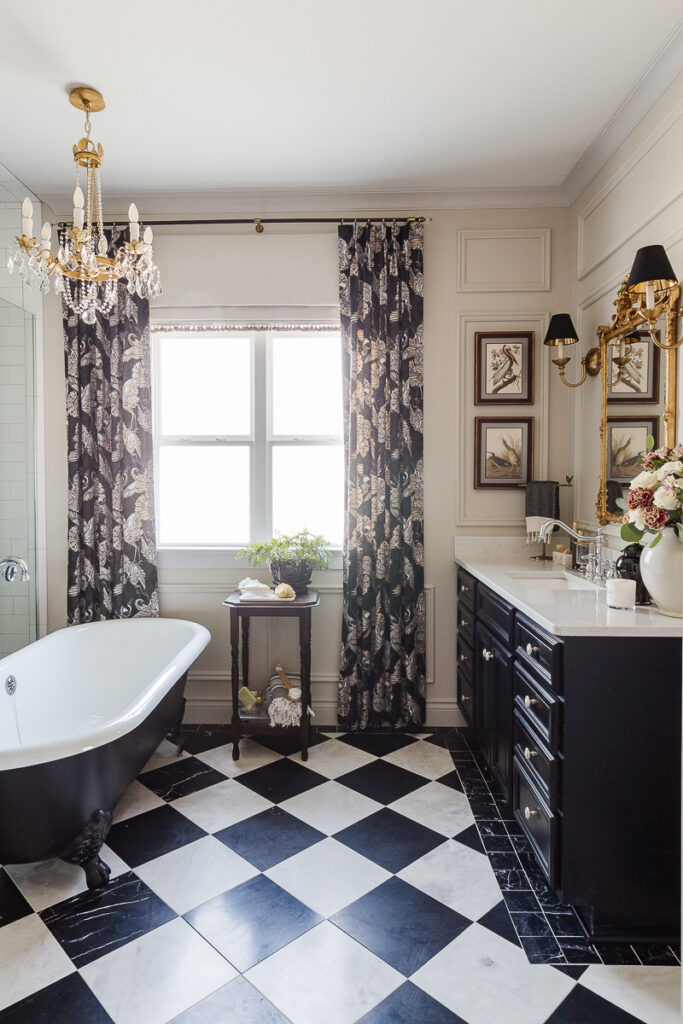
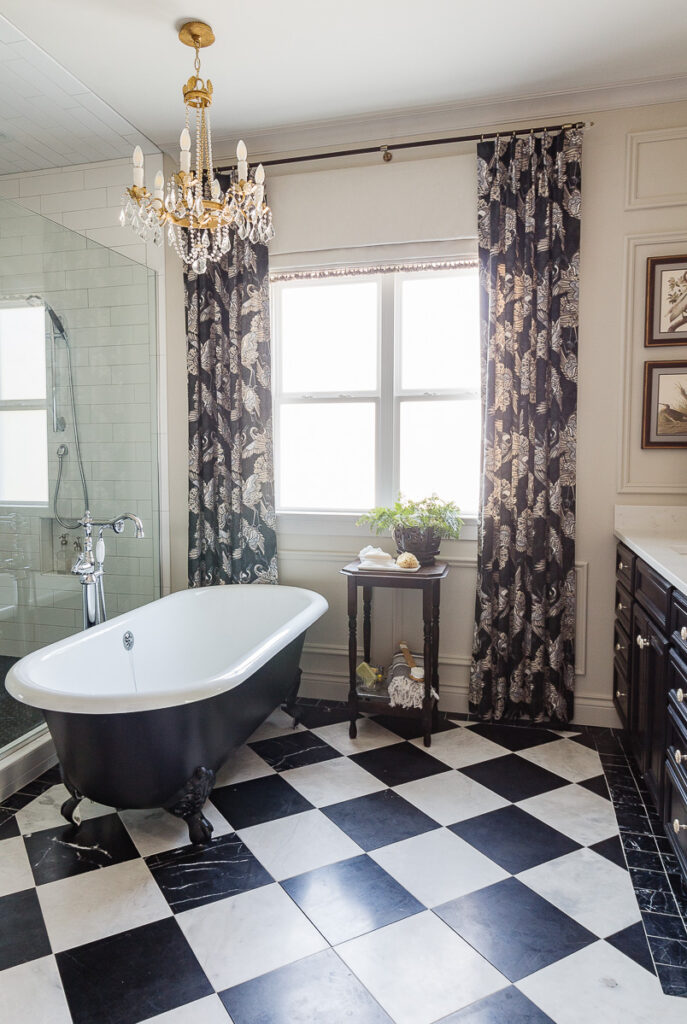
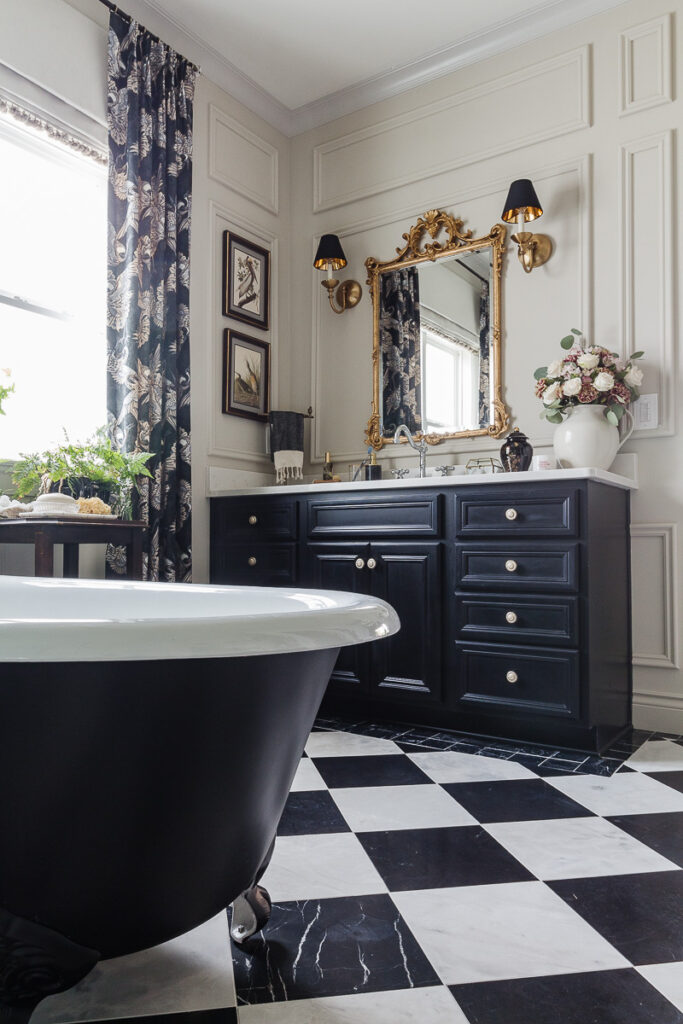
This tub is everything I’ve dreamed of and more. The size is absolute perfection. This is the 66″ model of the Kensington Cast Iron Tub from my sponsor, Vintage Tub & Supply.
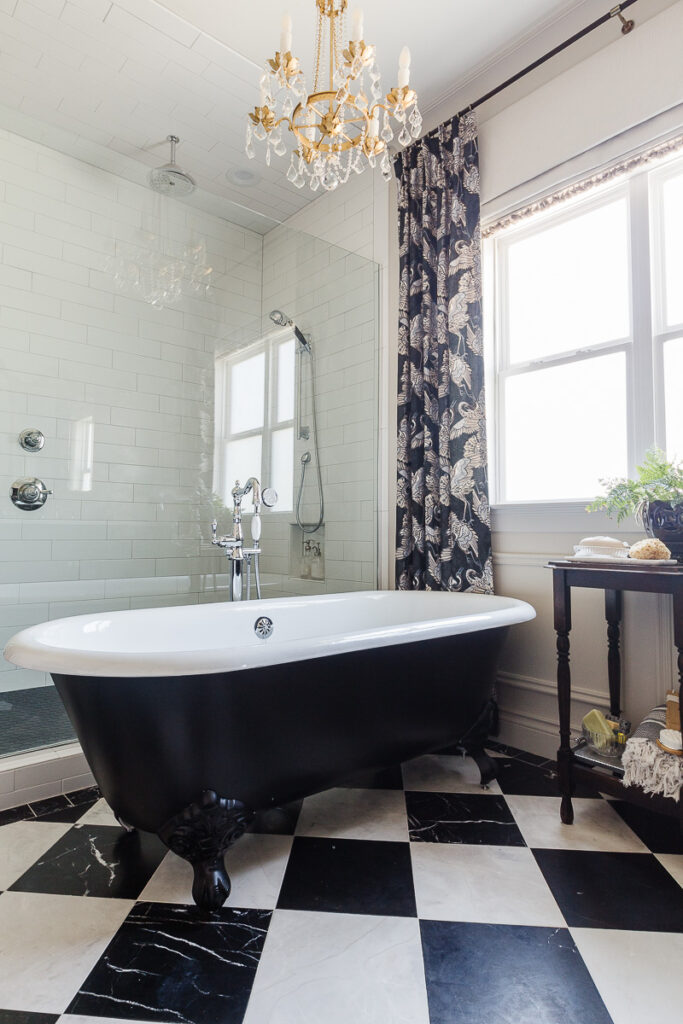
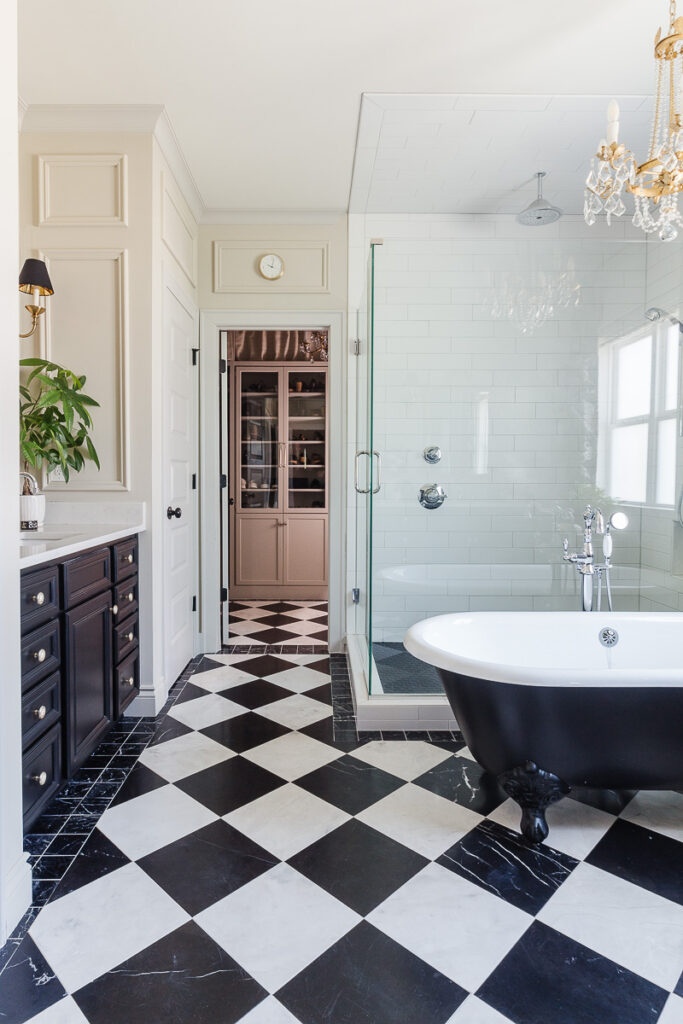
I opted for a matte black finish on the outside of the tub and the feet. I love the way it compliments the checkered marble floors.
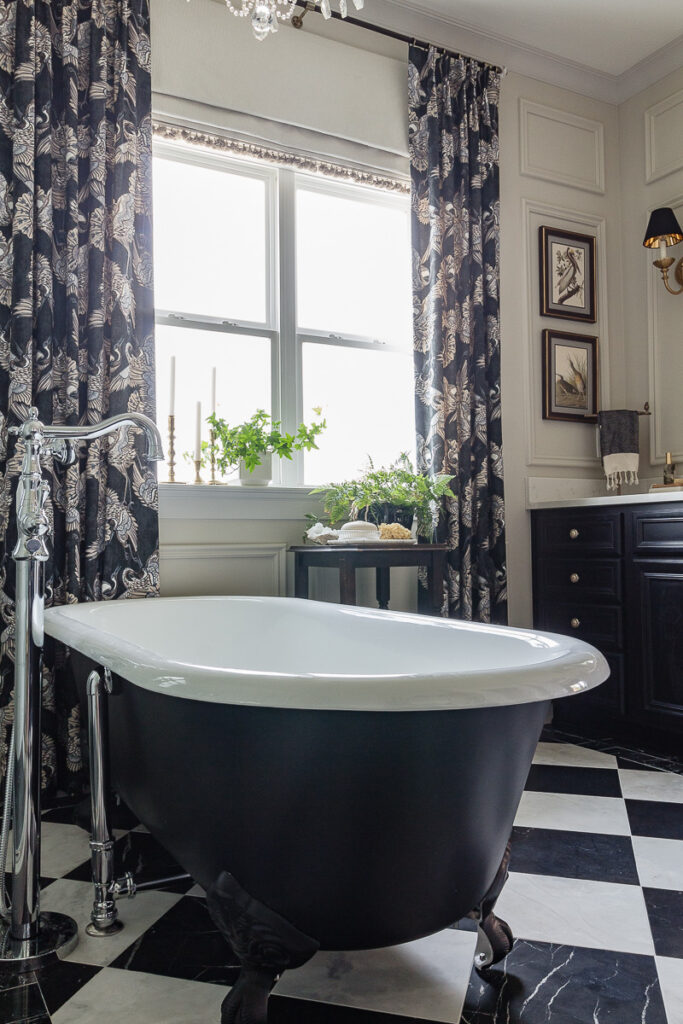
The freestanding tub filler is an equally beautiful piece. The handheld sprayers are a welcome addition to the bathing experience. Another point I sorely missed with the previous tub.
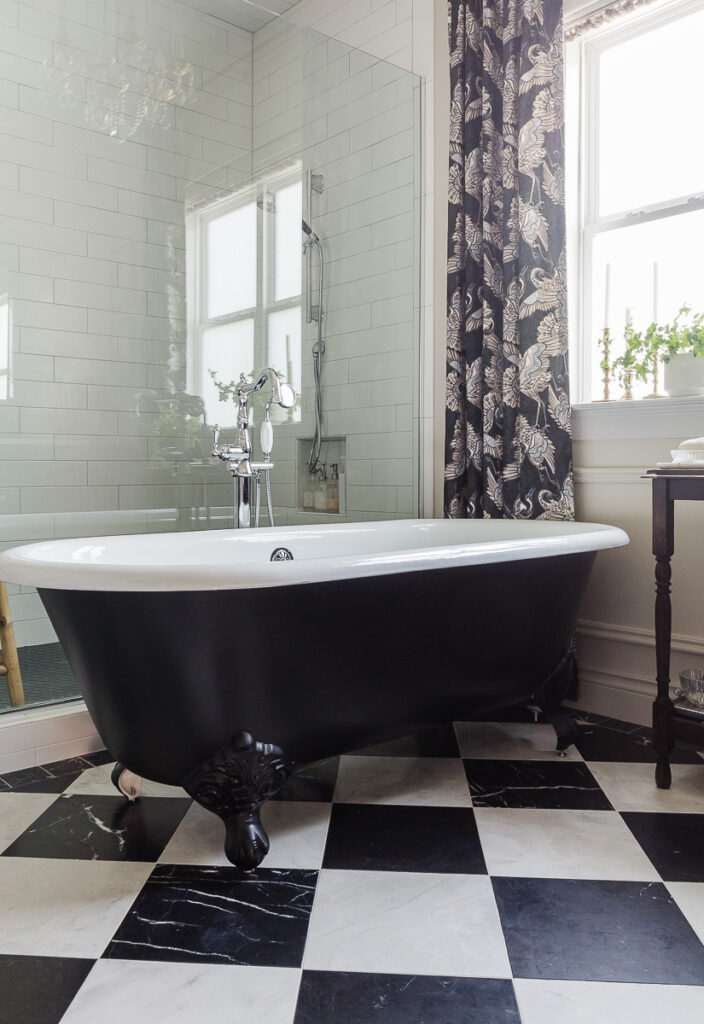
I have never had a cast iron tub and I now know why it is the most desired of all types of tubs. It truly retains heat far better than an acrylic tub. Already, I have spent over an hour at a time in the tub and never felt the water temperature drop enough to feel even slightly cool. I used to refill the old tub with hot water when it got too cold so I could soak longer.
The Vanities
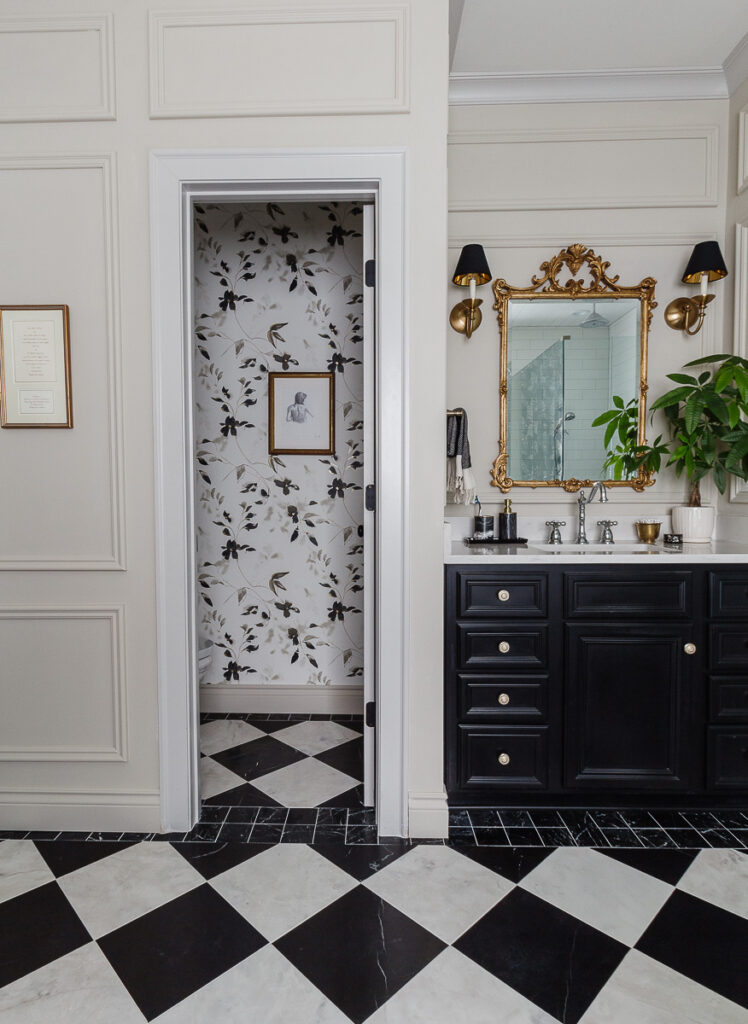
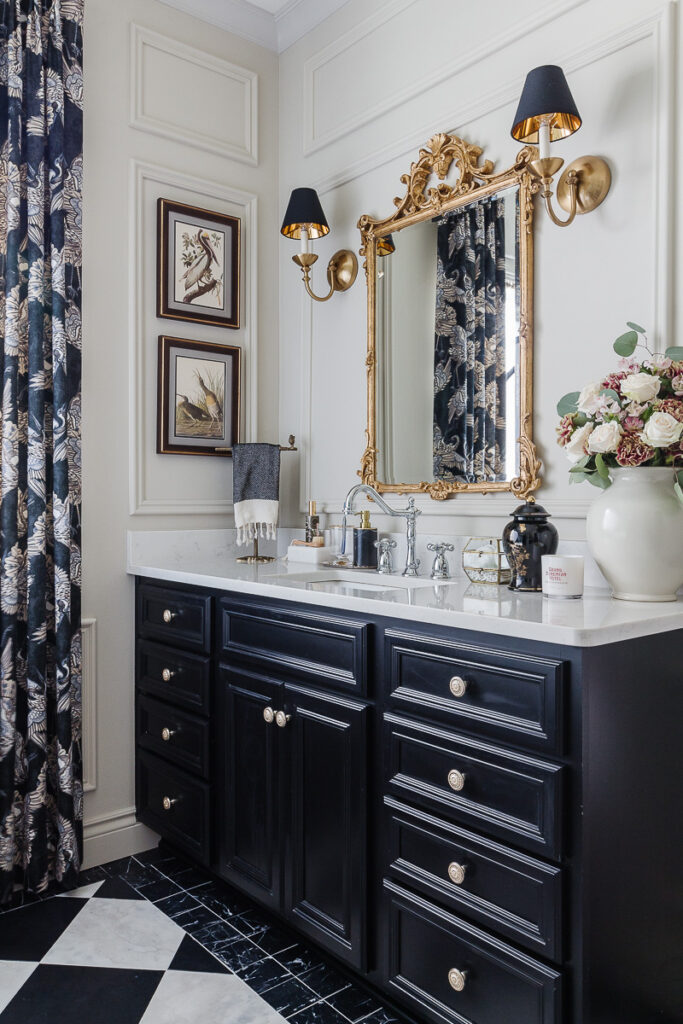
For the Vanity areas, the stone and cabinets remained the same. New ornate mirrors and more traditionally styled sconces replaced the previous versions that were given new homes through Facebook Marketplace.
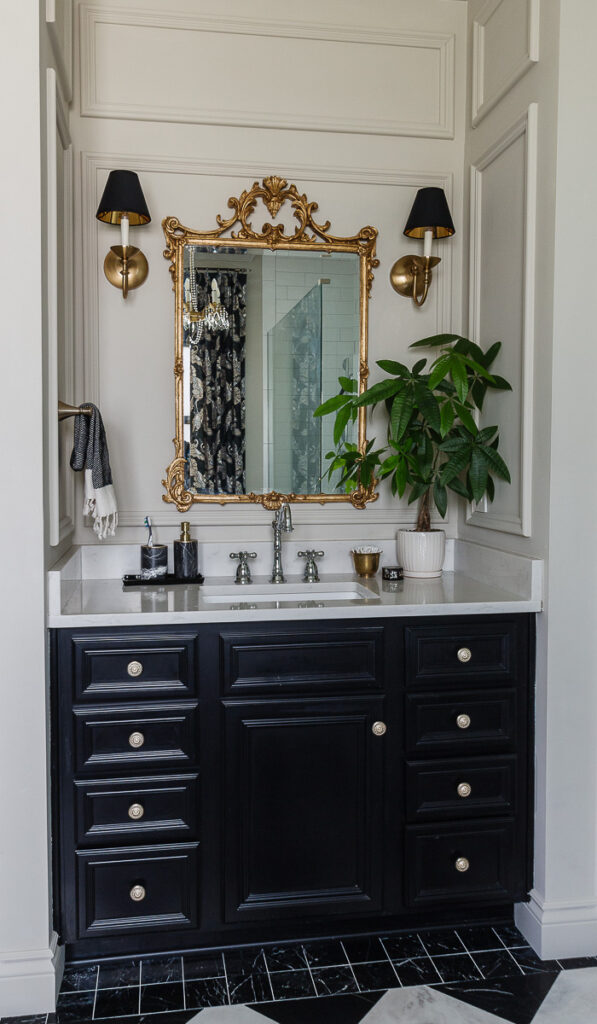
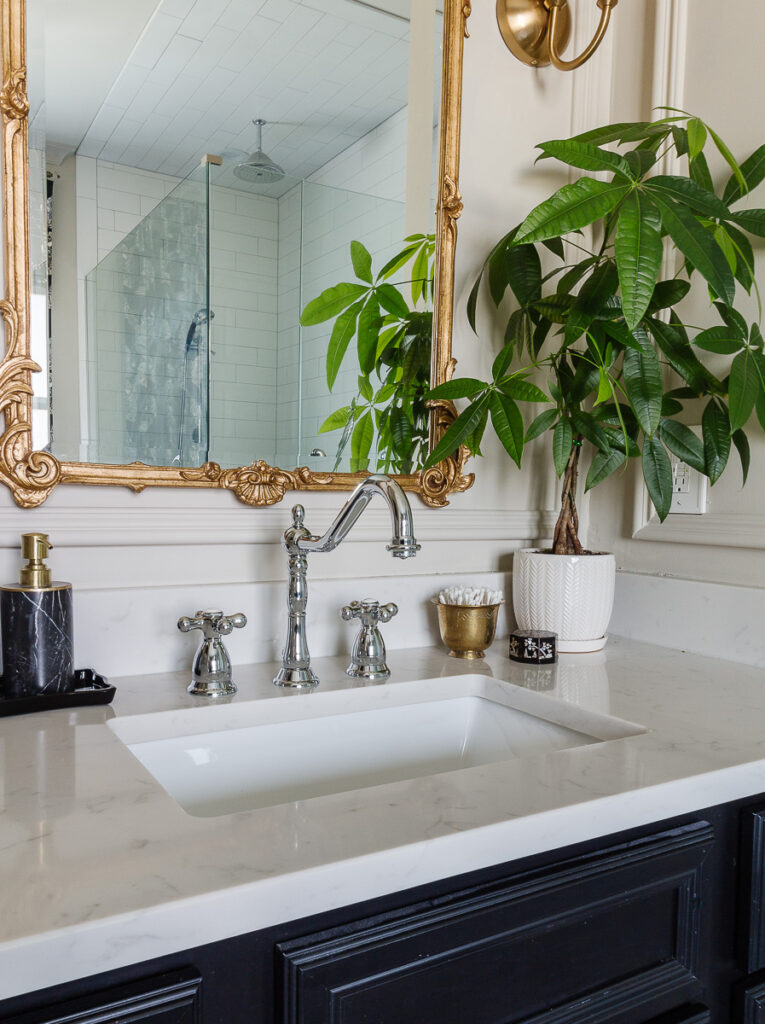
New Victorian style, high arc sink faucets are dramatic new additions that coordinate with the Freestanding Tub filler.
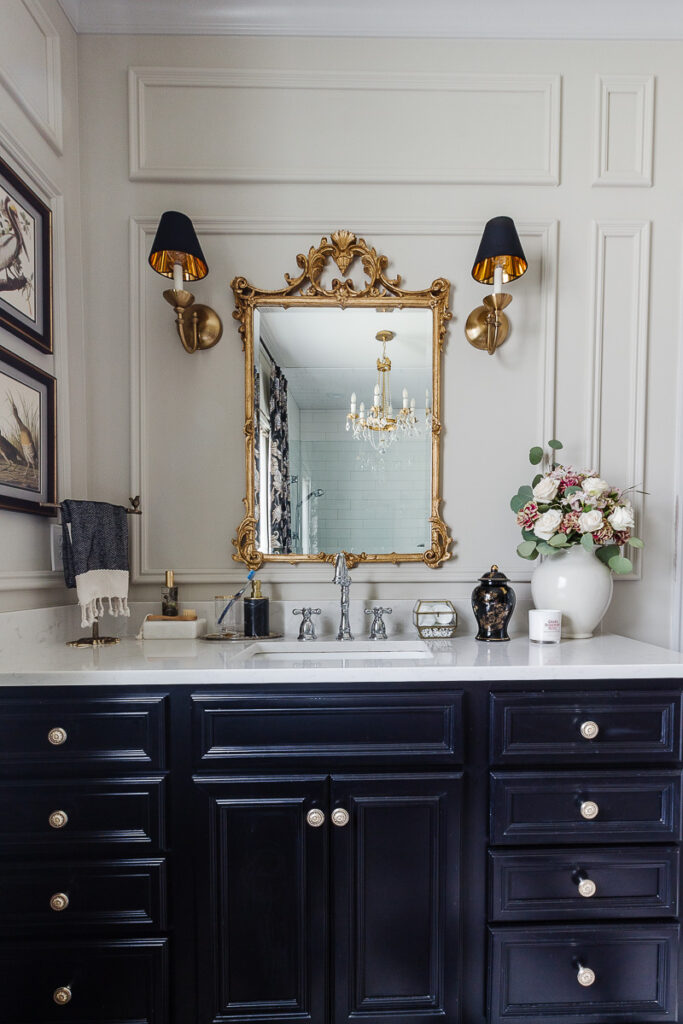
One unique feature both faucets have is a pivoting head. It is great for allowing you to rinse your face right next to the faucet to reduce water run-off.
The Water Closet

The floral wallpaper is an unexpected touch as you peek inside. Finding the right wallpaper to complement the whimsical nature of the custom drapery also from Calico, was a little bit of a challenge. But working with the knowledgeable staff at my local Calico we were able to narrow down the options rather quickly.
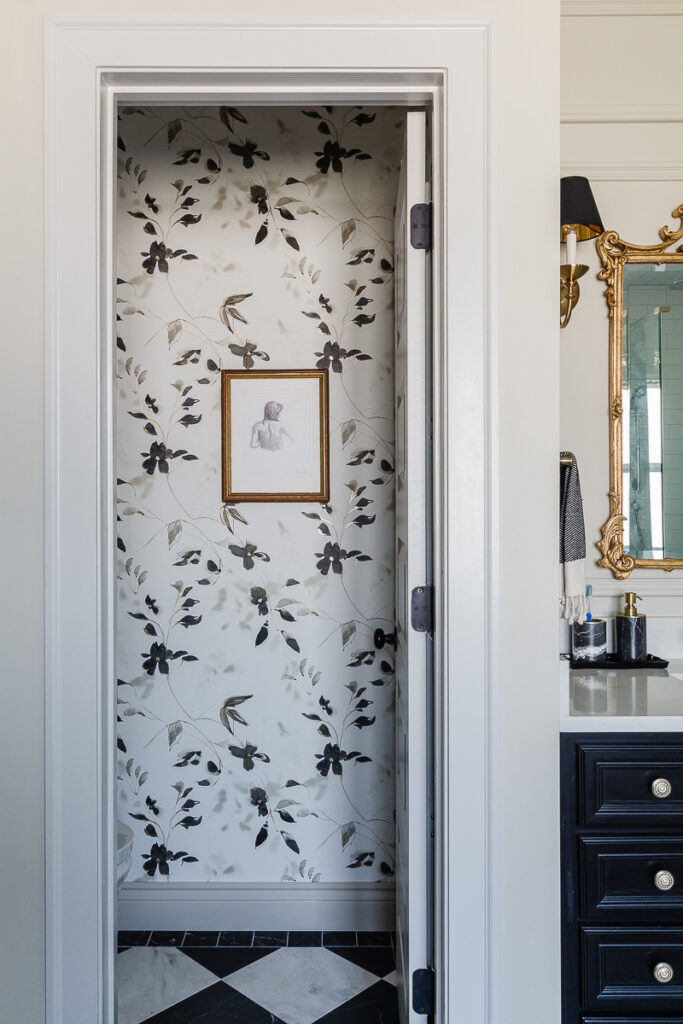
I was just a little surprised to find this sketch at HomeGoods during a last-minute trip. I had my daughter trim down the oversized mat and place the art in a vintage frame.
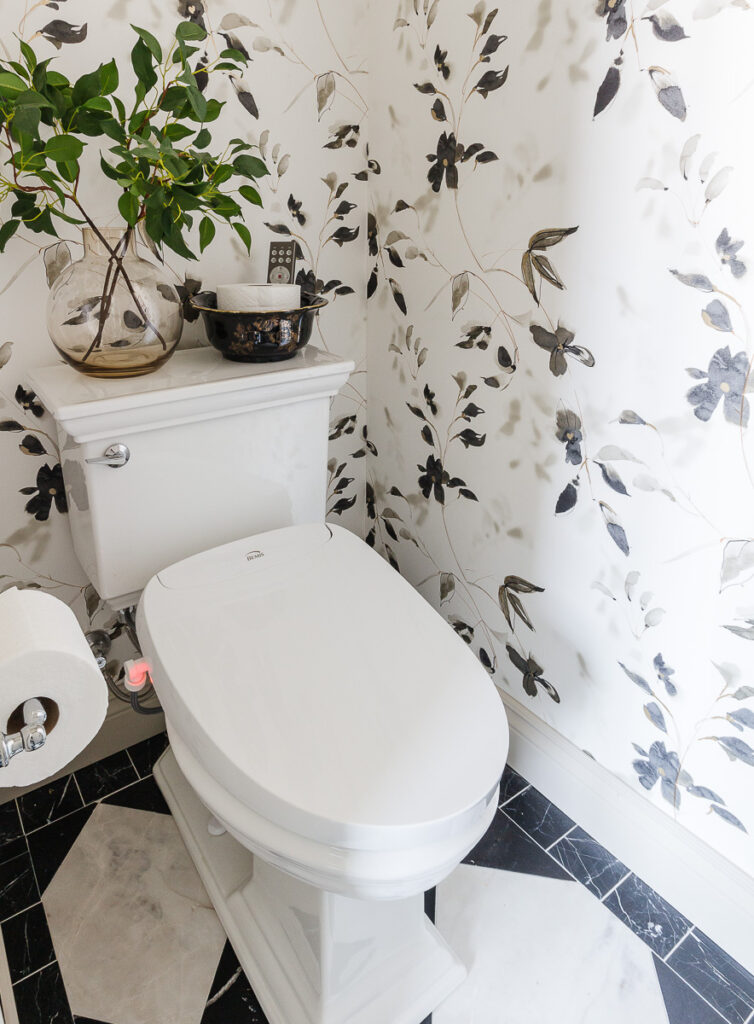
My hope is the room feels timeless. However, there is more than one high-tech addition.
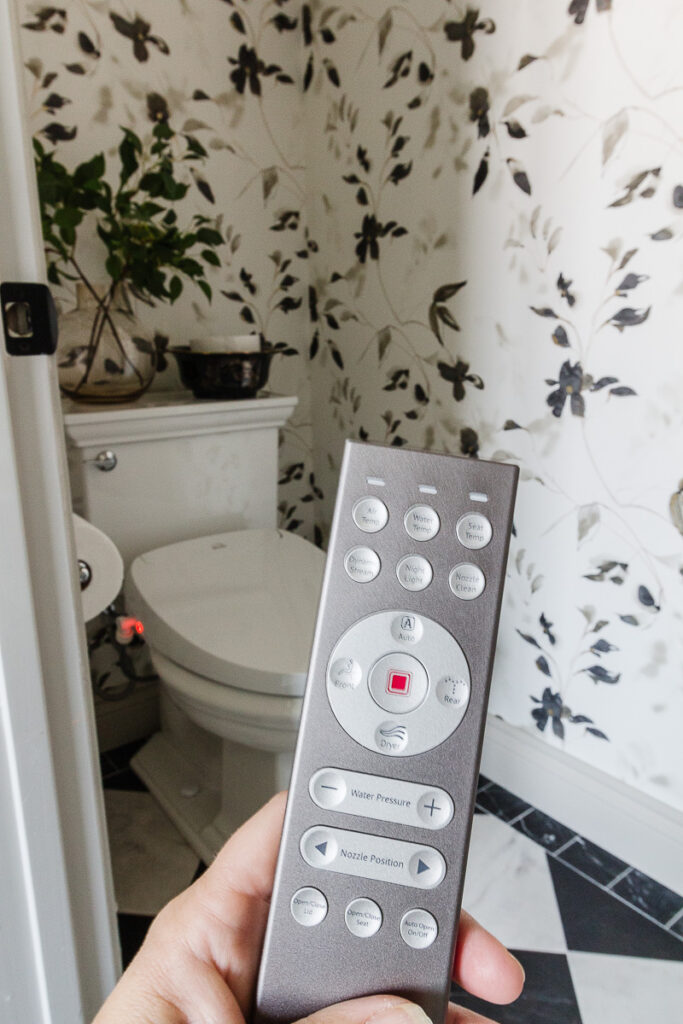
I can describe this bidet, from my sponsor Bemis, as the ultimate in luxury without hesitation. It has a heated seat, automatic lid, and seat rising functions, and night light. Not to mention, UV sterilization, heated water, and a drying function!
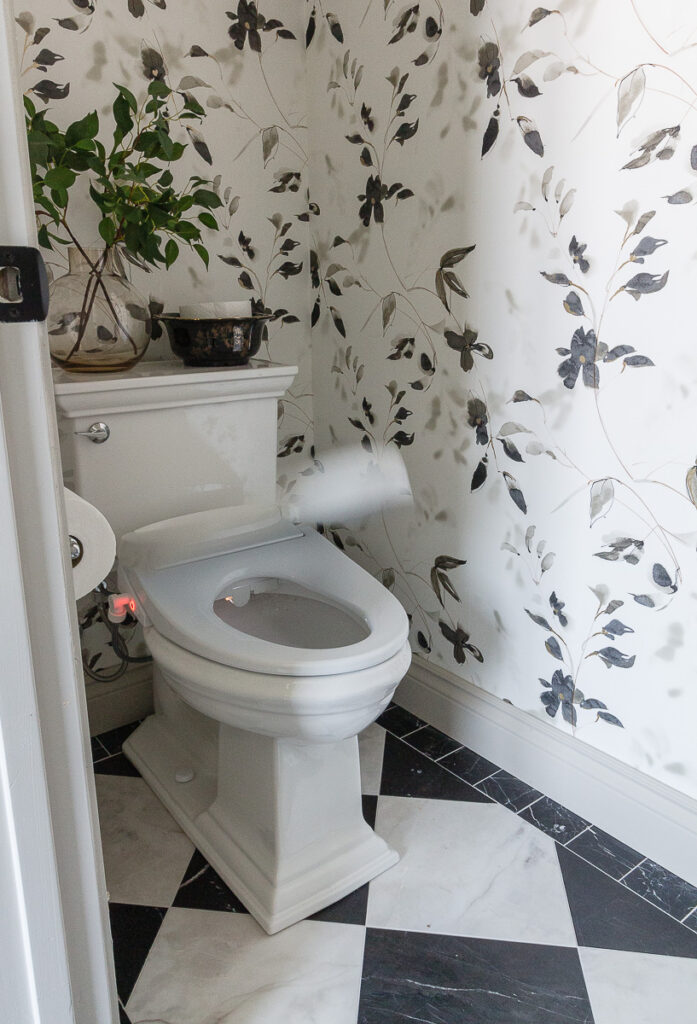
I guess I’m going to get just a little personal here but I don’t know how else to tell you about this bidet. We previously had a different brand of “entry-level” bidet that I disliked using because I didn’t enjoy cold water on my skin. It was just not something I enjoyed and therefore never used it. My husband didn’t seem to mind and was a total convert, but there’s no denying he likes warm water and a warm dryer better.
So, my thoughts on bidets are this. If you are going to invest in one, go all-in for every luxury offered to ensure you actually enjoy the experience. This Haven model fits the bill.
Styling the Room
Besides the water closet, the only opportunity for art in the room was this one wall next to the vanity.
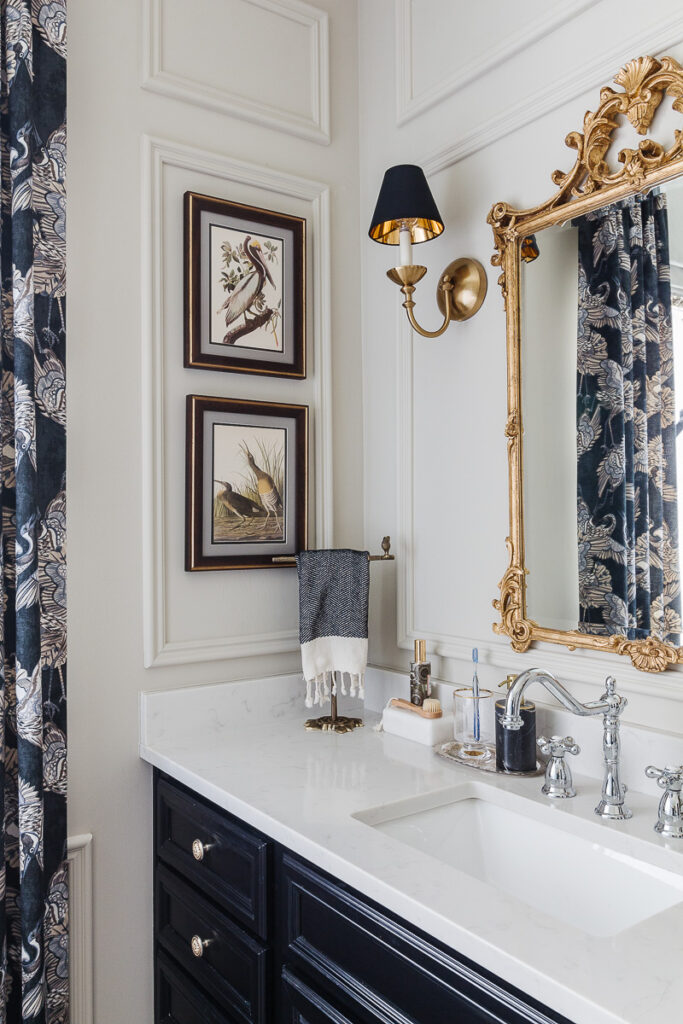
A few months back I picked up these Audubon prints from a vintage reseller friend of mine. The birds, the egret, and the pelican were the perfect way to incorporate a nod to our southern heritage. The Pelican is the state bird of our home state of Louisiana.
The beautiful wood and gold frames from Custom Picture Frames bring warmth to all of the cooler surfaces. This is the Jensen frame with a Terrazo and black mat. They are my favorite resource for custom framing that doesn’t cost a small fortune.
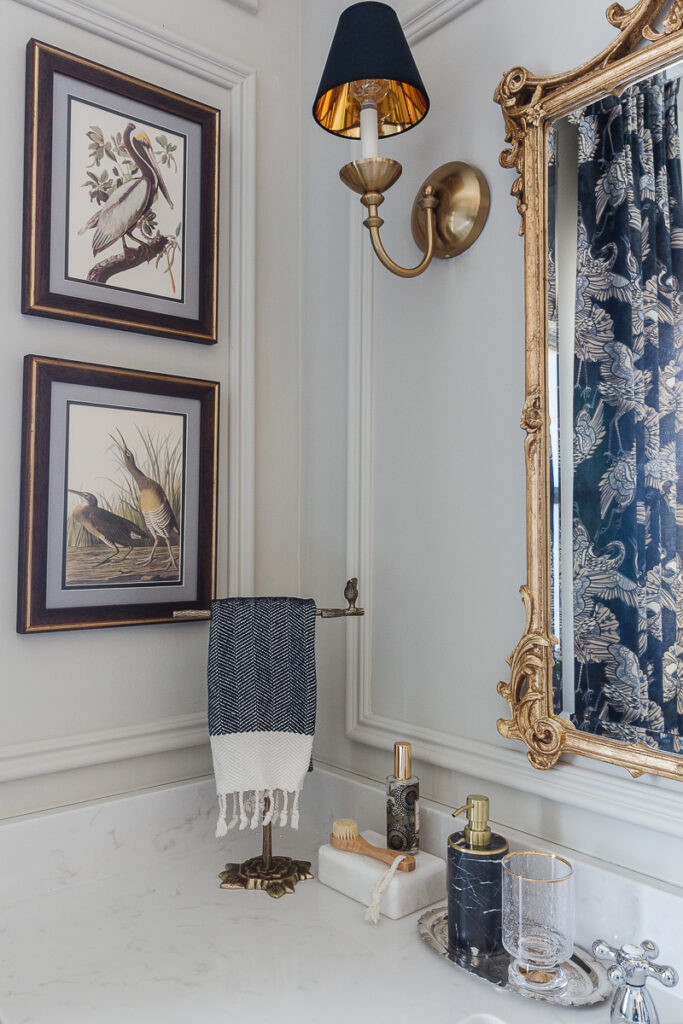
Like any of my spaces, I love to bring a mix of old and new accessories. I found the perfect black marble, gold-rimmed soap dispensers and paired them with vintage trays.

A favorite scent from a local hotel tucked in with a vintage urn and a newer neutral ceramic pitcher filled with florals finish off this vanity.
The Window Treatments

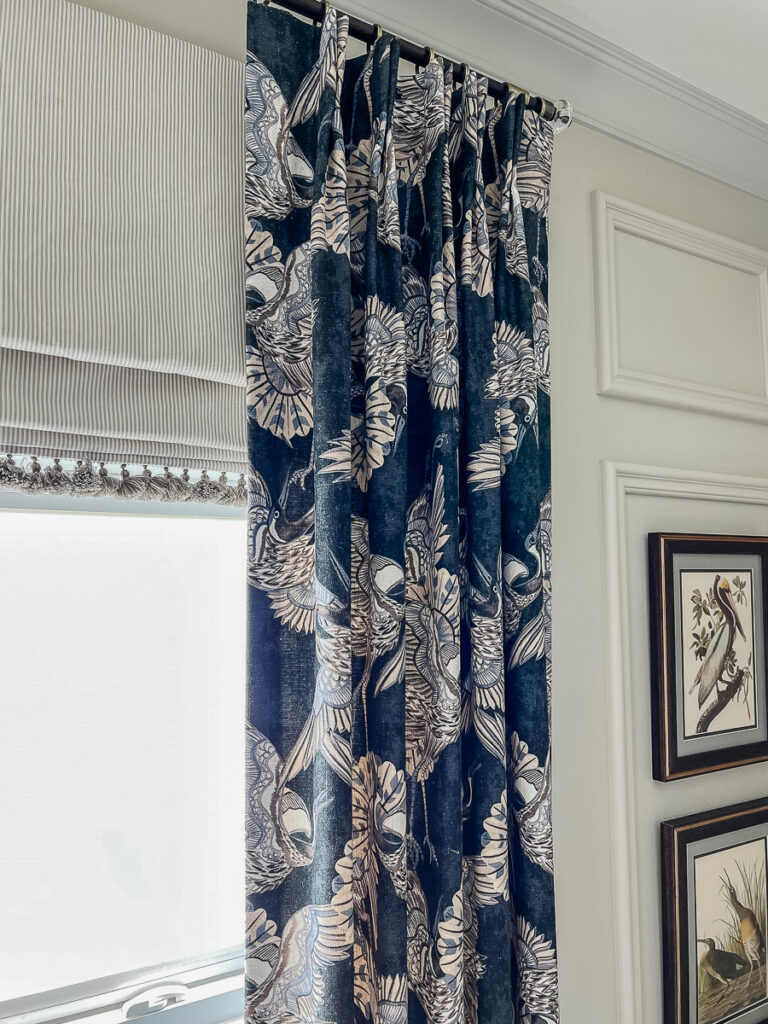
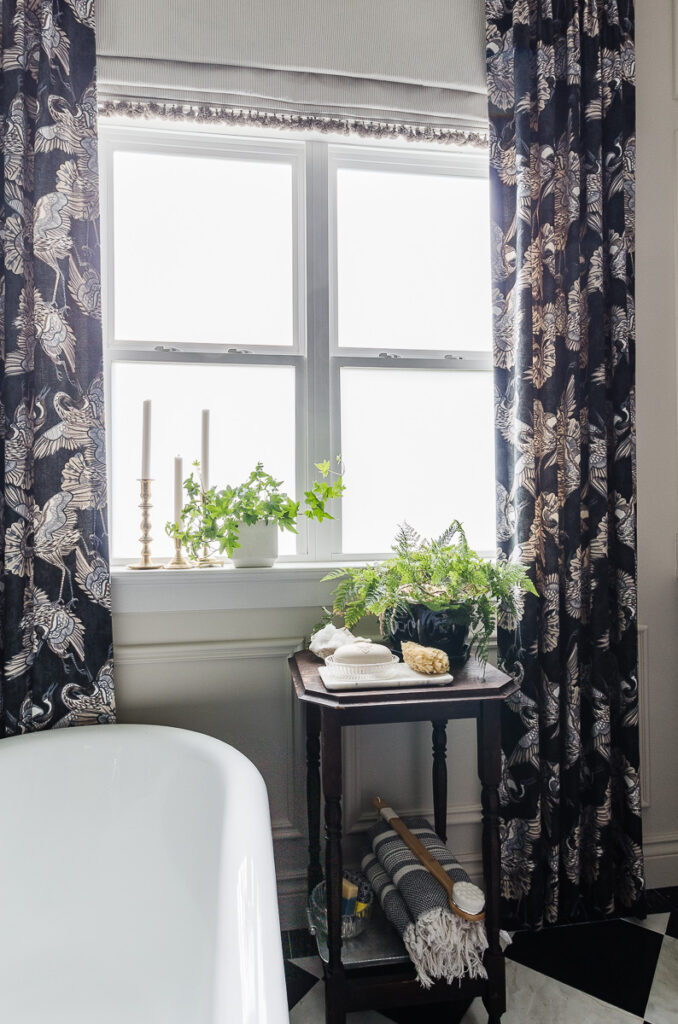
I loved the original custom drapery from Calico and the style and pattern were in keeping with the new design. This Stacy Garcia egret pattern is made from Crypton fabric so I don’t have any concerns with them hanging near the tub.
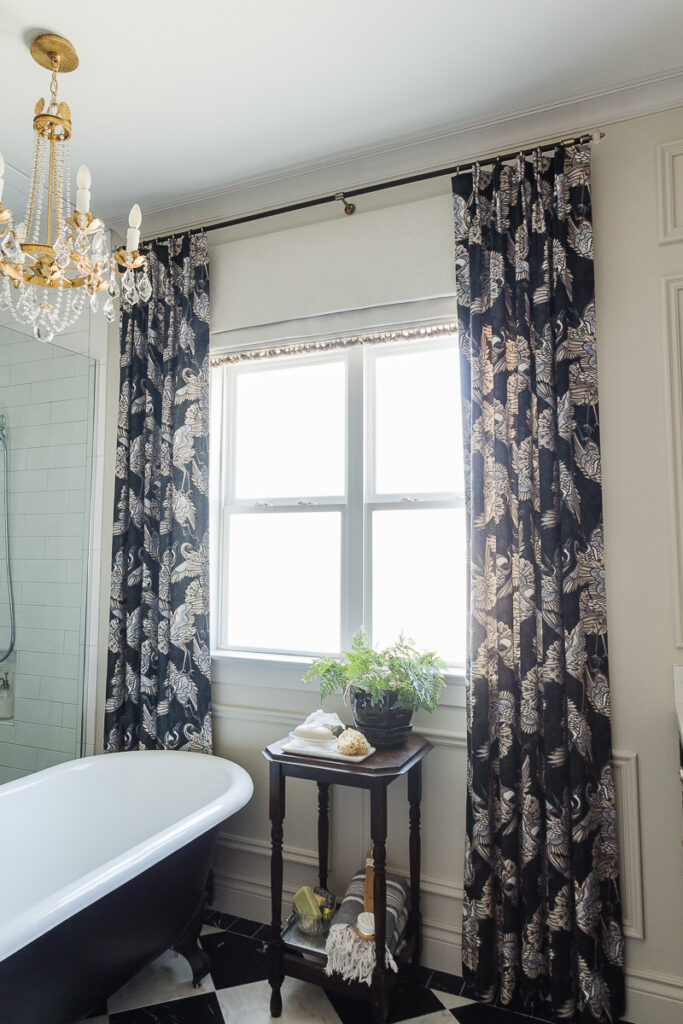
The new additions from Calico are the tailored wooden rod with antique brass finishes and the faux roman shade. The one issue I had with this previous window treatment was the wall space above the window. Adding a small pinstriped roman shade with an adorable tassel fringe along the bottom remedied that nicely.
The Custom Closet
Before
As with any good reveal post, we must start at the beginning.
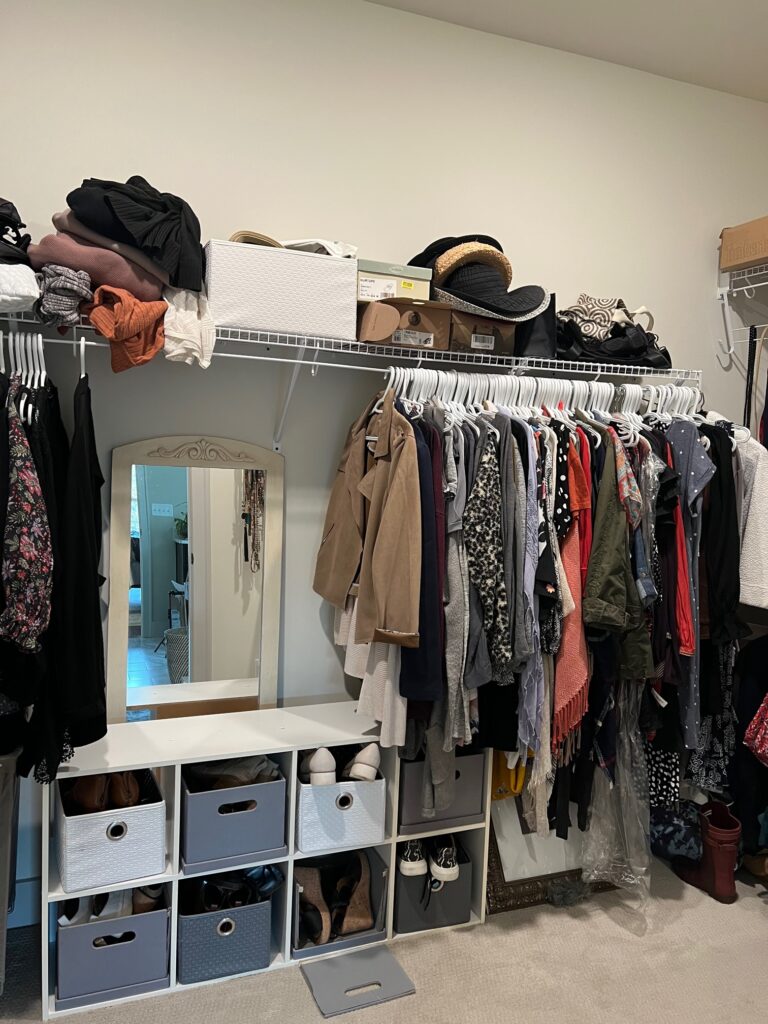
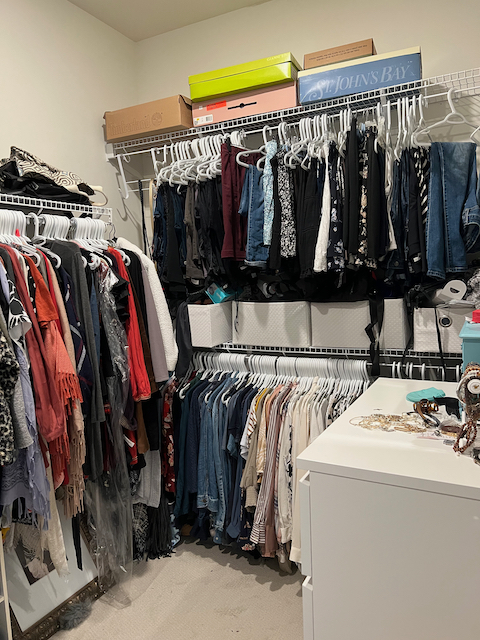
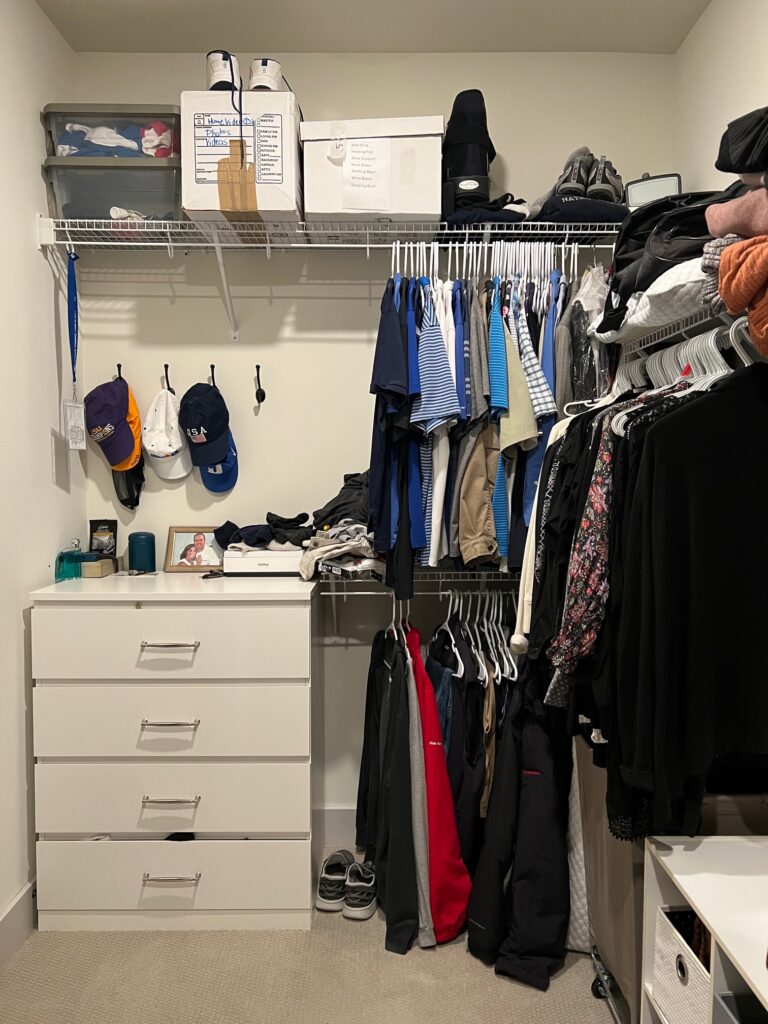
The before was cluttered, but honestly no different than most basic closets installed in new construction. Inefficient wire shelving and no frills. The one upgrade we made was to move in 2 Ikea dressers so that it functioned more like a dressing room. But only to the degree that everything we needed to dress for the day was in here.
You might have noticed from these before photos the vertical space of the closet was underutilized. What you can’t see is the carpet had a few paint stains thanks to our builder’s final touch-up paint job.
Luxury Closet After
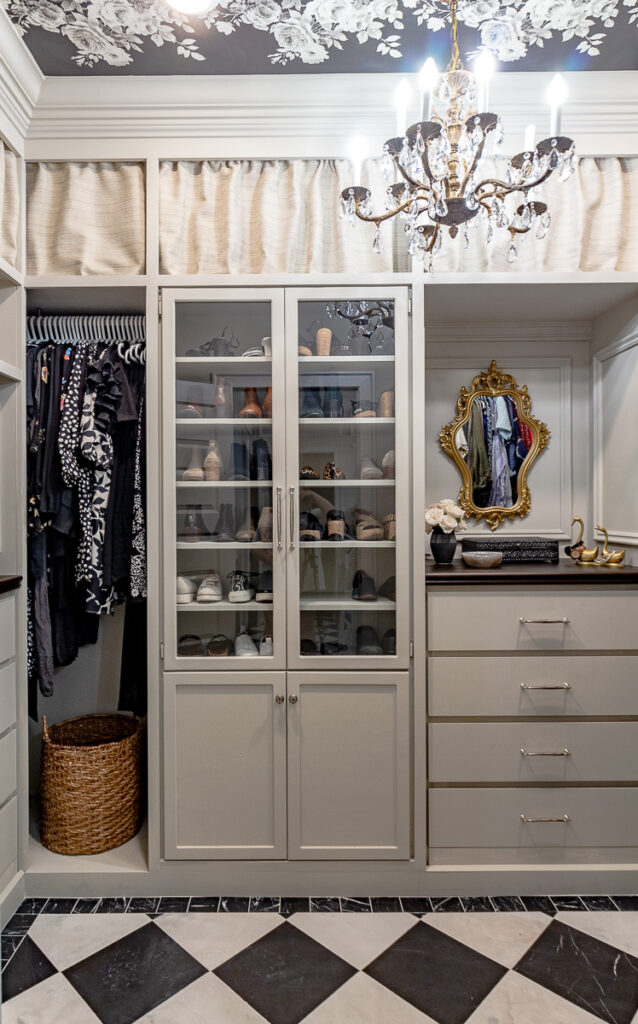
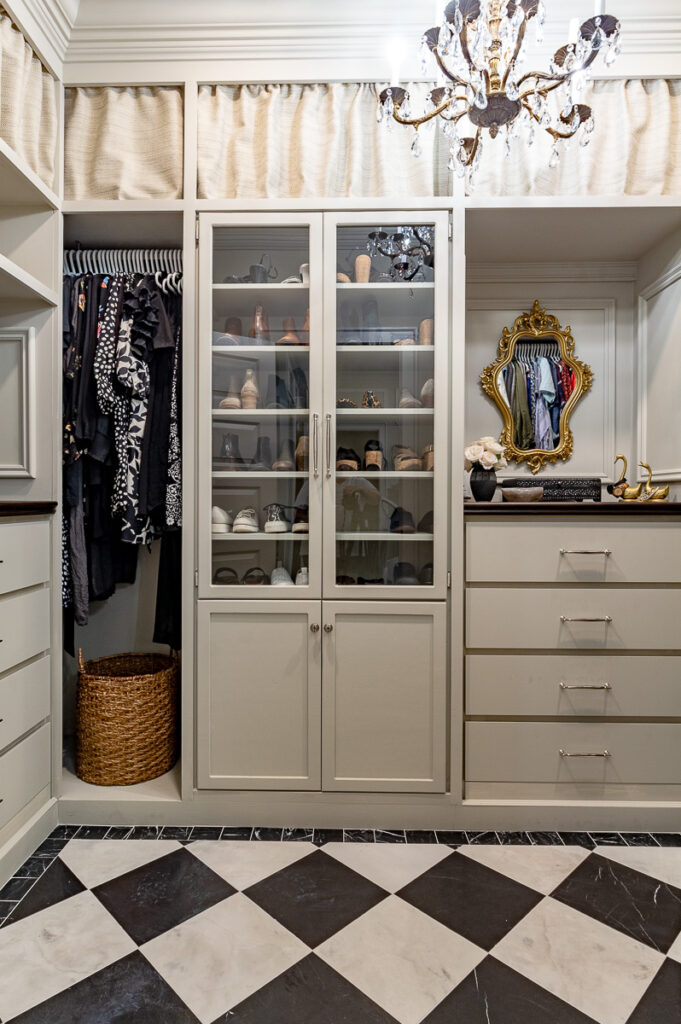
The closet now feels like a luxury retreat.
The Marble heated Floors
The first component of luxury is the heated marble floors. These floors go throughout the entire bathroom and were one of the driving forces behind the renovation. We had installed heated floors in our last two homes and found we longed-for toasty toes again as extravagant as it is.

We tucked the control panel for the heated floor in one of the hanging clothes sections.
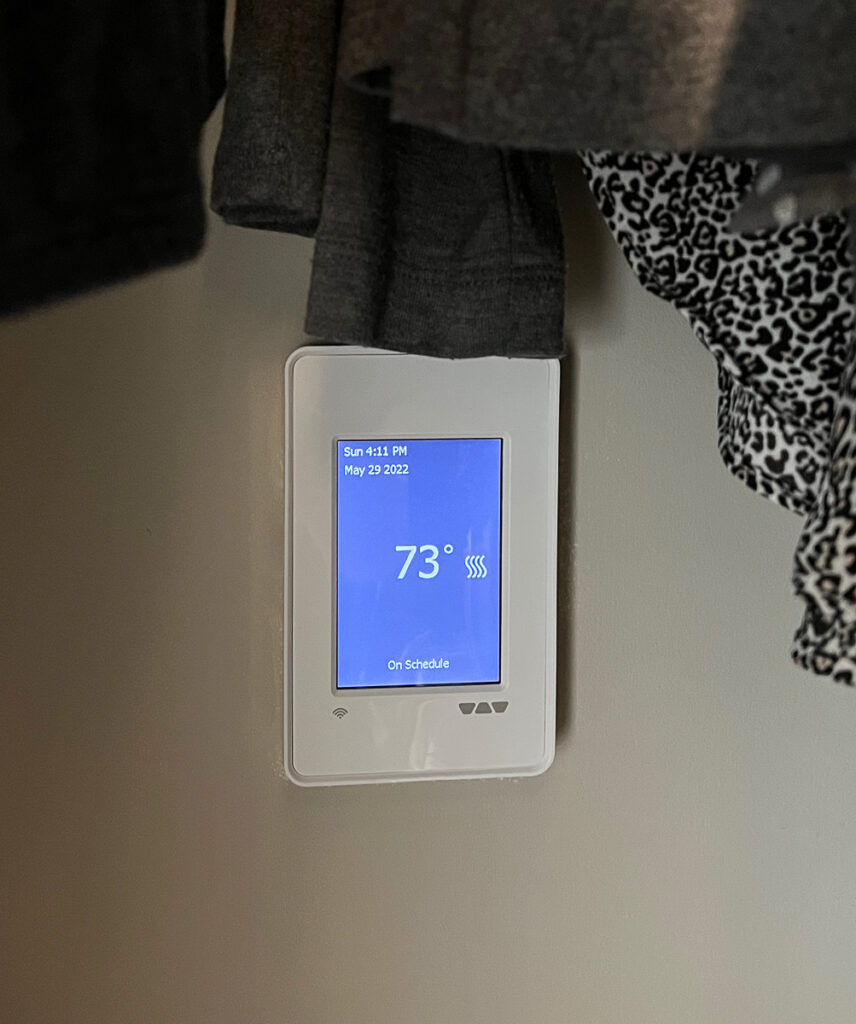
The 12 x12 inch honed Black Marble and white Himalayan floor was set on a diagonal with a band of 4×4 black marble. All of this was set over the Schulter Ditra Heat System.
Custom Storage
Knowing we could repurpose our existing Ikea Malm dressers, as soon as we decided to makeover the closet I focused my attention on finding an existing cabinet that could be modified into a shoe cabinet. It took some time and patience, scouring Facebook Marketplace daily, but the perfect cabinet with the required measurements finally did appear!
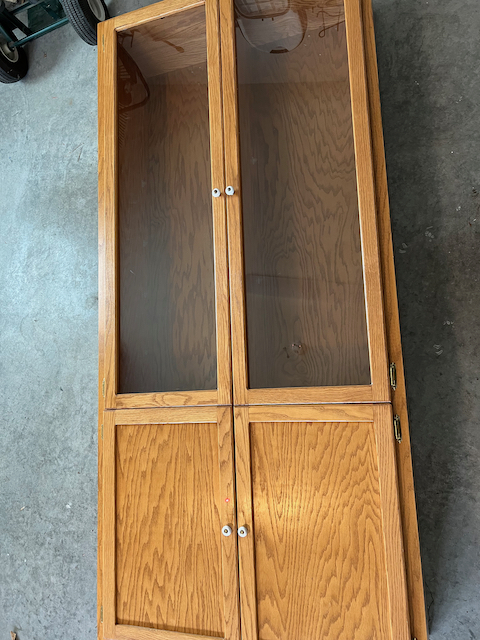
The closet layout was designed with the shoe cabinet directly across from the entry door for a dramatic first glance.
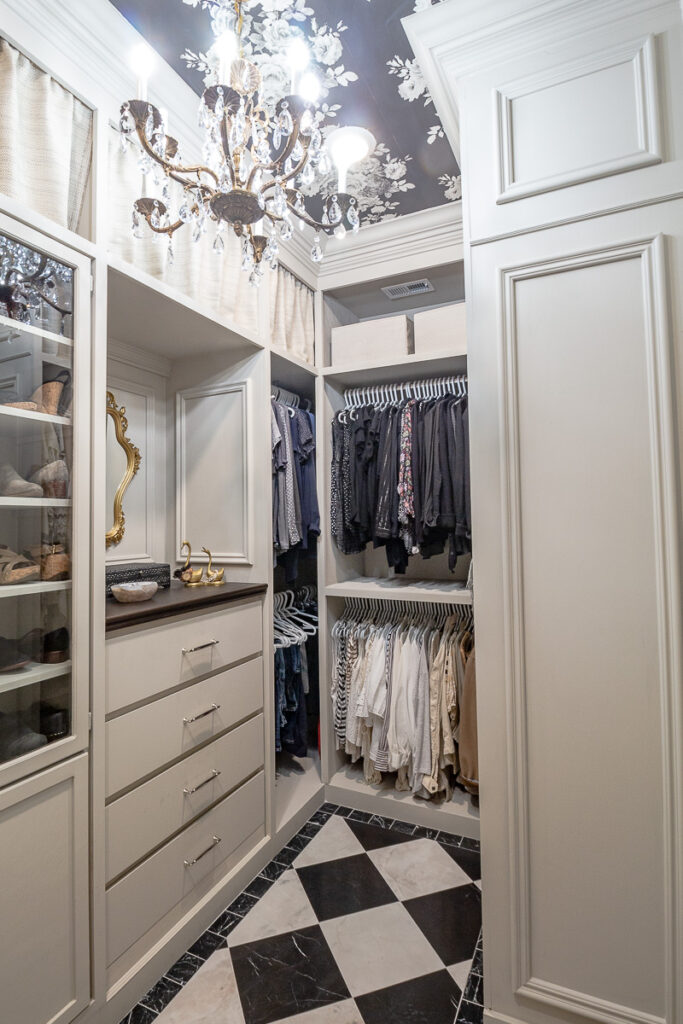
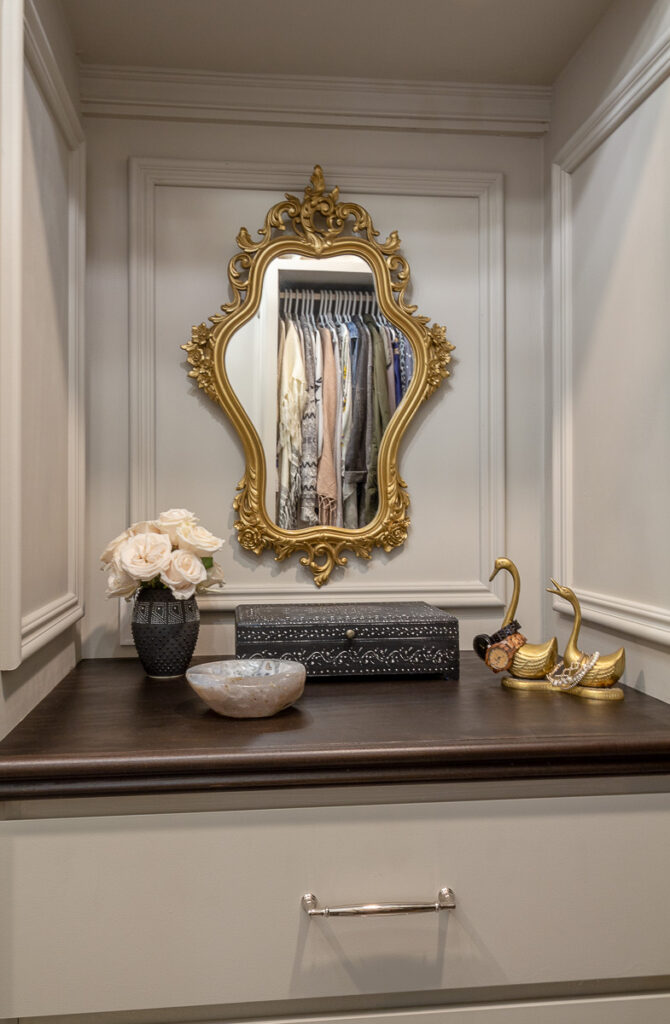
Beside the shoe cabinet, my dresser was painted and topped with a wooden counter. Not only did it bring an element of warm wood into the space, but the finish will also be more durable than a painted top.
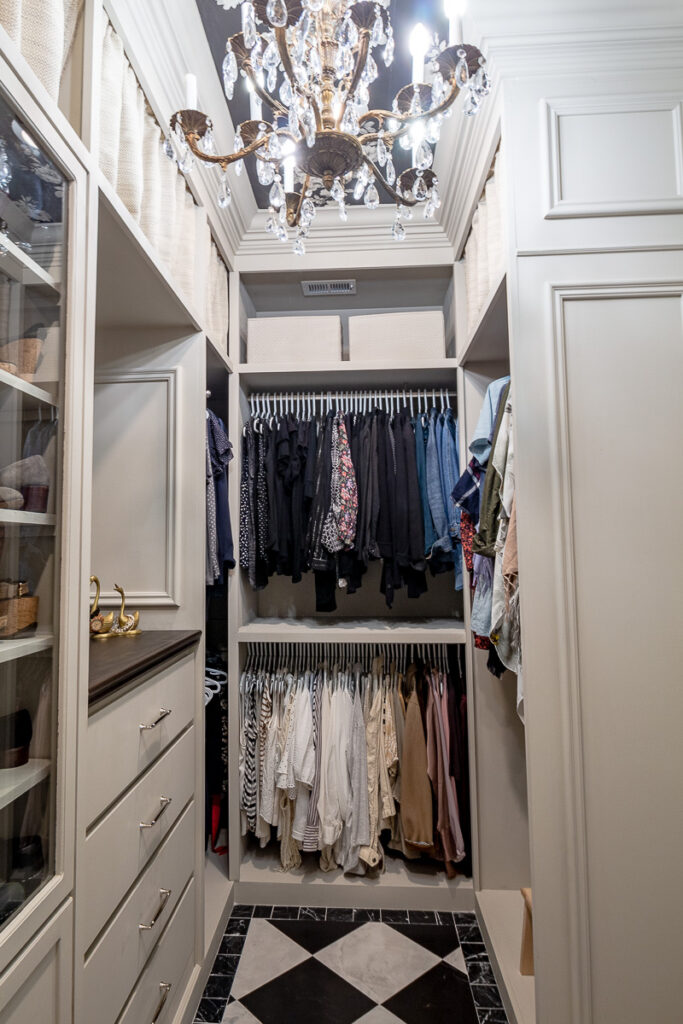
Bringing the shelving all the way to the ceiling provided much-needed storage. But my concern for that space was that eventually, it would look cluttered and unappealing.
Inspired by my friend Susan, at the House of Brinson, I partnered with Calico Fabric for a beautifully textured fabric to conceal almost all of the upper panels.

The one exception was for the upper shelf that housed the air vent. My contractor and I considered moving it out of the built-ins, but I decided I didn’t want another obstacle or eyesore on the ceiling.
Even if you have no plans to build a custom closet, every closet should have one or two valet rods.
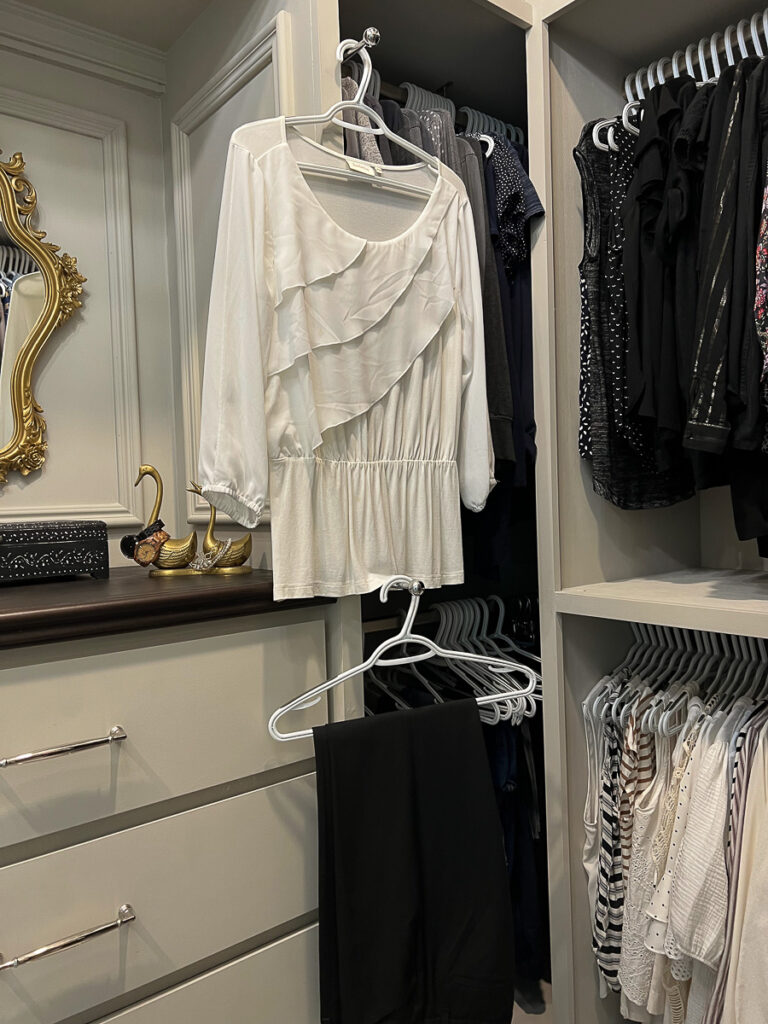
They are the most convenient addition to any closet. I use them as a temporary holding spot for recently laundered items, to plan an outfit or even give an item a quick steam.
The Wallpapered Ceiling
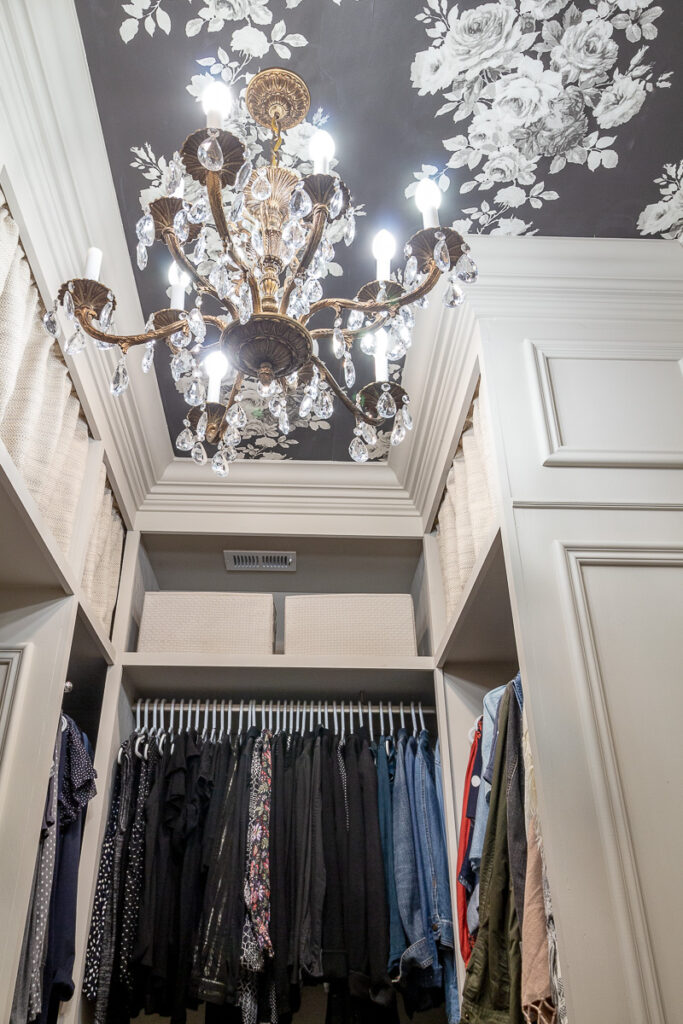
Also from Calico, the black tea rose-patterned wallpaper finishes off the 5th wall of the room perfectly.
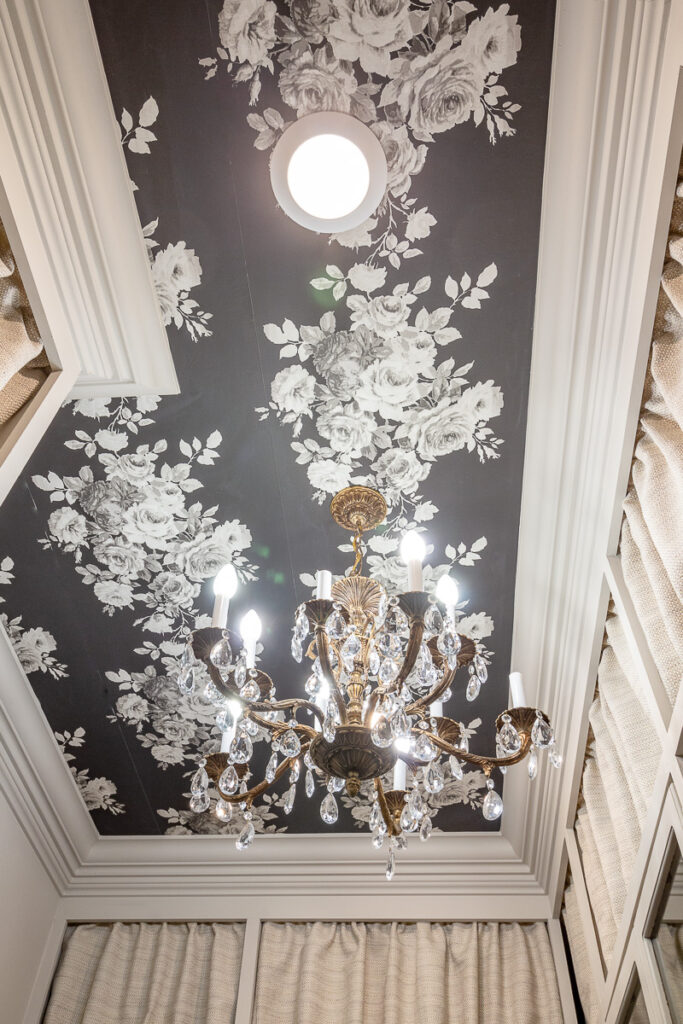
The 7″ crown moulding and millwork from Novo Building Products, add a level of richness and grandeur to the room.
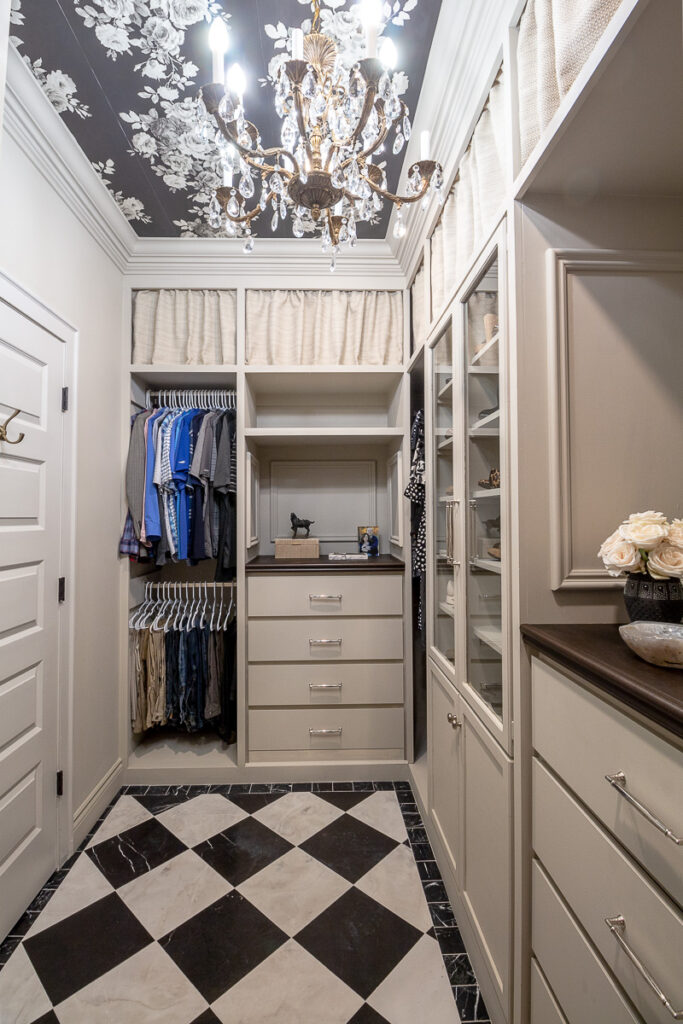
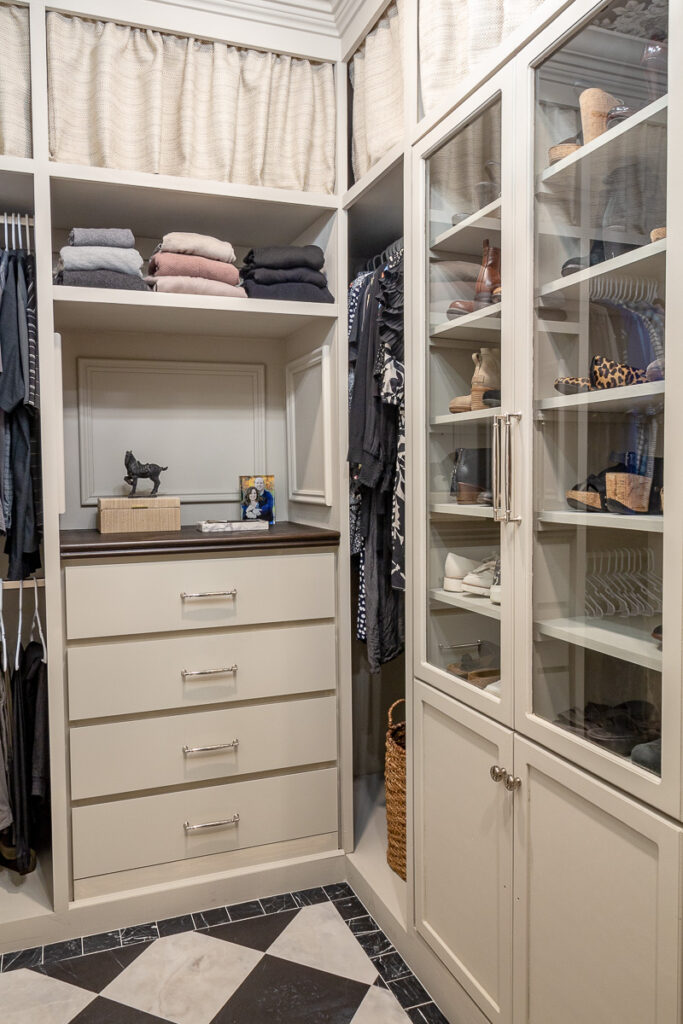

The entire room is drenched in the color, Swedish Gray from Jolie Paint in an eggshell finish. I was extremely pleased with the quality and coverage of this paint.
The Chandeliers
Any dressing room of this caliber needs a chandelier to top it off, right? I hadn’t planned on using my favorite antique chandelier in the closet.

I had intended to keep this one for the bathroom. But as I was shopping for a smaller scale light for the closet, I found the perfect chandelier for over the tub. Then, it made perfect sense to move the antique one in here.

Because if you are going to have a European inspired bathroom then a French Empire Chandelier is nearly a requirement. Right? The smaller then average size of this one makes it perfect for over the tub.

SPONSORS
I could not create the room I have envisioned without these amazing brands! I am thankful for their continued support and partnerships.
Vintage Tub & Bath || Novo Building Products and Empire Moulding and Millwork || Calico Fabrics
Bemis || Custom Picture Frames || Charleston Hardware Co.
Be sure not to miss finding other participants at the One Room Challenge™! There are sure to be inspirations found in every design style and room! Because it is the 10th anniversary there are exciting features in store with the new media sponsor, Apartment Therapy!
Sources Bathroom
Soap dispenser and Toothbrush cup
Vanity Cabinet Hardware (antique silver)
Wall & Moulding paint color : Slumber Sloth by Sherwin Williams
Doors & Crown paint: On The Rocks by Sherwin Williams
Closet Sources
Cabinetry, Trim and wall color: Swedish Grey by Jolie Paint in Eggshell
Cabinet Hardware: Charleston Hardware




4 Comments
Millie
May 27, 2022 at 5:09 amWow! The closet looks so good! Can’t wait to see the bathroom 😊!
Giselle
May 27, 2022 at 6:47 amAbsolutely stunning! I can only dream of having a walk-in closet/en-suite, let alone one this gorgeous. I love everything!
Glenda
May 27, 2022 at 9:32 amAbsolutely beautiful!!! You are a creative genius. What a transformation. Can’t wait to see the bathroom. Love the wallpaper & flooring.
laura
June 17, 2022 at 6:59 amHI Leslie,
OH my the ceiling!!! Gorgeous!!! Love it! This is gorgeous! Great job! Laura in Colorado